Hello Anna's Craft Cupboard!!

After being asked a little while back now by Anna, it is with great delight that I can now 'officially' announce that I have joined the Design Team at Anna's Craft Cupboard. Primarily, I will be working with Kaiser products, but I may also be allowed to play with Prima too LOL!! :wink:

Thank You Anna!! Very excited to be joining the team along with Fran, Nerrida, and Wendy.

So I have been having lots of fun with Little Toot.

This collection is obviously primarily 'boy' orientated and has lots of cute mechanical 'things that go' elements. Perfectly suited for my young nephew and have also managed to create a couple of fun pages that include my two 'princesses'.

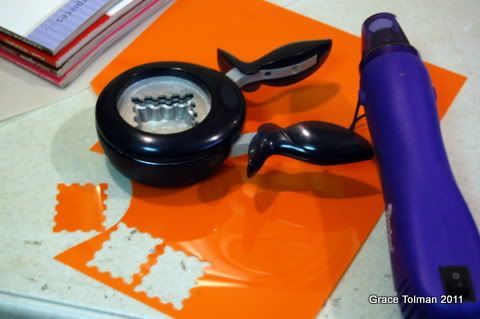
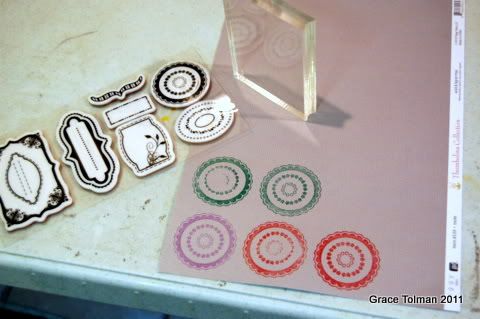
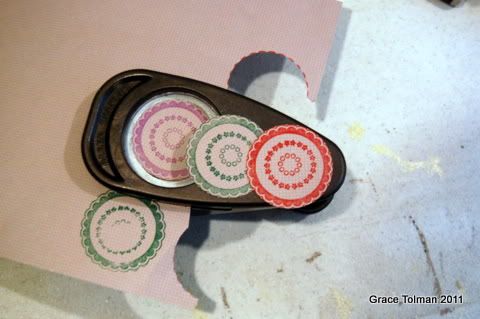
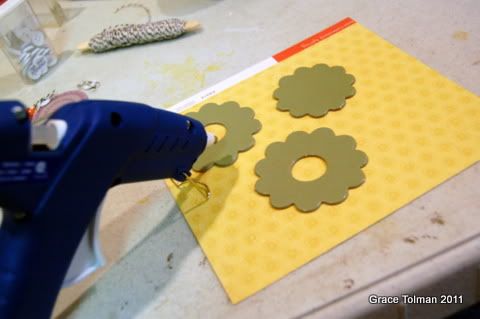
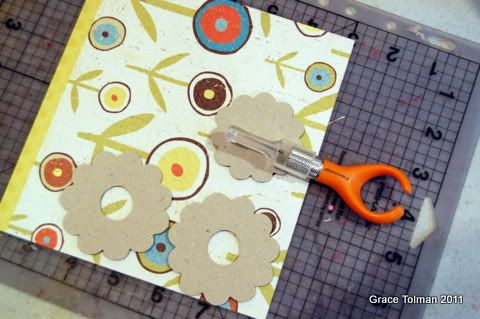
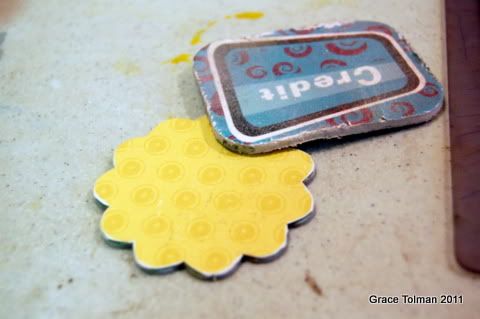
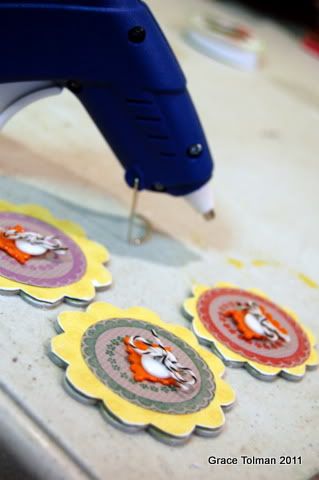
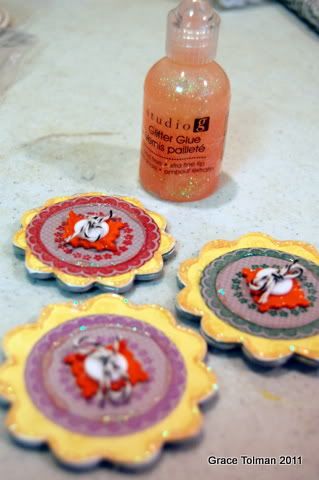
These are some of my creations that have been showcased recently on the Anna's Craft Cupboard BLOG
- I will also have a step by step which will go up a bit later on

'Hey Cuz'


Photobucket

'Hey Cuz' : Kaisercraft Little Toot – Specialty Die Cut – Directory, Little Toot – Bang, Little Toot – Bumper, Little Toot – Cruise, Little Toot – Putt, Little Toot – Screech, Little Toot Printed Chipboard,Little Toot 6.5” Paper Pad, Mini Alpha Stickers – White & Black

American Crafts Thickers - Foam Giggles Brown have been used for the title - available in Anna's Craft Cupboard HERE

Photobucket


5,4,3,2..1 Blast Off

Photobucket

'Blast Off' : Kaisercraft Little Toot – Cruise, Little Toot – 6.5 “ Paper Pad, Little Toot – Sticker Sheet, Little Toot – Printed Chipboard

American Crafts Thickers - Foam Giggles Brown have been used for the title - available in Anna's Craft Cupboard HERE

Photobucket

'Proceed with Caution - It's a boy thing'

Photobucket

'Proceed with Caution - it's a boy thing': Kaisercraft Little Toot – Beep, Little Toot – Bang, Little Toot – Putt, Little Toot – Screech, Little Toot - Honk, Little Toot – Specialty Gloss Varnish Paper Road Trip, Little Toot – Specialty Gloss Varnish Paper Traffic Jam, Little Toot 6.5 “ – Paper Pad, Little Toot – Printed Chipboard, Little Toot – Sticker Sheet


American Crafts Thickers - Foam Giggles Brown have been used for the title - available in Anna's Craft Cupboard HERE

Photobucket

'Little Toot' Collection is available in Anna's Craft Cupboard HERE


You have read this article Anna's Craft Cupboard / Kaisercraft with the title June 2011. You can bookmark this page URL http://skinnyminny22.blogspot.com/2011/06/hello-anna-craft-cupboard.html. Thanks!

Let us Entertain You With GlueArts & Fiskars!

Do you like to add fun touches and handmade items to your party decor?

We've got just the ticket for you today!

Designer Lesley Langdon has a trio of items perfect for an upcoming party or celebration. And it's easy to adjust the colors and patterns to fit your needs!

Designer Grace Tolman has a fun way to spruce up a fridge door or even a school locker. Anywhere you can place a magnet...these adorable flower stamped magnets will look amazing!

All today's project use Fiskars quality tools and products along with GlueArts adhesives. (you know you need some!!)

Entertaining Trio
GlueArts Designer: Lesley Langdon

If you love to entertain, you can go that extra step and make really quick invitations, napkin rings, and place cards. Just choose three coordinating patterned papers, stamps, ink, your Fiskars tools and favorite Glue Arts adhesives. Because Fiskars SuperCut Trimmer can cut up to 7 sheets of paper at a time, you can save time here too! You can switch up the colors according to the time of year and meal choice.

If you love to entertain, you can go that extra step and make really quick invitations, napkin rings, and place cards. Just choose three coordinating patterned papers, stamps, ink, your Fiskars tools and favorite Glue Arts adhesives. Because Fiskars SuperCut Trimmer can cut up to 7 sheets of paper at a time, you can save time here too! You can switch up the colors according to the time of year and meal choice.

Supplies:
Glue Arts Extreme Adhesive Squares
Glue Arts U-Cut-It Foam
Fiskars SuperCut Paper Trimmer
Fiskars Precision Knife
Fiskars Simple Stick Stamps (Accents)
Walnut Stain Distress Ink by Ranger
Spun Sugar Distress Stain by Ranger
My Mind's Eye Patterned Paper (Stella Rose)
Crate Paper Patterned Paper ( Portrait Collection)
Watercolor Paper
Scor-Mat by Scor-Pal

Instructions: 
1. Cut 12 inch strips of patterned papers at 2 inches, 1.5 inches, and 1 inch using the Fiskars SuperCut Paper Trimmer. You will use these for the invitation, place card, and napkin ring.


2. To make labels for each project, adhere Distress Stain to watercolor paper, let dry. Stamp over top using Fiskars Accent stamps, and cut out using Fiskars Precision Knife.

3. To make the napkin ring, place the strips on top of one another and use the paper trimmer to cut 3 sheets at a time at 7 inches. Adhere the strips on top of one another with Glue Arts Extreme Adhesive Squares. Wrap into a circle and staple together at ends. Adhere label with Glue Arts U-Cut-It foam adhesive.

4. To make place card, take a piece of patterned paper and make into a place card. Adhere strips of patterned papers from step 1. Adhere label with Glue Arts U-Cut-It foam adhesive.

5. To make invitation, adhere patterned paper and strips to card front. Adhere large and small label with Glue Arts U-Cut-It foam adhesive.

6. Hand write names and sentiment on projects.


Flower Magnets
GlueArts Designer: Grace Tolman

Supplies:
Glue Arts Glue Gun
Pattern papers- (grey) Piggy Tales; (yellow) Crate Paper
Shrink plastic- Grafix Arts
Stamp, stamp punch- Fiskars
Circle punch- EK Success
Chipboard flowers- Source Unknown
Buttons- Favorite Findings
Baker’s twine- Papertreats.etsy.com
Glitter glue- Studio G, Hampton Arts
Others- Magnet strip

Instructions:
1. Gather your supplies.

2. Punch out stamp images from shrink plastic. Follow the package instructions to shrink your image. 

user posted image

3. Stamp circle images on the grey paper using three different ink colors.
user posted image

4. Punch out the circle flower stamps.
user posted image

5. Add a bow through three white buttons with baker’s twine.
user posted image

6. Adhere the chipboard shapes onto the back side of the yellow paper with glue gun.
user posted image

7. Using the Fiskars craft knife, cut out the shapes from the paper.
user posted image

8. Sand the edges of the chipboard flowers.
user posted image

9. Adhere the stamped paper, shrinked postage stamp and button onto the chipboard flower with glue gun.
user posted image

10. Add magnet strip on the backs of the chipboard shapes using glue gun.
user posted image

11. Add some sparkle to the project with glitter glue. I added it to the edges of the flowers and also around the circle stamped images.
user posted image


So tell us...are you a Fiskars fan?  Wishing for some new tools? YOU can win some of their awesome products! Fiskars was incredibly generous and is allowing us to giveaway to one of you...


... a Trimmer, Cloud Squeeze Punch, Stamp Border Punch, Postage Stamp punch, Acrylic Stamps and more! Simply leave us a comment and we'll enter you to win! Next Monday we'll select one winner to enjoy these goodies!!


And guess what....we need to include some GlueArts adhesives with this prize! So we'll ALSO include our Glue Glider Pro and a roll of our Adhesive Squares! Now you're definitely ready to craft!

Last but not least....you can see me, the Glue Girl, as the Guest Designer this month for Fiskars! Here's a peek of another one of my project, Peony Flower Pillow, I shared with them!  Just visit this link to see all the projects with the tutorials!


Be sure to check back in with us tomorrow for more Fiskars projects from our Glue Girls Design Team! 

We'll have one more project from our talented Guest Designer Stephenie Hamen and don't forget to visit Fiskars Crafts for more creative ideas!!   


You have read this article Extreme Adhesive Squares / Fiskars / Lesley / U Cut It Foam with the title June 2011. You can bookmark this page URL http://skinnyminny22.blogspot.com/2011/06/let-us-entertain-you-with-gluearts.html. Thanks!

Farewell Kaisercraft

Hello!

Firstly, can I take this opportunity in thanking Kaisercraft for the privilege of being a contributing Design Team Member for 2010-2011. The last 12 months has been a fabulous creative journey - THANK YOU!!

To my fellow DT buddies - you gals ROCK!! To each and every one of you - Thank You for the inspiration and friendship. You are all amazing **MWAH**

Gosh, how quickly the last 12 months seem to have flown by. It just seems like yesterday when I was posting my first official design creations and today I showcasing my last.

So, here we go... my last 'official' Kaisercraft Showcase as a 2010-2011 Contributing Design Team Member.

The soft sorbet pastel colours of the Pink Gelato collection are very pretty.

Here is my layout created with it

'You are my most favourite memory'

Photobucket

I couldn't help but fondly recall my Sarah Kay 'swap cards' from my childhood or should I say younger 'girl hood' - especially with the super sweet bicycle elements of this collection.

Here, I have hand cut a large bicycle from patterned paper and combined it with layers of pretty hand cut floral elements and paper blooms.

Photobucket

Photobucket

Materials Used: Pink Gelato P679 Watermelon, P680 Vanilla, P683 Strawberry, P685 Pineapple, SS104 Sticker Sheet, PP845 Paper Pad, RB922 Colour Rubon ; Paper Blooms – Fairy Floss & Fushia; Grosgraine Ribbon – Little Girls. Other: Digital Credit – Ali Edwards Word Art Brushes, Tattered Florals Die, Spellbinder Frame, Border Punch

A 'generic' girly card

Photobucket


Photobucket

Materials Used: Pink Gelato P685 Pineapple, PP845 Paper Pad, CB129 Printed Chipboard. Other: Cardstock

I have also added a touch Pink Gelato sweetness to a frame

'Moving Forwards'

Photobucket

Photobucket

Materials Used: Pink Gelato P684 Honey Dew, P685 Pineapple, PP845 paper Pad, SS104 Sticker Sheet; Paper Blooms – Fairy Floss, Grosgrain Ribbon – Little Girls; Frame.

I also had some fun with the Kaisercraft Velvet Ensemble Collection. As soft and pretty as Pink Gelato is, Velvet Ensemble is striking, bold and nostalgic.

The rustic, earth tonings of this collection suited these photos I took of Miss E when we last ventured to the beach - we don't get to see the beach very often as we do live quite a distance from one. Anyway, this beach wasn't big on sand - but it did have lots and lots of shells which my girls had great delight in fossicking through for 'treasures'.

'Fossick'

<span class=

A large hand cut a floral element from the Matinee patterned paper creates the base for the design of my page.

<span class=

Fossick’ by Trudi Harrison. Materials Used: Velvet Ensemble P672 Matinee, P673 Interval, P675 Performance, SS103 Sticker Sheet, PP844 Paper Pad; Paper Blooms – F630 Iceberg, Rhinestone Flourish, Flutterby’s – Bubblegum, Wood Flourish – Sign. Other: Border Punch

So that's it....


Thanks for dropping by

Hugs

Trudi

You have read this article Kaisercraft with the title June 2011. You can bookmark this page URL http://skinnyminny22.blogspot.com/2011/06/farewell-kaisercraft.html. Thanks!

How Many Love Letters Do You Have?

Do you save special love notes?

Have a collection of cards and special mementos that a special someone gave to you?

Do you keep them in a special place?

Today we're continuing our week with our amazing Orange partner....Fiskars! And Designer Jan Hennings has the perfect way for you to keep all those special love letters.

Designer Kristen Swain has a special gift box set that you too can make and give to someone special! All of today's crafts were made with Fiskars tools and GlueArts adhesives!!


Love Letters Notebook
GlueArts Designer: Jan Hennings
Supplies: 
5" x 5" Notebook (DMD)
Postage and Notebook Border Punch, Stamp Punch, Cloud Punch, Accent Stamps (Fiskars)
images (Crafty Secrets) 
Pin (making memories)
hand dyed seam binding
paper towel
Baby Blue Ink (Superior)


Instructions:
Step 1: Start with a 5" x 5" Note pad.

Step 2: Blot Baby Blue ink on a paper towel.
user posted image
Step 3: Place a piece of cardstock under the papertowel and punch a cloud.
user posted image
Step 4: Cut two 5" x 5" pieces of cloud paper.
user posted image
Step 5: Layer Love Letters image on the cloud paper.

Step 6: Using PermaTac adhesive, adhere the cloud to the top right of the notebook.
user posted image
Step 7: Use hand dyed seam binding to make a shabby bow.
user posted image
user posted image
Step 8: Using the postage stamp punch, punch Special Delivery.
user posted image
Step 9: Tie the stamp to the bow.
user posted image
Step 10: Using a Hot Glue Gun and melt sticks, hot glue the bow to the left center of the book.
user posted image
user posted image
Step 11: Using the Notebook and Postage Stamp Border Punches, punch the bottom of each of the inner pages.
user posted image
Step 12: Stamp the inner pages using Accent Stamps and Baby Blue ink.
user posted image
Step 13: Assemble book.
user posted image


Gift Set
GlueArts Designer: Kristen Swain

Supplies:
Adhesive- Glue Arts High Tac, Adhesive Squares and UCutIt foam
Punches and Stamps- Fiskars
Paper/Stickers/Brads- Crate Paper
Twine
Diecut machine- Cricut Expression and Sweet Tooth Boxes Cartridge
Ribbon- www.etsy.com/shop/scrapinkris
ink- Adirondack


Instructions:

1. Fold card to 5x7, then cit a strip of striped paper, back with strips of red that have been punched with Fiskars Postage Stamp border punch, adhere to card with High Tac.
user posted image
1. Fold card to 5x7, then cit a strip of striped paper, back with strips of red that have been punched with Fiskars Postage Stamp border punch, adhere to card with High Tac.
user posted image

2. Stamp and cut out bracket and greeting spot using Fiaskars Stamps. Then cut border stickers to fit under bracket spot and slightly bend them upwards.

user posted image

3. Use UCutIt foam under bracket spot, adhere to card, adding punch out flowers to one side and a ribbon bow with fabric brad to other.

user posted image

Box.
1. Cut box lid and bottom out using Cricut Expression and Sweet Tooth, adhere sides together with Adhesive Squares.

user posted image

2. Fill box with treats, add lid to box then tie up with twine.

3.Fussy cut out flowers, adhere them to box lid with UcutIt foam. 

user posted image

4. Punch out two Fiskars Postage Stamps using punch, write greeting and adhere to box lid with High Tac.

user posted image

user posted image


Today we are pleased to share a bit more about our Guest Designer...Stephenie Hamen! And another fun project from her too!


Stephenie Hamen is one of those crafty types who loves it when she is covered in glitter and up to her ears in patterned paper and glue.  

She is the Content and Education Manager for Fiskars Brands, Inc. in Madison, WI.  

She is a published crafter, as well as mother of 2, wife, teacher, Master Gardener, and an avid home cook. She basically has a passion for creating stuff – no matter what the venue or supplies are!  Stephenie’s work can be found at www.fiskars.com and www.mycraftyadventures.com.

Joyful Picture Frame
Guest Designer: Stephenie Hamen

One of my favorite things in the world is taking an inexpensive plain photo frame and giving it an all new look.  This project was no exception.

This project is quick and simple, and all you need are a few tools:
·         A few coordinating pattern papers
·         String or twine
·         Ribbon or lace
·         Tulle
·         Bling or buttons
·         Alpha letters or pen
·         Basic photo frame
·         GlueArts Glue Gun 

I am a big believer in having thing you need prepped and ready.  I cook quite a bit and learned early in life how important it was to have everything in the kitchen prepped in order for all of the food to come up right.  I think it kind of stuck with me and follows me into my craftiness.

 
1.    To start, open up your picture frame, remove the glass and mat, and put them to the side in a safe place.  All you need is the frame itself.
2.    Using the frame, lay out your string and cut it about 4-5 inches longer than the width of the frame.  This will allow the banner to drape and still leave a bit of string on the ends when you are done.  
3.    Next, grab your papers and your Seal of Approval punch and punch out a few shapes. 

4.    Fold each shape in half.  Then, using your Glue Glider PRO, secure them to the string.
5.    Cut and tie on some small pieces of lace or ribbon in between each of the banners.

6.    Place the banner on the frame, making sure you have the look and size that you want. 
7.    Using your glue gun, glue each corner of the banner to the top corners of the photo frame. 

8.    Next, add some tulle , bling, or other embellishments to the frame around the banners.
9.    Taking a coordinating paper and cut it about an inch wide.  Use the Upper Crest Border punch and punch the edge.  Cut it to the appropriate size and adhere it to the bottom of the frame with your Glue Glider PRO.
  
10.  Add another punched scallop circle and hand-cut a small accent piece to adhere to the center.  Add your sentiment.
  
11.  Now, grab your featured photo and trim it down. 
12.  Using the Upper Crest border punch, punch the edge of the photo.
13.  Mount the photo to fun paper and then lay your mat over the top.  Secure it all together with the Glue Glider PRO.
14.  Trim off the excess paper.
  
15.  Reassemble your frame and you are all done! 
 
I hope you have as much fun as I did creating a special photo frame!


So tell us...are you a Fiskars fan?  Wishing for some new tools? YOU can win some of their awesome products! Fiskars was incredibly generous and is allowing us to giveaway to one of you...


... a Trimmer, Cloud Squeeze Punch, Stamp Border Punch, Postage Stamp punch, Acrylic Stamps and more! Simply leave us a comment and we'll enter you to win! Next Monday we'll select one winner to enjoy these goodies!!

And guess what....we need to include some GlueArts adhesives with this prize! So we'll ALSO include our Glue Glider Pro and a roll of our Adhesive Squares! Now you're definitely ready to craft!


Be sure to check back in with us tomorrow for more Fiskars projects from our Glue Girls Design Team!   
You have read this article Fiskars / Glue Gilder Pro / Hot Glue Gun / Jan / Kristen / Perma Tac with the title June 2011. You can bookmark this page URL http://skinnyminny22.blogspot.com/2011/06/how-many-love-letters-do-you-have.html. Thanks!