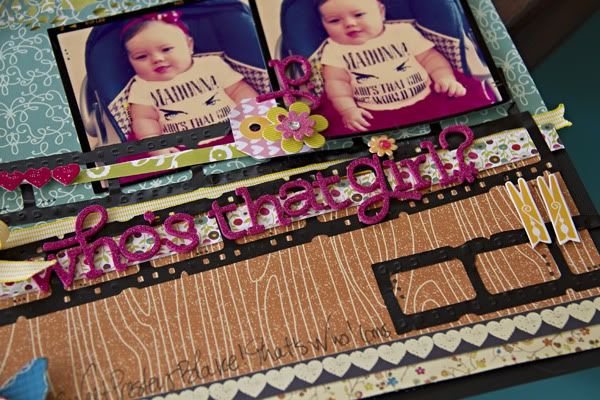
Now seriously....who would of thought of using our GlueArts Accent It All in Black Out to diecut a film strip?
I know I sure have not! But our incredibly talented Designer Miss Leslie Ashe did!
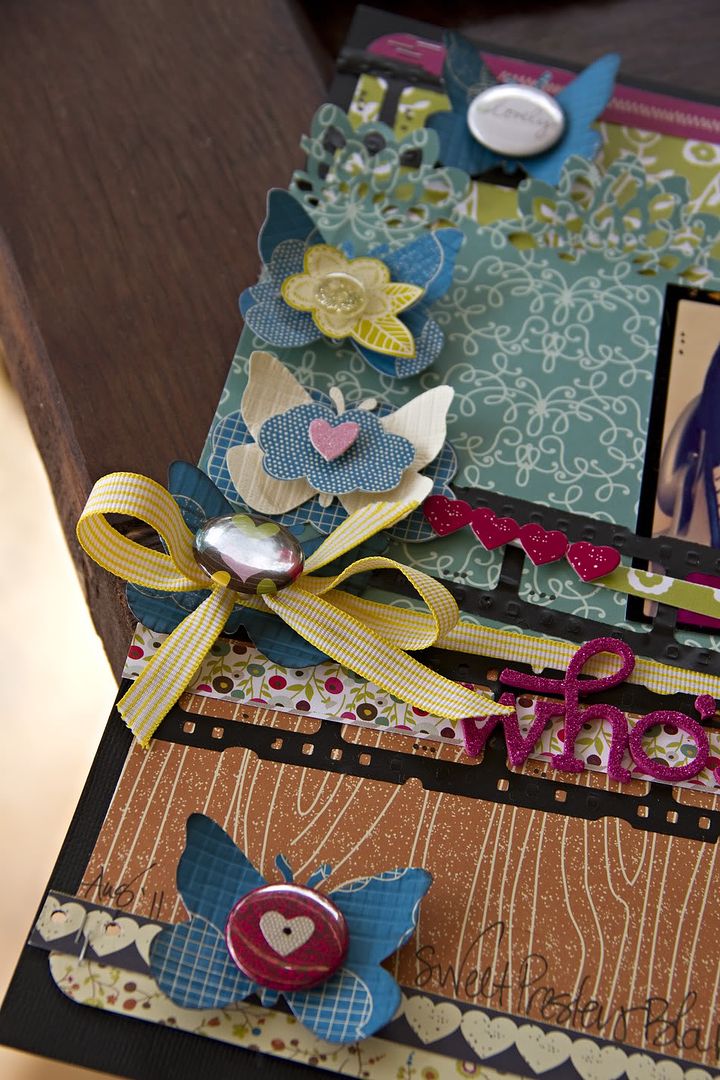
So many amazing details on this layout but the standout feature {besides the adorable baby?!} the cool film strips.
Don't you agree??!
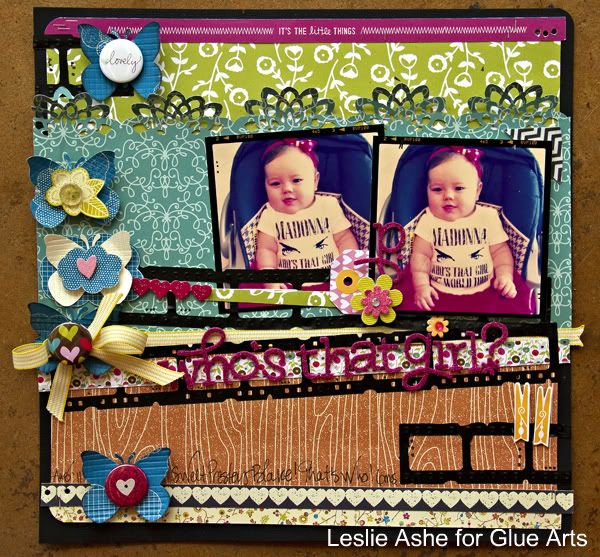
Who's That Girl
GlueArts Designer: Leslie Ashe
Glue Arts Supplies:
Accent It All Vinyl Black Out
Glue Glider Pro with High Tac cartridge
3D UCut It Foam
Extreme Adhesive Squares
Other:
cardstock, patterned paper, letters, embellishments: American Crafts
die cut machine: Big Shot
die cut: Tim Holtz Filmstrip Frames
Simple Accent It All directions:
Accent It All Vinyl Black Out
Glue Glider Pro with High Tac cartridge
3D UCut It Foam
Extreme Adhesive Squares
Other:
cardstock, patterned paper, letters, embellishments: American Crafts
die cut machine: Big Shot
die cut: Tim Holtz Filmstrip Frames
Simple Accent It All directions:
-trim big 12 x 12 sheet in 3 strips
-using die cut machine and die cut, simply cut 4 strips of filmstrips

-place 2 of the strips touching at the right side, branching out on the left side
-cut one strip in half and place part of it on the bottom right
-add the rest of the strip to the top left
-build your page and embellish around the strips.
So how would you like a chance to create and craft with our GlueArts Accent It All vinyl? We'd like to invite you to post a comment for a chance to win 12 sheets of our vinyl! You'll receive all 11 of our colors plus one extra sheet of Black Out!

Simply post a comment here on the blog and you're automatically entered to win! We'll draw one winners name on Monday and announce it here on the blog!

And speaking of winners...you might just want to sign up to follow the GlueArts Blog, friend us on Facebook and while you're at it...follow us on Twitter too! Because starting this Saturday October 1st we're kicking off a new product!! And that means we're giving you chances to win! And not only 1 chance to win, not even 10 chances to win....try 100 Chances to win!!!! That's right...100!
All the details will be available this Saturday...so don't miss out!!
You have read this article 3D Combo Pac /
Accent It All /
Extreme Adhesive Squares /
Glue Gilder Pro /
Leslie
with the title September 2011. You can bookmark this page URL http://skinnyminny22.blogspot.com/2011/09/gluearts-accent-it-all-makes-lovely.html. Thanks!