Showing posts with label Ribbon Adhesive. Show all posts

Crafty Wishes To You!


Welcome to Day 5 of the Glue Arts and Want2Scrap Spring into Summer Blog Hop! 

We hope you enjoyed Day one of the hop and today is just as fantastic!! THIS we are sad to say is the last day. To get in on the prizes make sure to leave a comment on the Want2Scrap AND the Glue Arts Blogs.


AND


As we hope you know... Glue Arts provides a wide range of adhesive from our Glue Glider Gliider PRO+ Adhesive Squares, or Embellishments Adhesive. We have just what you need for your next scrapbook or crafting project.


Want2Scrap specialize in blingchipboard albums, laser designs, iPhone 4 cases and ribbons! Be sure to stop by their site too for a bit of online shopping!


We're wrapping up this amazing week with a beautiful card from talented Designer Audrey Pettit! Be sure to follow the links below to Audrey's blog to see the full tutorial!  


user posted image

Birthday Wishes Card 
GlueArts Designer: Audrey Pettit


Supplies:
Want2Scrap Donna Salazar Canvas ATCs
Want2Scrap Nestaboard Lattice Rectangles
Want2Scrap Say it in Pearls Adhesive Pearls
Kraft Outlet Cardstock
American Crafts Dear Lizzie Patterned Paper, Stitched Crepe Paper, Cardstock Stickers, and Buttons
Papertrey Ink and Stampin'Up Stamps
October Afternoon Sticker Tab
Spellbinders Flower Dies
Stampin'Up and The Twinery Trim
Stampin'Up and Clearsnap Inks
Burlap

Here's the last of the designers on our hop...

Audrey Pettit 
Nina Brackett 
Joe Morgan/Joe Rotella
Mimi Leinbach
Keely Yowler


To be entered for both prizes... make sure to leave a comment on the Want2Scrap AND the Glue Arts BlogsComments will be taken until Sunday May 27 at midnight.


Before you go...please be sure to post a comment and enter to win a GlueArts prize package of... 

a Glue Glider PRO+ and one PermaTac Cartridge, our Adhesives Squares and our 3D Combo Pac! Be sure to post a comment each day this week for more chances to win.


 And be sure to stop by the Want2Scrap blog to enter there too!! It's a must see and stop on your Spring into Summer Blog Hop!

You have read this article Audrey / Extreme Adhesive Squares / Glue Gilder Pro / High Tac / Ribbon Adhesive / Want2Scrap with the title Ribbon Adhesive. You can bookmark this page URL https://skinnyminny22.blogspot.com/2012/05/crafty-wishes-to-you.html. Thanks!

Frame Your Love for Mom with GlueArts

A mother is a person who seeing there are only four pieces of pie for five people, promptly announces she never did care for pie.  ~Tenneva Jordan

How true is that.....Designer Grace Tolman has a beautiful idea for Mother's Day using our GlueArts Adhesives. 


user posted image

user posted image

user posted image

user posted image

Mother's Love Frame


I was inspired by the quote and decided to display it in a beautiful frame that would be a good reminder for me of the importance of a mother’s love all year long. 

GlueArts Designer: Grace Tolman


Supplies Used:

Frame- Michael’s Craft store
Pattern papers, die cut flowers and letter stickers- My Little Shoebox
Typewriter- Royal
Rhinestones and pearls- Want2Scrap
Border punch- Fiskars
Trim- Pebbles
Die cut- Labels Eight, Spellbinder


user posted image

user posted image

user posted image

user posted image


We've got something special for all Mom's! Well....really all of our GlueArts fans! Now through May 14th take advantage of a savings on our PRO+ Refills and a PRO Handle! Just click this link to go to our sale page! And while there...don't forget to stock up on our Embellishment Adhesives and our Adhesive Squares!!


You have read this article Extreme Adhesive Squares / Glue Gilder Pro / Grace / Mini Adhesive Squares / Perma Tac / Pro+ / Ribbon Adhesive / U Cut It Foam with the title Ribbon Adhesive. You can bookmark this page URL https://skinnyminny22.blogspot.com/2012/05/frame-your-love-for-mom-with-gluearts.html. Thanks!

From GlueArts To You...Happy Crafting!

Happy Crafting!

 Usually those words bring a smile to the face and a million ideas that run through the mind for the next craft project! We're wrapping up this week with Nikki Sivils and her team and sending out good vibes to everyone for some happy crafting. And when you craft...be sure to chose GlueArts Adhesives so you too can make what Designer Audrey Pettit and Patti Milazzo share with us today!

user posted image

user posted image

user posted image

From Me to You Gift Bag 
GlueArts Designer: Audrey Pettit


Supplies:

Nikki Sivils Messages Collection:
Patterned Papers and Die Cut Sheet
Tag: The Kraft Outlet
Doily Die: Sizzix
Trim: Craft Supply
Buttons: Foofala
Ink: Clearsnap
Recycled Kraft Printed Shopping Bag
Pinking Scissors

Recently, while out shopping, I received a very fun kraft shopping bag with a vintage-ad print, which was way too cool to throw away. Although the bag was a bit too big for an average gift bag, I've saved it and cut it apart to create all new bags, like the one here. It's super easy to make your own bags, and it's earth-friendly and budget-friendly, too.

Instructions:

1. To get started, cut open the kraft shopping bag. Then cut two rectangles from the paper in the desired size of your finished new bag. Cut both pieces to the same width, but allow an extra 1/2" in height on the second piece. For my bag, I cut my two pieces at 6" x 8" and 6" x 8.5".


user posted image

2. Cut the tops of both pieces of printed kraft paper with pinking scissors. Lay the wrong sides of the paper together and then machine stitch down both sides. Fold up the bottom 1/4" of paper, edge with brown ink, and adhere flap using Glue Arts High Tac adhesive.


3. Cut various strips of 12" patterned paper in different widths. Adhere strips together. Add die cut scalloped border. Adhere lace trim to the top and bottom edge using Glue Arts Ribbon Adhesive.

4. Fold finished strip in half and adhere to the center of the bag using High Tac adhesive.

5. Tie inked ribbon around the center of the gift bag.


user posted image

6. Fussy cut a journaling card from patterned paper and adhere to the center of a shipping tag. Die cut a doily from patterned paper and adhere behind the tag. Fussy cut a typewriter from the patterned paper and adhere to the tag with U Cut It Foam adhesive.


7. Embellish with a sentiment strip cut from the paper, Messages die cuts, and matching yellow buttons.


user posted image
Happy Bday Card
GlueArts Designer: Patti Milazzo

Supply List: 
Glue Arts- 
Glue Glider Pro 1/4 Perma Tac Cartridge Refill - Pro
U-Cut-It Adhesive FoamRaise ‘Ns

Nikki Sivils: Noah Collection Kit


Instructions:
Create a 6" square card from kraft and set aside.

Cut a 6" square of blue pattern paper. Also cut a 5" square of kraft cardstock and adhere it to the front of the blue paper using the Glue Glider Pro with Perma Tac Adhesive. Machine stitch around the border of the kraft square twice.

Punch 9 circles from a mix of patterned paper. I used 1" circles around the outside and a 2.5" circle in the center. 


user posted image

Cut pieces of U-Cut-It Foam Adhesive to fit behind the center circle and a few of the smaller circles as well. Apply Raise 'Ns to the remaining circles for just a bit of dimension.

user posted image

Apply letter stickers for the sentiment on the center circle. Use more U-Cut-It Adhesive Foam to add the "Happy" tag and heart die-cut.

user posted image

Add additional tiny die-cuts to the circles by cutting the Raise 'Ns - leave the paper and clear plastic backing on to cut the Raise 'N into 4 small pieces.

Use the Glue Glider Pro again to adhere the embellished card front to the 6" kraft card to complete.


user posted image


We hope you've enjoyed our week with Nikki Sivlis!!


We're giving away this fun My Lil' Monster Kit from Nikki Sivlis...perfect for Father's Day, cute kids, grandkids...you name it...we're sure you'll find just the right things to use it for! 

Simply post a comment and we'll enter you to win this fun collection kit filled with paper, stickers and much more! And to help you with your crafting, we're going to include our Glue Glider PRO Handle (already own one...no problem we'll offer you a second cartridge!) and our PRO+ Perma Tac Cartridge plus we'll tuck in our must have 3D Combo Pac. It's filled with our GlueArts U Cut It Foam (used here today!) along with our Raisen's! Now that's a giveaway!

We'll collect all the comments and pick one random winner next Monday! Please remember to visit the Nikki Sivlis Blog and her talented Doghouse Diva's to see what they've created this week with GlueArts products! Be sure to visit the Nikki Sivils page on Facebook and give them a like!! Let them know GlueArts sent you by! If you would!  

We'd also like to extend a sincere thank you to Nikki and her team for working with us!!
You have read this article Audrey / Extreme Adhesive Squares / Glue Gilder Pro / High Tac / Nikki Sivils / Patti / Pro+ / Ribbon Adhesive / U Cut It Foam with the title Ribbon Adhesive. You can bookmark this page URL https://skinnyminny22.blogspot.com/2012/04/from-gluearts-to-youhappy-crafting.html. Thanks!

Spring Goodies with GlueArts


user posted image
Spring Goodie Bag
GlueArts Designer: Kristen Swain

Since it's spring fever is breaking out all over, I thought I'd share a baggie that would be cute to gift to your kids. A simple lunch bag filled with some inexpensive outdoor goodies from the dollar store and you can be sure they will fill an afternoon playing with all the fun things.

Supplies:

Bobunny cardstock
Ribbon
gem brads- gcd studios
butterfly punch- martha stewart
flower punch- eksuccess
gems- Kaisercraft
lunch bag
paper- Pebbles
deco scissors- Fiskars cloud
button/twine

user posted image

Instructions: 
1. Cut out strips of green cardstock to go around bottom of bag, then cut grass cuts at top of grass. Use Raisen's to pop grass up off of baggie.

user posted image

2. Use flower punch to punch out two punches for each flower. Punch small hole with needle and add gem brad to center of flower punch.

user posted image

3. Adhere ribbon to baggie with ribbon adhesive, then adhere flowers to baggie with Raisen's.

user posted image

4.Punch butterflies, adhere to baggie with ribbon adhesive and add gems to center of butterflies. Top baggie with rectangle of paper, cut at corners with deco scissors, then adhere button/twine to center of rectangle.

user posted image


GlueArts is know to our fans for our Glue Glider PRO+! What many of you may not be aware of are the amazing Embellishment Adhesives we offer too!

GlueArts Raisen's are one of those and loved by our Designers! We'd like for you to have an opportunity to try out not only our Raisen's but our must own U Cut It Foam! No waste...cut to 
any size and shape and even run through your die cut machines such as your Sizzix or Cuttlebug.


Just just a comment today and we'll enter you to win two pack of our Raisen's along with a pack of our U Cut It Foam! Both products are perfect for adding just a bit of dimension for your crafts and more! We'll pick one random winner next Monday!
   
You have read this article Kristen / Raisen's / Ribbon Adhesive with the title Ribbon Adhesive. You can bookmark this page URL https://skinnyminny22.blogspot.com/2012/04/spring-goodies-with-gluearts.html. Thanks!

Dreams Are Made of This!

Sometimes we chatter away and share little bits and bobs about the projects we're sharing. Letting you know what's special, what we liked etc etc

Today...we're going to stand back and let this project do the talking....it's full of amazing chatter don't you agree?!

user posted image
Sweet Dreams Shadowbox
GlueArts Designer: Andrea Budjack

Glue Arts Supplies:

Vellum Adhesive

Perma Tac
Raisen's
Ribbon Adhesive

Additional Supplies:
Pink Paislee - paper
Basically Bare - felt and chipboard pieces
7gypsies - shadowbox
Epiphany Crafts - circle, pennant punch
Prairie Bird Boutique - wrinkle ribbon
Papertrey Ink - cardstock
Word (Consolas) - sentiment
fabric
metal tin
buttons
vintage buttons
glitter
cork
trim


user posted image
Instructions:


1. Cut paper and cork to fit inside squares of shadowbox. Using Glue Arts Perma Tac, adhere together, stitch and adhere to shadowbox.


2. Using Glue Arts Vellum Adhesive and shaped die cuts, cover each piece with layers of adhesive, paper and glitter (moon only). Stitch. Layer each item into large part of shadow box using Glue Arts Raisen's. Continue using Raisen's to adhere buttons to stars.


user posted image
user posted image

3. Punch out pennants and add to stick pins. Add to cloud.


4. Create fabric garland by stitching layers of fabric together and cutting slits into it. Scrunch garland and adhere to large part of shadowbox using Raisen's.

5. Fill tins with buttons. Apply Glue Arts Ribbon Adhesive and add trim. Add Raisen's to back of tin and add to small parts of shadowbox.


user posted image
user posted image

6. Print out sentiment onto cardstock and punch or cut. Adhere to shadowbox using Perma Tac.


7. Add photo to cork portion using stick pin.

8. Add ribbon around shadowbox.

Truly beautiful isn't it?? We're blessed to have such a talented team of Designer who take our GlueArts Adhesives and  turn them into beautiful art. Truly!


Leave us a comment today and let us know how you would use ourGlueArts Raisen's for your next project! We'll enter you to win two pack of our Raisen's along with a pack of our U Cut It Foam! Both products are perfect for adding just a bit of dimension for your crafts and more! We'll pick one random winner next Monday!
You have read this article Andrea / Perma Tac / Raisen's / Ribbon Adhesive / Vellum Adhesive with the title Ribbon Adhesive. You can bookmark this page URL https://skinnyminny22.blogspot.com/2012/04/dreams-are-made-of-this.html. Thanks!

Time to Think About Spring with GlueArts!

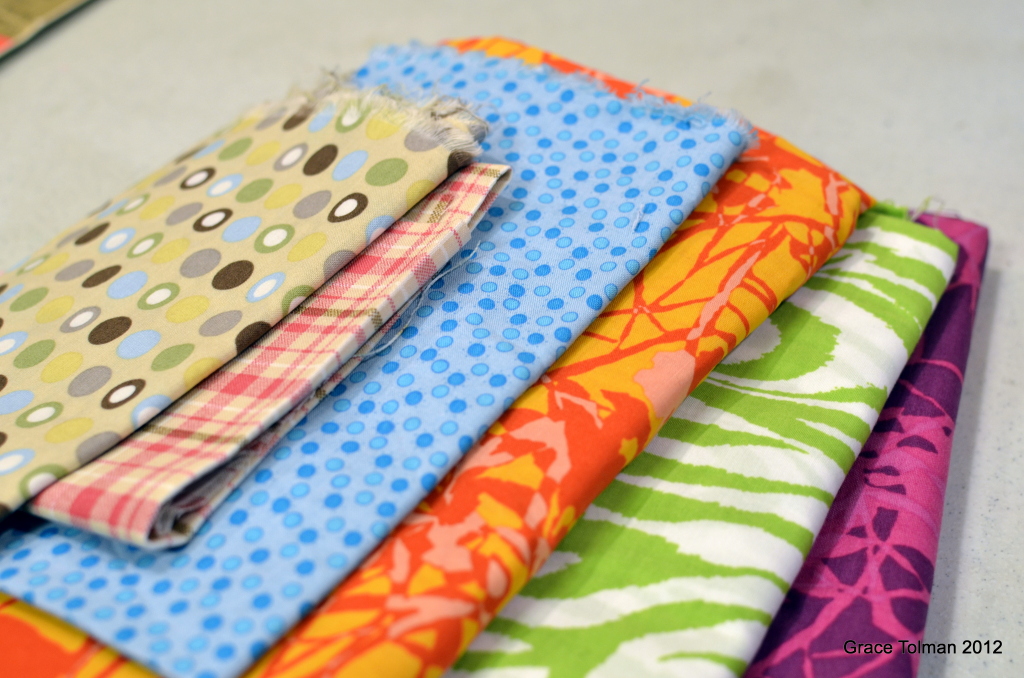
Spring is by far one, if not my most, favorite season of all. I love the introduction of bright, cheery colors which is a welcomed sign to me that we are ending another cold and snowy winter. So to welcome the new season, I decided to put together some fun, bright colored fabrics and start my Spring decoration at home with a homemade rosette pillow.  
Spring Rosette Flower Pillow 
GlueArts Designer: Grace Tolman

Supplies Used:
Fabrics
Pillow or pillow form
Button- GCD Studios
Baker’s twine- Pink Sorbet, Twinery
Thread- Coats and Clark
Sewing Machine- Kenmore
Others- Zipper, Iron and Ironing Board

Instructions:

1. Gather your supplies

2. I wanted to reuse an old throw pillow so I made a case for it first using a solid colored fabric and added a zipper to the case to make it easy for me to change it up when a new season comes.


3. I started the rosette flowers by cutting pieces of fabrics that is 4” x 20”. I wanted my flower to be big so I used about 10 different but coordinating fabrics.


4. With wrong side facing you, fold the fabric in half and machine stitch to close.


5. Turn the fabric inside out and iron.


6. Bring the fabric strip back to the machine and stitch in the middle, folding the piece as you go along.


7. Once you’ve made all of your rosette strips, you can start assembling the flower. Plug in your Glue Arts glue gun and place a piece of cardboard inside the pillow case to keep the glue from transferring to the other side of the case.

8. Use a plate or any circle form and lightly trace the shape. This will be your guide for the flower.


9. Working from the outer edge of the circle, start adhering your fabric strips using the Glue Arts glue gun. Overlap the edges of each fabric strip for a more finished look.


10. Thread some twine through a big button and adhere this to the center of your flower using more Glue Arts glue gun.

now I have a pretty flower pillow to adorn my otherwise boring black couch!

Audrey captures spring with these sweet thread spools with springy flowers...

Flower Picks 
GlueArts Designer: Audrey Pettit

Supplies:
Glue Arts Glue Gun and Glue Sticks

Wool Felt
Embroidery Floss
Wooden Skewers
Spray Mist (optional)
Buttons
Spools 


These spring flower picks are a quick and easy home decor project, and SO fun to make. To get started, gather your supplies. 


I picked up some wool felt from my local big box sewing store. To save on supplies and expense, I purchase one wool felt in a deep, mossy green, and a second piece in a neutral cream with the idea in mind that I could dye the cream to any color I chose. If you want to skip this step, simply purchase felt in the colors of your choice.

1. If you're using cream felt and want to dye it other colors, simply pour some spray mist or re-inkers into a disposable container and soak your fabric in the colorant for several minutes. Squeeze to remove all excess liquid, and then lay flat to dry. 
2. While your fabric is drying, move onto the stems. To create each stem, cut a wooden skewer to the desired height. Cut a length of green wool felt that is just wide enough to wrap around the skewer. I guessed the size by laying the skewer at the edge of my fabric and rolling it up until covered. Cut a notch and then unroll the skewer and cut the entire length off.
3. Apply Glue Arts Ribbon Adhesive along the entire length of felt, making sure to apply strips on each edge. 
4. Lay the wooden skewer at one edge, and roll up. The adhesive will keep the felt in place. I whip stitched along the seam for a decorative touch, but this is not necessary.

5. Lay two small scrap pieces of green felt together and straight stitch simple leaf designs. I made one leaf per stem. Cut out leaves and whip stitch them to the stem. 


6. Cut two different sized circles from the dyed felt. I used a 2" and a 1" circle for mine. You will need to cut two of the larger circles per flower, and one of the smaller circles.
7. Blanket stitch around the edge of the smaller circle. Stitch a button to the center, then stitch the smaller circle to one of the larger circles.

8. Apply a strip of Ribbon Adhesive to the last remaining circle. Press the tip of the stem into the adhesive, then place the stitched circles with button over the top. Blanket stitch around the edge of the larger circle. 


9. Tuck finished flower into a wooden spool. For a tight and more permanent hold, add a bit of Glue Arts hot glue into the spool's hole first. 

WOW! How's that for one fantastic way to kick off a Monday and the first full week of spring!! Stop by all week long while we bring you more Easter and spring treats with fabrics and GlueArts Adhesives!

It's Monday though and that means time to announce our Tuskineko winner and that is:


Congrats to you Renee!!Please email me at Gluegirl@gluearts.com with your info! We'll see you back here tomorrow with more Easter and spring treats! 

Glue Arts 
Don't forget to check our our spring cleaning sale too! It's a perfect time to pick up some of your favorite GlueArts products at amazing prices!  
You have read this article Audrey / Grace / Hot Glue Gun / Ribbon Adhesive with the title Ribbon Adhesive. You can bookmark this page URL https://skinnyminny22.blogspot.com/2012/03/time-to-think-about-spring-with-gluearts.html. Thanks!