Time to Think About Spring with GlueArts!

Spring is by far one, if not my most, favorite season of all. I love the introduction of bright, cheery colors which is a welcomed sign to me that we are ending another cold and snowy winter. So to welcome the new season, I decided to put together some fun, bright colored fabrics and start my Spring decoration at home with a homemade rosette pillow.  
Spring Rosette Flower Pillow 
GlueArts Designer: Grace Tolman

Supplies Used:
Fabrics
Pillow or pillow form
Button- GCD Studios
Baker’s twine- Pink Sorbet, Twinery
Thread- Coats and Clark
Sewing Machine- Kenmore
Others- Zipper, Iron and Ironing Board

Instructions:

1. Gather your supplies
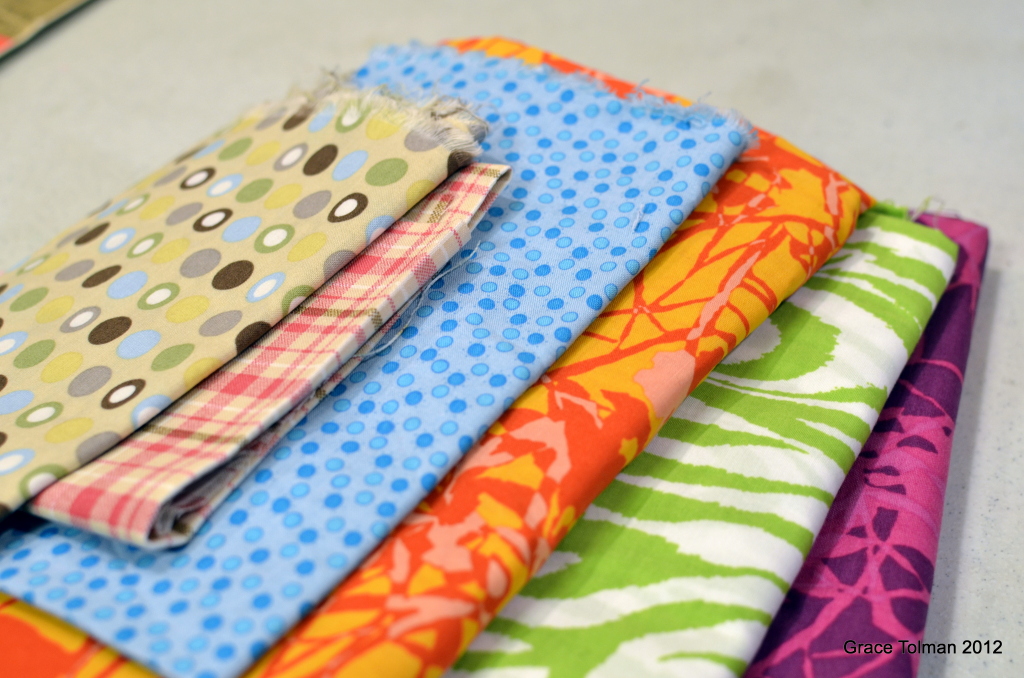
2. I wanted to reuse an old throw pillow so I made a case for it first using a solid colored fabric and added a zipper to the case to make it easy for me to change it up when a new season comes.


3. I started the rosette flowers by cutting pieces of fabrics that is 4” x 20”. I wanted my flower to be big so I used about 10 different but coordinating fabrics.


4. With wrong side facing you, fold the fabric in half and machine stitch to close.


5. Turn the fabric inside out and iron.


6. Bring the fabric strip back to the machine and stitch in the middle, folding the piece as you go along.


7. Once you’ve made all of your rosette strips, you can start assembling the flower. Plug in your Glue Arts glue gun and place a piece of cardboard inside the pillow case to keep the glue from transferring to the other side of the case.

8. Use a plate or any circle form and lightly trace the shape. This will be your guide for the flower.


9. Working from the outer edge of the circle, start adhering your fabric strips using the Glue Arts glue gun. Overlap the edges of each fabric strip for a more finished look.


10. Thread some twine through a big button and adhere this to the center of your flower using more Glue Arts glue gun.

now I have a pretty flower pillow to adorn my otherwise boring black couch!


Audrey captures spring with these sweet thread spools with springy flowers...

Flower Picks 
GlueArts Designer: Audrey Pettit

Supplies:
Glue Arts Glue Gun and Glue Sticks

Wool Felt
Embroidery Floss
Wooden Skewers
Spray Mist (optional)
Buttons
Spools 


These spring flower picks are a quick and easy home decor project, and SO fun to make. To get started, gather your supplies. 


I picked up some wool felt from my local big box sewing store. To save on supplies and expense, I purchase one wool felt in a deep, mossy green, and a second piece in a neutral cream with the idea in mind that I could dye the cream to any color I chose. If you want to skip this step, simply purchase felt in the colors of your choice.

1. If you're using cream felt and want to dye it other colors, simply pour some spray mist or re-inkers into a disposable container and soak your fabric in the colorant for several minutes. Squeeze to remove all excess liquid, and then lay flat to dry. 
2. While your fabric is drying, move onto the stems. To create each stem, cut a wooden skewer to the desired height. Cut a length of green wool felt that is just wide enough to wrap around the skewer. I guessed the size by laying the skewer at the edge of my fabric and rolling it up until covered. Cut a notch and then unroll the skewer and cut the entire length off.
3. Apply Glue Arts Ribbon Adhesive along the entire length of felt, making sure to apply strips on each edge. 
4. Lay the wooden skewer at one edge, and roll up. The adhesive will keep the felt in place. I whip stitched along the seam for a decorative touch, but this is not necessary.

5. Lay two small scrap pieces of green felt together and straight stitch simple leaf designs. I made one leaf per stem. Cut out leaves and whip stitch them to the stem. 


6. Cut two different sized circles from the dyed felt. I used a 2" and a 1" circle for mine. You will need to cut two of the larger circles per flower, and one of the smaller circles.
7. Blanket stitch around the edge of the smaller circle. Stitch a button to the center, then stitch the smaller circle to one of the larger circles.

8. Apply a strip of Ribbon Adhesive to the last remaining circle. Press the tip of the stem into the adhesive, then place the stitched circles with button over the top. Blanket stitch around the edge of the larger circle. 


9. Tuck finished flower into a wooden spool. For a tight and more permanent hold, add a bit of Glue Arts hot glue into the spool's hole first. 

WOW! How's that for one fantastic way to kick off a Monday and the first full week of spring!! Stop by all week long while we bring you more Easter and spring treats with fabrics and GlueArts Adhesives!

It's Monday though and that means time to announce our Tuskineko winner and that is:


Congrats to you Renee!!Please email me at Gluegirl@gluearts.com with your info! We'll see you back here tomorrow with more Easter and spring treats! 

Glue Arts 
Don't forget to check our our spring cleaning sale too! It's a perfect time to pick up some of your favorite GlueArts products at amazing prices!  
You have read this article Audrey / Grace / Hot Glue Gun / Ribbon Adhesive with the title . You can bookmark this page URL https://skinnyminny22.blogspot.com/2012/03/time-to-think-about-spring-with-gluearts.html. Thanks!

Get a Little Artful with GlueArts and Tsukineko!!

Little Darlings Artful Kit
GlueArts Designer: Jan Hennings

Supplies:
Tangelo Memento Dye ink (Tsukineko), Ribbon (Really Reasonable Ribbon), Little Darlings paper and embellishments (Graphic 45), Projector Case, Embellishment Boxes, Trinket Pins (Maya Road) recycled clam shell box, Peach acrylic paint (DecoArt), pearls

I've designed my artful kit and rubbed all the exterior papers with Tangelo Dye Ink.


Beautiful isn't it? Jan is truly a talented designer and knows how to use those Tsukineko inks! That wraps up our week with Tsukineko! We hope you've enjoyed it!


Don't forget...we'd love to see your projects using Tsukineko Inks and products! Link up your work from your blog, galleries (using our Inlinkz) and more and we'll enter you to win this spring prize filled with: Tsukineko Memento Inks, Jolee's Boutique Dimensional Sticker, the new March Card Maker magazine, bag of springs pink buttons from Blumenthal Lansing's Favorite Findings collection and three brand new stamps! Two wood block and one large cling butterfly!


Plus that's not all...we'll also send to you a roll of our GlueArts Adhesive Squares and a pack of our Raisen's also perfect for cardmaking! Simply link to your project or post a comment to be entered to win! We'll select one random winner next Monday! And if you haven't already "liked" Tsukineko on Facebook...stop by and give them a warm hello from GlueArts! 


GlueDeals 


Stop by the GlueArts website do pick up some great deals on all your favorite adhesives while we spring clean!!
You have read this article Jan / Pro+ / Ribbon Adhesive / Tsukineko.Glue Glider Pro with the title . You can bookmark this page URL https://skinnyminny22.blogspot.com/2012/03/get-little-artful-with-gluearts-and.html. Thanks!
Prima: Poise and Grace

Hi Everyone,

Today I have a Prima project to share created with the beautiful Fairy Belle Collection. I have also had a play with some Pan Pastels and have incorporated these with the background work.  A step by step is available on the Prima blog as well as below.

'Poise and Grace'


 Layers of  hand cut elements and paper strips from the Fairy Belle patterned papers have been combined with  pretty Prima blooms. 

The dancing girls have been cut from Fairy Belle patterned papers 'Summer Dream' and 'En Pointe'.


Prima Cotton Tape and Masks, Pan Pastels, and Texture Paste have been used to first alter the background.

To recreate a similar effect:

Start with the Fairy Belle 'Marcelle' Patterned Paper as the base - I used the reverse side


1. Attach strips of Cotton Tape vertically and horizontally over the area where the main design elements and photo will be featured. Cut them at different lengths and stagger them.
Prima Cotton Tape is already adhesive backed which makes it quick and easy to attach.

2. Lay a large Prima Swirl Mask over the top the attached tape - I used the Prima 12 x 12 Mask #545628


3. Apply Texture Paste over the top of the mask. Remove Mask and allow to dry.


4. With a 'Sofft Art Sponge, add some colour to the Texture Paste with Pan Pastel. 


A light application of Yellow Ochre Tint was first applied.  Highlights of Turquoise and Permanent Red were added. A round sponge bar was used to apply the Pan Pastel.


If the color was too intense for my liking, I was able to remove by erasing.
The area was then sealed.


5. Some additional masking were added.  The thistle element of the mask was highlighted with Pan Pastel Turquoise. 


6. Attach thin strips of patterned paper vertically and horizontally - I used the decorative strip at the bottom of the Fairy Belle Patterned Paper and attached over some of the previously attached Cotton Tape.  

 7. Add other design elements and photo.


  • Products Used:

  • #555433 Vinetta Fairy Belle
  • #555467 Charme Rose Fairy Belle
  • #555474 Essential Petals Fairy Belle
  • #554330 12"x12" Cardstock Stickers Fairy Belle
  • #950156 Fairy Belle Col. La Ronde
  • #950132 Fairy Belle Col. Marcelle
  • #950118 Fairy Belle Col. Le Toulle
  • #950095 Fairy Belle Col. Summer Dream
  • #950088 Fairy Belle Col. En Pointe
  • #556259 Lucerne Almanac
  • #550790 Writers Tape - Khaki
  • #551711 Firefly - Tone
  • #554620 8" x 8" Mask
  • #545628 12" x 12" Mask
  • #549053 Sugar Blooms Sparkling
  • Pan Pastel - Yellow Ochre Tint, Permanent Red, Turquoise
  • Sofft Art Sponge - Round Sponge Bar


I loved putting this one together. 

Prima and Pan Pastels - truly are a 'graceful' combination.

Till next time,

Hugs,
Trudi
You have read this article Pan Pastels / Prima / Tutorials with the title . You can bookmark this page URL https://skinnyminny22.blogspot.com/2012/03/prima-poise-and-grace.html. Thanks!

Feeling Fabulous with Tsukineko and GlueArts!!

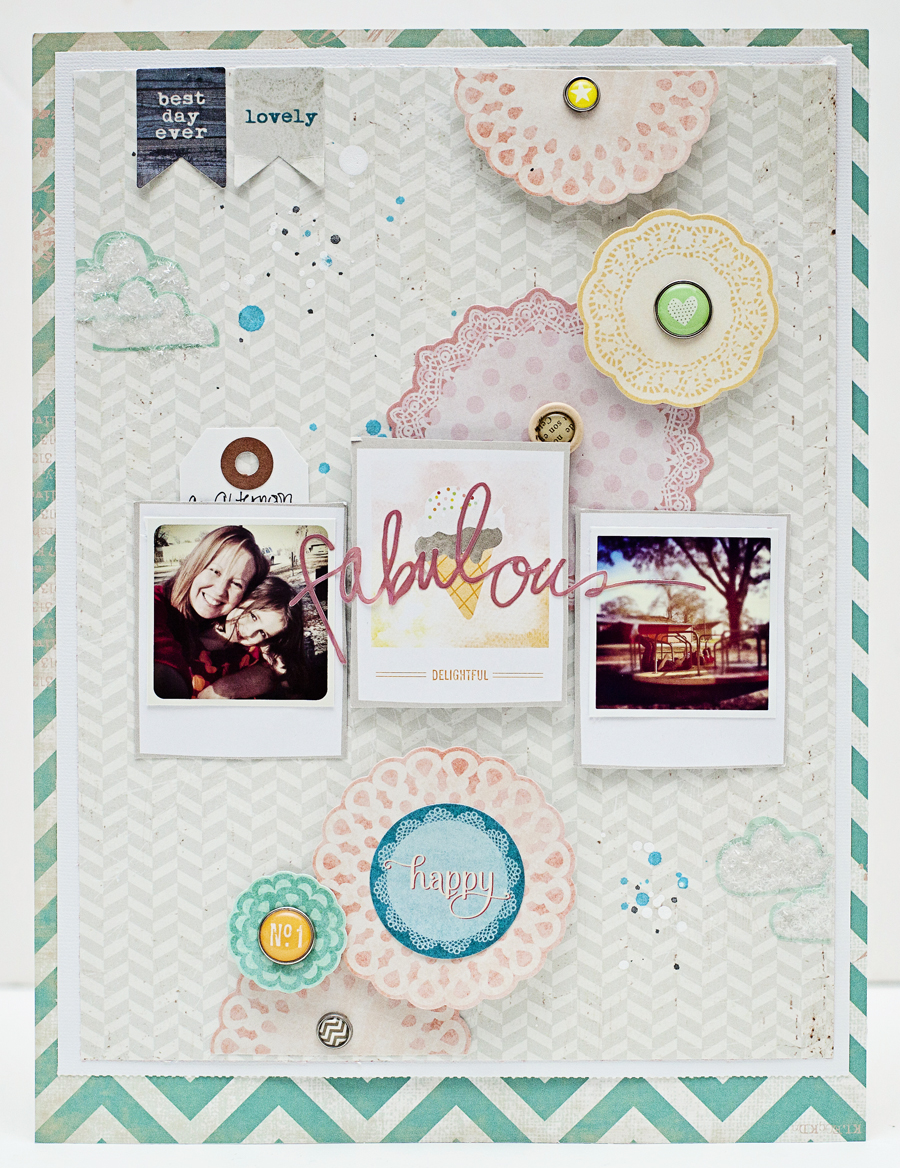
Fabulous Layout
GlueArts Designer: Jaime Warren

Glue Arts Products:

U Cut It Foam
Perma Tac Minis
Glue Glider Pro

Tsukineko products:

The Essential Glue Pad
Fireworks in Tuxedo Black
Fireworks in Bahama Blue

Hi everyone!!! Jaime Warren with you today to share a fun little layout using Tsukineko and Glue Arts products! Let me start by telling you how impressed I was with the Fireworks mists - WOW!!! Gorgeous, rich color and amazing sparkle. I loved them!

I decided to change up my layout size this time and went with an 8.5x11 instead of my typical 12x12. I love to change the sizes - it helps me when my creativity feels low. I layered my patterned paper over white cardstock (again, changed it up from my usual layering style!)


I adhered the two sheets using my Glue Glider Pro. Once attached I used the spray nozzle from the Tsukineko Fireworks and lightly dripped the mist in random areas around my layout. I let the first color dry and then did the same with the second color.


I then started attaching my photos and cut out patterned paper embellishments using the Glue Glider Pro and U Cut It Foam. I then started layering on my stickers using the U Cut It Foam. Once they were attached I used my paper piercer to make holes for my brads.

I cut out my little clouds from my vellum sheet and attached using Perma Tac Minis. I then used my finger to apply the Tsukineko Glue Pad to my clouds and covered them in glitter.


The next to last step is my journaling which I have "hidden" behind one of my photos. I used a simple shipping tag and then tucked it behind the photo! The finishing touch was layering the entire layout over my last piece of patterned paper - leaving the bottom larger than the rest for a "polaroid" feel!


The final result:


Thanks for stopping by everyone!!!


Just a Note Card
GlueArts Designer: Kristen Swain


Supplies:
Tsukeniko Staz-On Black and White
Tsukeniko Goosebumps Spray
Tsukeniko Fabric Markers-- Arboretum 
Tsukeniko Fireworks spray in Rosebud
Stamps by Inkadinkado
American Crafts cardstock
Cricut Geometric Rings Embossing Folder
punch- eksuccess
 pearls- Joann's 

user posted image

1.Fold tan cardstock to 4x6.5, then ink edges of cardstock with white Staz-On. Stamp flowers on white cardstock using black Staz-On. 

2. Color in with Fabric Markers. Cut out. Stamp, color and cut out leaves.


user posted image

3. Emboss tan cardstock using Cuttlebug, adhere to front of card using Perma Tac, then ink edges with white Staz-On. Cut out rectangle of white cardstock, punch with notebook punch, stamp sentiment on bottom and attach to card with UCutIt foam tape, adhering several flowers as border underneath.

4. Spray crinkled ribbon with Fireworks spray, dry and tie onto card, using button in center of bow. Attach cut out flowers to card using UCutIt foam to pop flowers up, attach leaves with mini adhesive squares.


user posted image

5. Use goosebumps spray and layer onto flowers to add dimension, by unscrewing cap and using end of tube. Let dry.

6. Attach pearls to card.


user posted image 


Absolutely beautiful don't you agree! Both Jaime and Kristen used Tsukineko's new Fireworks! sprays! Click here to see them online at Tsukineko's website! Don't forget to be a friend of Tsukineko's on Facebook. Let them know GlueArts sent you!!

So let's have some fun this week...we'd love to see your projects using Tsukineko Inks and products! Link up your work from your blog, galleries (using our Inlinkz) and more and we'll enter you to win this spring prize filled with: Tsukineko Memento Inks, Jolee's Boutique Dimensional Sticker, the new March Card Maker magazine, bag of springs pink buttons from Blumenthal Lansing's Favorite Findings collection and three brand new stamps! Two wood block and one large cling butterfly!


Plus that's not all...we'll also send to you a roll of our GlueArts Adhesive Squares and a pack of our Raisen's also perfect for cardmaking! Simply link to your project or post a comment to be entered to win! We'll select one random winner next Monday! And if you haven't already "liked" Tsukineko on Facebook...stop by and give them a warm hello from GlueArts!

You have read this article Glue Gilder Pro / Jaime / Kristen / Tsukineko / U Cut It Foam with the title . You can bookmark this page URL https://skinnyminny22.blogspot.com/2012/03/feeling-fabulous-with-tsukineko-and.html. Thanks!