Showing posts with label Extreme Adhesive. Show all posts

Peace & Joy to You This Season!

We wish for Peace and Joy to you this holiday season!

Today we have a bit of Joy to share when you see Designer Linda Albrecht's beautiful holiday project she's created!

Linda has taken was was a wood block, some paper and embellishments, GlueArts Adhesives (of course!) and infused it with such beauty....we're speechless! Truly!

Take a peek yourself and see if you don't agree...
"Peace & Joy" Angel
GlueArts Designer: Linda Albrecht
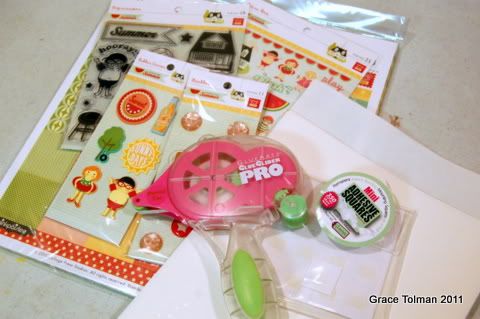

Supplies:

Glue Arts Hot Glue Gun & Sticks
Glue Arts Glue Glider Pro with Perma Tac Adhesive
Glue Arts 6" Adhesive Lines from "Crop & Glue" set
Glue Arts 1/2" Adhesive Squares


Maya Road Chipboard- People Coaster Album- Girl, Snowflakes Set
BasicGrey patterned papers- Picadilly Collection
Melissa Frances Resin Star and Rhinestones

Other: 
Snowflake brads, 6"x4"x2" wood block, silver pipe cleaners, silver wire,silver glitter, Mica Flakes, seam binding ribbon, button, acrylic paints, Acrylic stamps(snowflake and seasonal greeting), Brown ink pad, Cream cotton lace, small wood knob

Instructions:
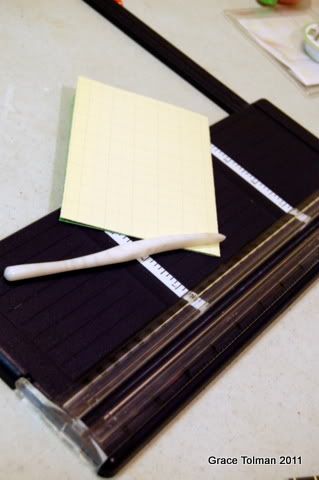
1. Paint wood block white and distress edges with sandpaper and brown ink pad.
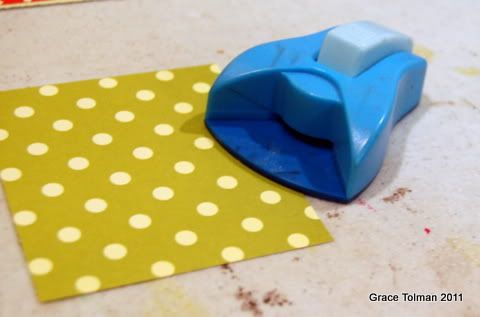
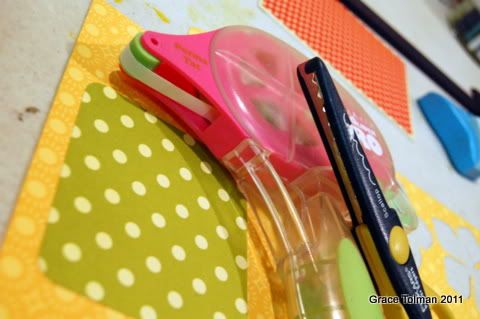
2. Adhere patterned papers to front surface of wood block and to the chipboard girl piece. Distress edges with brown ink pad.


 3. Apply Glue Arts Adhesive Line near the bottom of the dress, rub in place then remove the protective plastic strip.
4. Apply fine silver glitter to the Adhesive Line and press into it with your finger. Shake off excess glitter.
 5. Wrap silver wire around the girls head to resemble a halo. Paint chipboard snowflakes white, allow to dry then apply Mica Flakes. Adhere the chipboard snowflakes to the backside of the girl to make angel wings.
 6. Stamp wood block at the top right corner with seasonal greeting. Adhere the angel with wings to the block and use a 1/2" Adhesive Square to the backside of a metal snowflake brad and add to the halo.
 7. Cut strips of cotton lace, embroider a running stitch along the top of the lace then adhere to the bottom of the skirt. Make a wreath with silver pipe cleaners and adhere resin star and snowflake brad. Adhere 2 small green leaves to the wreath.


 8. Apply seam binding to the outside circumference of the wood block and tie a bow on the side. Adhere a button and rhinestone to the bow's knot using hot glue. 
9. Adhere a wood knob to the top center of the block with hot glue and add a rhinestone to the center top.


Beautiful right? Amazing how a simple piece of wood can be turned into something so incredible.

We'd love to help you craft and create by sharing a few of our favorite products that bring all of us a bit of peace and joy!! Simply post a comment today and we'll enter you to win...


.. our PRO handle, new PRO+ Perma Tac cartridge, our Adhesive Squares and yes...our U Cut It Foam! The more you comment...the more chances you have to win!! We'll collect the comments over the next two weeks and pick one random winner. Just think...YOU might be the winner of  a bit of JOY! 


You have read this article Crop and Glue / Extreme Adhesive / Glue Gilder Pro / Hot Glue Gun / Linda / Perma Tac with the title Extreme Adhesive. You can bookmark this page URL http://skinnyminny22.blogspot.com/2011/12/peace-joy-to-you-this-season.html. Thanks!

Scare It Up With GlueArts Accent It All

Halloween is just around the corner!

And for our family that means a house full of Halloween decor inside and out!

Designer Andrea Budjack has created a spooky ornament that would look great on a black feather tree or hung perhaps from a chandelier! This is also a craft kids can join in on as well!

If you don't decorate for Halloween...then change it to Noel and make your own holiday ornaments to give as gifts and more!

user posted image
user posted image
Boo Ornament
GlueArts Designer: Andrea Budjack


Supplies: 


Supplies:
Glue Arts Accent-It All (black)
Glue Arts Ribbon Adhesive
Glue Arts Extreme Adhesive Squares
Glass Ornament - craft supply
Provo Craft Cricut Expression and "Storybook" cartridge
Really Reasonable Ribbon - ribbon and trims
Polymer Clay/Charms
Martha Stewart - glitter
Vintage Tag - craft supply
Papertrey Ink - button and stamp (sentiment)
Fabric - craft supply

Instructions:

1. Cut out "Boo!" using Glue Arts Accent-It All and place onto ornament.


user posted image


2. Create charms from polymer clay and glitter following baking or use existing charms. Add string and insert into ornament, leaving the string long enough to attach to the top piece. 

3. Using Glue Arts Extreme Adhesive Square, stick each string to inside of top piece to secure. Trim excess string and put top piece in place.


4. Using Glue Arts Ribbon Adhesive, apply lace to top of ornament.user posted image

5. Stamp sentiment on tag. Add ribbon, tag, button and jute string to top of ornament.


We know once you try out our GlueArts Accent It All Vinyl you'll want one of all 11 colors! So let's help you by giving you a chance to win our entire color collection along with one additional sheet of our Black Out Vinyl. Perfect for this time of the year by the way! Simply post a comment and you'll be entered to win! We'll pick one winner this Monday! 


2011-09-16 20.25.53.jpg
Julia "Glue Girl" Timi, Ken Oliver and Nancy at
For Keeps SakeScrapbook Store
in St.Louis, Missouri 

And do be sure you're following us here as well as on our Facebook Wall and Twitter page! We have a NEW Product and Contest announcement starting THIS Saturday that you won't want to miss!!  (notice the color of the cartridge inside the Pro?! hint hint!)

You have read this article Accent It All / Andrea / Extreme Adhesive / Pro Plus / Ribbon Adhesive with the title Extreme Adhesive. You can bookmark this page URL http://skinnyminny22.blogspot.com/2011/09/scare-it-up-with-gluearts-accent-it-all.html. Thanks!

Slip n' Slide With GlueArts and Pink Paislee

Summer fun and the living is easy!

Summer is the perfect time for outdoor fun. Although many of us are battling heat warnings that make being outdoors a bit too much!

So if you're inside to cool off from the heat...here are some fun ways you can use GlueArts Adhesives and Pink Paislee's Hometown Summer collection to capture those memories and moments from your HOT summer!


Sweet Summer Card
GlueArts Designer: Grace Tolman


Supplies:
Glue Arts Perma Tac
Glue Arts U Cut it Foam
Glue Arts Raisen’s
Pattern papers, stamp and stickers- Hometown Summer, Pink Paislee
Scallop scissors- Fiskars
Thread – Walmart
Sewing Machine- Kenmore
Corner rounder- Marvy Uchida
Circle punch- EK Success

Instructions:
1. Gather your supplies
user posted image

2. Make the card base that is sized 4 x 5 ½” from grid pattern paper. Cut a piece from red star paper that is 1/8” smaller than the card base and adhere to the card.
user posted image

3. Cut a piece from green dot paper that is 3 x 3 ½” and round the corners.
user posted image

4. Adhere the green paper onto the yellow paper with GlueArts Perma Tac adhesive and trim the edges with a scallop scissor. Adhere to the left side of the card.
user posted image

5. Stamp the summer banner image onto the grid paper and trim.
user posted image

6. Create pleats with a strip of the number paper. Machine stitch it onto the bottom of the card.
user posted image

user posted image


7. Add the stamped summer image, using foam adhesive to the card. Also adhere the rubber sticker onto the card.
user posted image

8. Punch out a circle from pattern paper, add Raisen’s adhesive on the back of the circle and adhere to the card.
user posted image

9. Layer a star bubble sticker onto the circle.
user posted image


Besties Hanging 
GlueArts Designer: Audrey Pettit

Glue Arts Supplies:
Glue Glider Pro with Perma Squares Adhesive
Extreme Adhesive Squares
Micro Extreme Adhesive Squares
U Cut It Foam Adhesive

Pink Paislee Supplies:
Soiree Collection: Patterned Papers, Flags & Banner Stickers, Designer Pins, Wooden Shapes & 12" Rhinestone Chain

ClearScraps 12"x12" Clear Acrylic Sheet

Cut an 8x10 piece of clear acrylic sheet. Embellish with layers of patterned papers, a wooden banner, designer pins and flags, ribbons, bows, a handmade flower, and rhinestone chain. Add tiny alpha stickers for the title work, journaling strips, and a lace handle. Enjoy!

user posted image

user posted image

user posted image

user posted image

user posted image


Slip n' Slide Layout
GlueArts Guest Designer: Lynn Ghahary

Supplies:

Pink Paislee Hometown Summer Collection 
Pink Paislee Hometown Summer Baubles 


We would like to invite you to post a comment today for a chance to win products from the beautiful Pink Paislee Soiree collection! We're also going to tuck in our Glue Glider Pro

Ribbon Adhesive and our Extreme Adhesive Squares. Simply post a comment each day this week and we'll select another random winner next Monday!
Please join us tomorrow for more ideas and inspiration from our Guest Designer Lynn Ghahary and our Glue Girls!!! Please be sure to visit the Pink Paislee blog for endless ideas and inspiration where our Guest Designer, Lynn Ghahary can be found with more projects! 


You have read this article Audrey / Extreme Adhesive / Extreme Adhesives Mini Squares / Glue Gilder Pro / Grace / Guest Designer / Perma Tac / Pink Paislee / Raisen's / U Cut It Foam with the title Extreme Adhesive. You can bookmark this page URL http://skinnyminny22.blogspot.com/2011/07/slip-n-slide-with-gluearts-and-pink.html. Thanks!

Let GlueArts Be Your "Life Line"

How often do you scrapbook and craft items featuring your loved ones?

Many of you may say not enough....because can you ever say too much about those you love?

Today's projects feature Clear Scraps products, GlueArts adhesives and yes....families!

Designer Leslie Ashe used the Clear Scraps XL Deco Shapes. What makes her project truly unique is that she painted and stamped onto the acrylic! Now it's worthy of a special place in her home!!! 


Designer Ania Lexander made a wall hanging using the Clear Scraps XL Deco Shapes too! She added rubons onto the Clear Scraps Sheet and cut out the design for a special embellishment! Both projects are equally beautiful and both celebrate family!!

Life Lines
Designed by: Leslie Ashe


Supplies:
Glue Arts Glue Glider Pro with High Tac cartridge
Glue Arts Extreme Adhesive Squares
Glue Arts Mini Extreme Adhesive Squares
Clear Scraps XL Deco Shape sheet

Instructions:
patterned paper: My Minds Eye, October Afternoon
paint: Claudine Helmuth Studio (back of clear deco shape), Adirondack (silver touches everywhere)
spray mist: Tattered Angels
ink: Tsukineko & Staz On
bling, flowers, extras: Prima
other bling: jolee's (swarovsky crystals)
letters: American Crafts
vintage tag, numbers & stamp: Jenni Bowlin Studio
pens: zigs (silver & black)


Directions:
-using Staz On (permanent ink, dries FAST), stamp along the side border of the Clear Scraps deco sheet

-paint entire sheet color of your choice & let dry (I painted 2 coats)

-paint the edge in silver
-glue down on patterned paper
-add flowers, butterflies, stamps & embellishments on top of your deco sheet. 


-once your design is complete, add silver dots to edge of clear sheet & journal on top using your silver pen. Journal in black around edge of shap


Love You Sillies Wall Hanging
Designed by: Ania Lexander

Supplies:
Glue Arts:
Glue glider pro - Perma Tac
Hot gun
Raisen's
U cut it Foam
Ribbon adhesive
Extreme Adhesive Squares


Other:
XL Shapes - deco - Clearscraps
Regular 12x12 clearscrap-sheet
Papers from 3ndypapir
Journal tag from Making Memories
Letters from American Crafts
Transparencies and rubons from Hambly
Gems from KaiserCraft
Flowers from Prima and Kort&Godt
Ribbons and button from Crate Paper
Borderpunch from Martha Stewart


Usually, when I pleat papers like this, I use my sewing machine to sew the pleats in place. However, my sewing machine is kaput, so hot gluing the pleats in place works perfectly instead.


For the rub-on - I wanted to use it as a raised element on my layout - so I cut out the rubon and the size of the clearscrap that I needed, removed the protecting film from it before rubbing the rubon on it, then cut around the shape.
Because I had an idea that I might use the layout as a wall hanging, I needed the stuff on it to really, really stick. Hence the use of Extreme adhesive squares for attaching the paper to the layout.

For the paperborder and the photos however, regular Perma Tac would do.
Some U Cut It Foam was used too..
As well as ribbon adhesive..
Raisen's...perfect for transparencies on transparencies...you can hardly see the glue through the transparencies...plus..build them up in the height if you need higher dimension..
And hot glue!
Assemble the layout and punch holes on the top of the layout and thread your ribbon through.


Vacation Card
Guest Designer: Pinky Hobbs

Supplies:
GlueArts U Cut It Foam
GlueArts Glue Glider Pro and ExtremeTac
Clear Scraps MINI Expressions (painted the back side with Plaid Paint) 

Yellow Stickles


So for those of you who were hesitant about using acrylic in your projects...are you having a change of heart? Now feeling the nudge to work with acrylic?! {we hope so!}

GlueArts would like to help you make these projects by giving you an opportunity to win some fabulous goodies! Just post a comment here on the blog and we'll pick a random winner next Monday!

Clear Scraps has provided a fun item or two for us to include for this week's giveaway! We have a Scalloped Tab Album and the Deco XL Shapes to give away!


Simply leave us a comment and you're entered to win! We'll select one random winner next Monday to win!! Good luck!! Don't forget to visit the Clear Scraps blog  and Pinky's blog for more ideas and inspiration all week long!


Last for today...we'd like to ask you to go give a BIG GlueArts hello to Clear Scraps on their Facebook wall. Then visit our GlueArts Facebook wall and let us know you've done that! We're going to enter you to win a Clear Scraps Album, our Extreme Adhesive Squares and a 3D Combo Pac for being so kind!!


You have read this article Clear Scraps / Extreme Adhesive / Extreme Adhesives Mini Sqaures / Glue Gilder Pro / High Tac / Leslie with the title Extreme Adhesive. You can bookmark this page URL http://skinnyminny22.blogspot.com/2011/06/let-gluearts-be-your-line.html. Thanks!