Altered Shadow Box

Today I have a little altered Twiddleybitz and Prima project to share with you all.

This one will be display at the TWIDDLEYBITZ Booth #60, Brisbane Expo this coming Queen's Birthday weekend.  It has also been featured recently for Prima's Designer Day Blog Feature.

I have combined some wonderful Twiddleybitz components with some gorgeous Prima to come up with this sweet decor way of displaying a photo of my two precious girls.
 I first constructed the Twiddleybitz 6" x 6" Shadow Box and added the Awning from the Fence and Awning Kit across the top.  Note: I have not used the fence in this instance and have popped aside to use for another project. 
The sides of the box were covered with Prima Nature's Garden patterned paper. Pixie Glen patterned papers were used for decorating the inside and across the top.  The 6" x 6" Paper Pad was perfect for this. A 'faux' brick effect was added with the help of a Prima Brick acrylic mask, some Texture Paste, Diamond Dust, Tim Holtz Distress Ink and Stain and Tattered Angles Glimmer mists. 
The awning has had a touch of shabbiness added with Tim Holtz Distress Paint and again some more inking and staining.   
A touch of decorative architecture has been added with an assortment of Prima shabby Metal Treasures and Resin.
 These have been designed by Ingvild Bolme and they are amazing.  You can check out more about Ingvild here as she has been featured recently on the Prima blog for a Designer Day Feature.

Roman Pillars and Gable elements were added to the front and sides of the box and awning.
An Old Church Window sits on the inside back wall and smaller mini round windows sit on the inside of the opening shutters which were created from the Twiddleybitz Mosaic Grab Bag.
Some Metal bird cages were also added - one to hang from a gable element - I stuck two of these elements element to create more of a 3D look and to support the top of the cage.


 A Twiddleybitz Lamp Post and Bike with Flower Basket was added to the front - the lamp post was removed first and attached to sit behind the bike.
A Circle Flourish adds a decorative accent to the top and a Flower Flourish Vine was cut up and attached along with Prima Flowers and Alla Prima Resistant Canvas. 

I have used the following Twiddleybitz pieces and these will be available at the show


Prima Products Used:

#890735 Resin - Mini Windows
#890704 Resin – Old Church Window
#890759 Resin – Gable
#890674 Resin – Roman Pillars
#890858 Metal Treasures – Bird Cages
#556808 Miss Godivas – Celadon
#553319 Pixie Glen – Coventry Rose
#843571 Pixie Glen – 6 x 6 Paper Pad
#552534 Essentials 11 – Pixie Glen
#551629 Resist Canvas
SA-002/1 White


********************
Also make sure you check out the Twiddleybitz NING site for more inspiration and show updates.  The Twiddley gals have been madly creating and have lots of awesome projects that they are now starting to reveal in the gallery.

Thanks so much for dropping by,
Hugs,
T
You have read this article Altered Projects / Prima / Twiddleybitz with the title . You can bookmark this page URL http://skinnyminny22.blogspot.com/2012/06/altered-shadow-box.html. Thanks!

My Creative Scrapbook: Creating a tree embellishment

Last month I created this layout 'A Happy Home' for My Creative Scrapbook with the May Limited Edition Kit.


I've shared the creative process for creating the tree embellishment which is featured on the My Creative Scrapbook blog HERE.

The creative process is as follows:

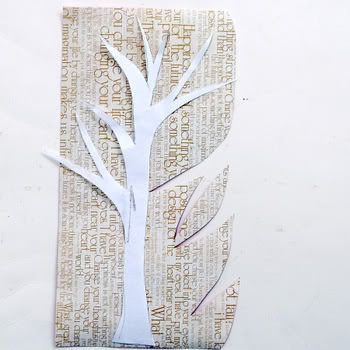
I first created a template by drawing a tree trunk onto a piece of paper.  Once I was happy with the design and the size, I cut it out.
The template created was then used to trace and cut around from a piece of patterned paper.
  I wanted a fairly large tree and it measures approximately 11" in height.  


To add a little definition, you may like to ink around the edges.
Add some foliage to the tree branches.
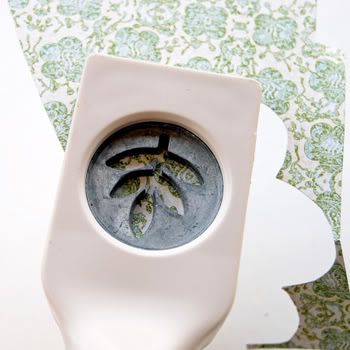
Punch out some leaves from patterned papers - I used a Martha Stewart punch.  This is also great way for using up some scraps.


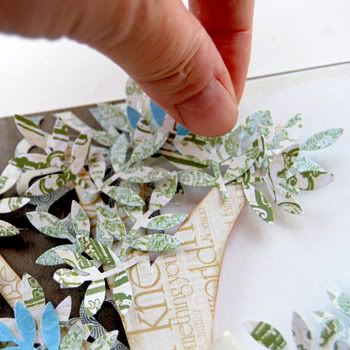
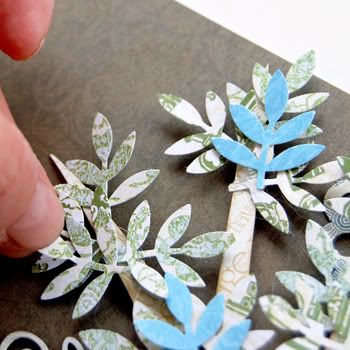
Now attach leaves to branches to recreate a tree canopy.


I used hot glue to attach.


Happy Creating!
You have read this article GDT / My Creative Scrapbook / Tutorials / Webster's Pages with the title . You can bookmark this page URL http://skinnyminny22.blogspot.com/2012/06/my-creative-scrapbook-creating-tree.html. Thanks!

My Creative Scrapbook - Sneak Peaks

The My Creative Scrapbook June sneak peaks are up and you can check them all out HERE. 
Can I just say that Pam has put together another wonderful assortment of kits. 
I am Guest Designing again this month and I so excited to create with the Limited Edition kit. Totally loved it and had so much fun creating with it.
Here are a few sneak peaks for now... 


Make sure you check back on the My Creative Scrapbook site on the 5th of June for the full kit reveal.
You have read this article GDT / My Creative Scrapbook with the title . You can bookmark this page URL http://skinnyminny22.blogspot.com/2012/06/my-creative-scrapbook-sneak-peaks.html. Thanks!

Dear Lizzy.....Tags, Cards & More With GlueArts

 
Happy Day!

It's hard not to have a happy day when you see these projects today from Designers Lesley Langdon and Jan Hennings!

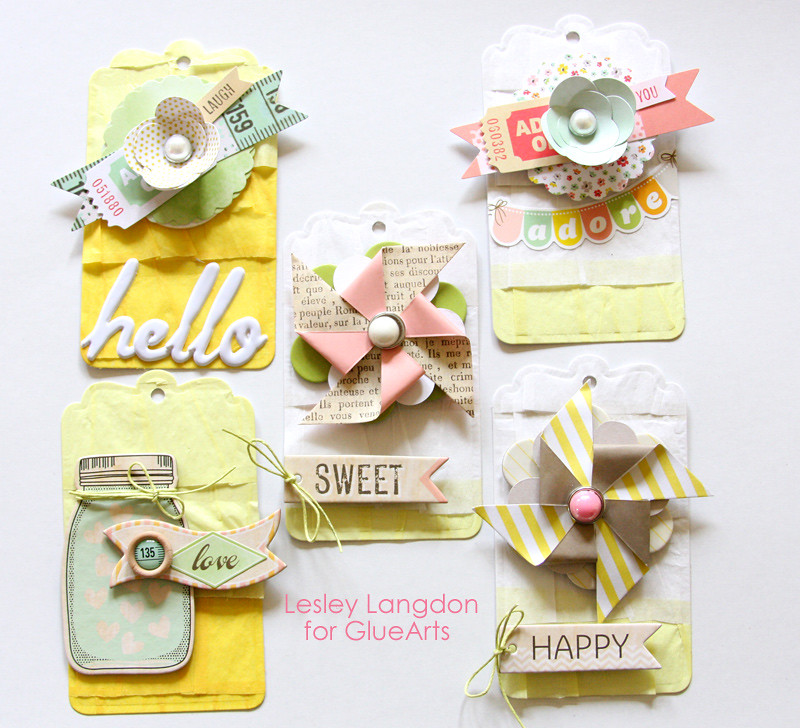
Lesley has created 5 of the CUTEST yes...we used all caps for that...cutest tags...beautiful for birthday's, Anniversaries or give the tags as a gift...so sweet!

Designer Jan Hennings has the perfect cards to give or receive!

The key to making everything come together so perfectly.....why GlueArts Adhesives of course!

user posted image
Dear Lizzy Tags
GlueArts Designer: Lesley Langdon


American Crafts Dear Lizzy (Neapolitan Stitched Ruffle Paper, Printed Chipboard Shapes, Accent and Phrase Stickers, Pinwheels, Ephemera Flowers, Alphas)
Spellbinders Dies S5-095 Tags and Flags
Spellbinders Grand Calibur Die Cut Machine
WeR Memory Keepers Big Bite (hole punch)
Green Cord

user posted image

Instructions:
1. Die cut tags from Dear Lizzy ruffle paper. Hole punch a circle in the top.

user posted image

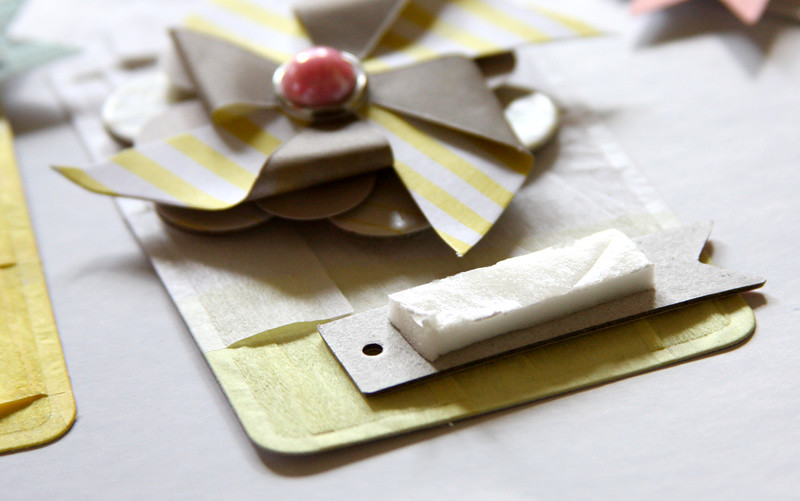
2. Adhere embellishments with GlueArts U-Cut-It Foam, and Raisen's.

user posted image

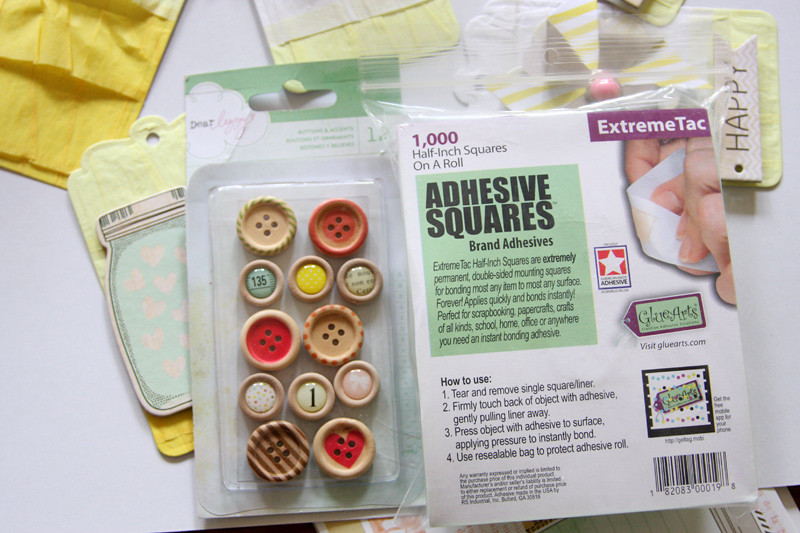
3. Adhere buttons with GlueArts Adhesive Squares (Extreme Tac).

user posted image

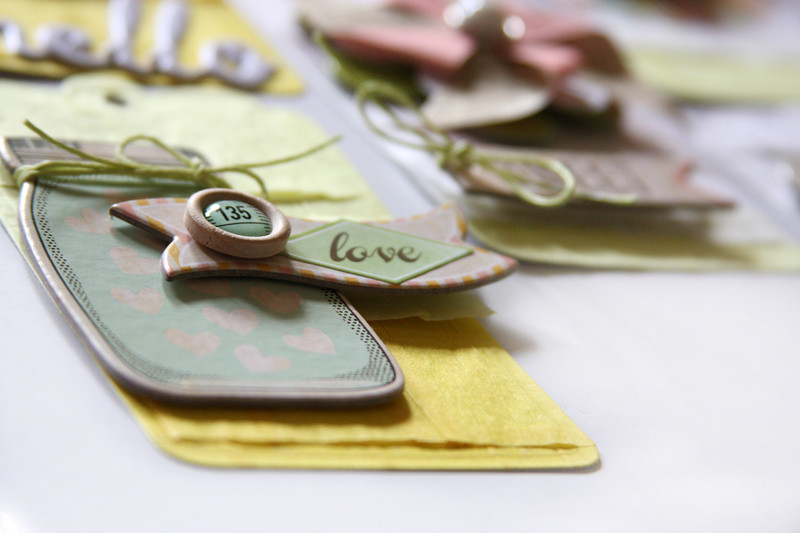
4. Adhere stickers with sayings to complete the tags.
5. Adhere cord.


user posted image
Dear Lizzy Card Set
GlueArts Designer: Jan Hennings

Supplies:
GlueArts Adhesive Squares (Extreme Tac)
American Crafts Dear Lizzy (Neapolitan Collection)

user posted image

user posted image


Well that's it! Our finale!


We hope you've enjoyed this week of beautiful projects using the Dear Lizzy Kit from our friend at American Crafts. 


And speaking of those friends...they were kind enough to send an amazing kit filled with the Dear Lizzy Neapolitan collection. It's filled with papers, stickers, buttons, alphabet stickers...and on and on. We'd like to send this to you...so please post us a comment. We'd love to hear how many of you are using GlueArts Adhesives. And if not...what is first on your list to try.

Then we'll select one random winner from this week's comment and post their lucky name right here next Monday. All it takes is one comment and it might be YOU!

Don't forget...you can order all your GlueArts adhesives direct from us...that's right! One stop shopping for all your adhesive needs! Stop by and see!
You have read this article 3D Combo Pac / Dear Lizzy / Glue Gilder Pro / Jan / Lesley / Raisen's / U Cut It Foam with the title . You can bookmark this page URL http://skinnyminny22.blogspot.com/2012/06/dear-lizzytags-cards-more-with-gluearts.html. Thanks!

We're Celebrating "Dear Lizzy" and GlueArts!


user posted image

user posted image

user posted image
Celebrating Her


GlueArts Designer: Andrea Budjack

Glue Arts Supplies:
Extreme Adhesive
Perma Tac
Glue Gun

Addtional Supplies:
American Crafts Dear Lizzy - paper, trim, stickers
Papertrey Ink - dies, stamps
Crate Paper - label
Melissa Frances - crepe paper
Want2Scrap - adhesive pearls
felt
ribbon
clothes pin
lace
stick pin
wooden spool
stick
wood clothes pin
paint
marker
rope
wire
fabric

How to Create:
1. Paint spool, clothes pin and stick with white paint. Using Glue Arts Glue Gun, adhere together.

2. Wrap fabric and ribbon around bottom of spool. Create two labels using American Craft stickers onto cardstock and add to spool using stick pin.

3. Die cut labels from cardstock and American Crafts paper. Stitch layers and adhere together using Glue Arts Perma Tac. Adhere to bottom of spool.

4. Add Extreme Adhesive to clothes pin and wrap pink trim and lace around to create dress. Tie on green ribbon.

5. Disassemble rope to create hair and add to top of clothes pin using Glue Arts glue gun.

6. Layer American Craft border sticker and burlap, stitch together and adhere to top of head using glue gun. Add wire crown.

7. Add eyes using a black fine tip marker.

8. Cut strips of crepe paper and adhere using glue gun to top of spool.


So how would you like to win the same supplies to be able to recreate what Andrea made today??


Our incredibly generous (did we say generous?/!!) friends at American Crafts were kind enough to send an amazing kit filled with the Dear Lizzy Neapolitan collection. It's filled with papers, stickers, buttons, alphabet stickers...and on and on. We'd like to send this to you...so please post us a comment. We'd love to hear how many of you are using GlueArts Adhesives. And if not...what is first on your list to try.

Then we'll select one random winner from this week's comment and post their lucky name right here next Monday. All it takes is one comment and it might be YOU!

Do stop by tomorrow...we have one more day of beautiful projects to share with you that we know you will not want to miss a day!
You have read this article Andrea / Extreme Adhesive Squares / Glue Gilder Pro / Hot Glue Gun / Perma Tac with the title . You can bookmark this page URL http://skinnyminny22.blogspot.com/2012/06/we-celebrating-lizzy-and-gluearts.html. Thanks!