Showing posts with label Audrey. Show all posts

"Dear Lizzy....You Are Delightful!" Said GlueArts!


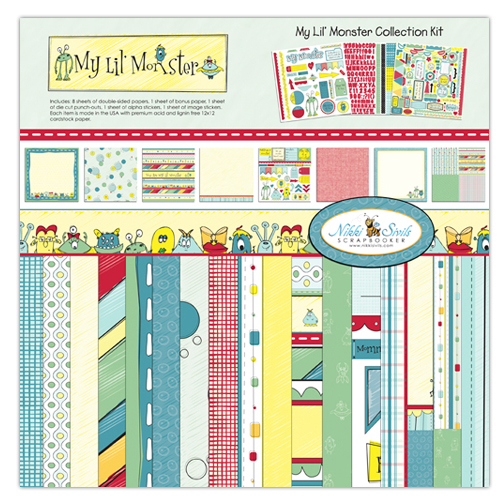
Soft sweet colors, feminine embellishments....flowers, ice cream, strawberries and more!

All of this is part of the beautifully delicious Dear Lizzy Neapolitan collection!


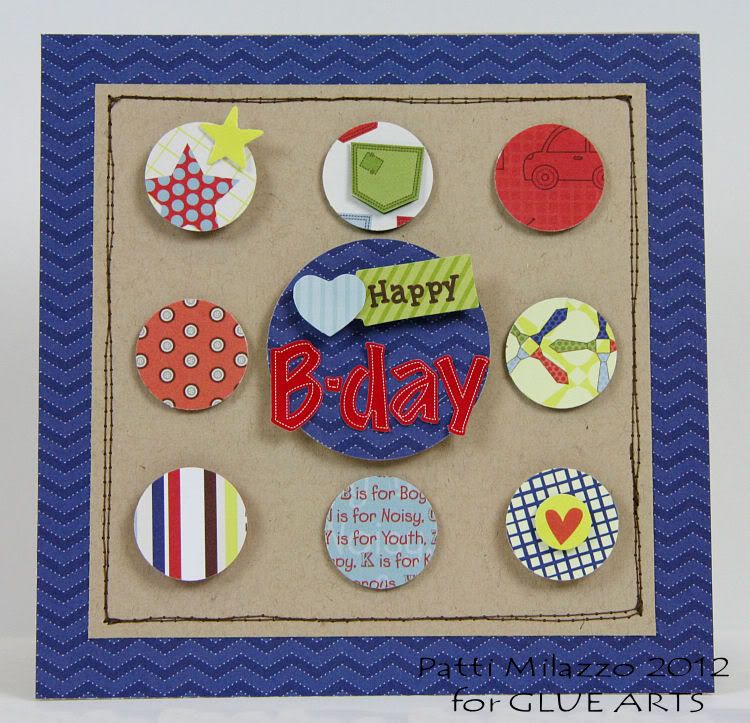
Today Designers Kristen Swain and Audrey Pettit are going to have your sweet tooth crying out...they're just so soft and sweet! GlueArts Adhesives though..can't be beat! (nothing wrong with a little rhyming on a Tuesday!)

user posted image
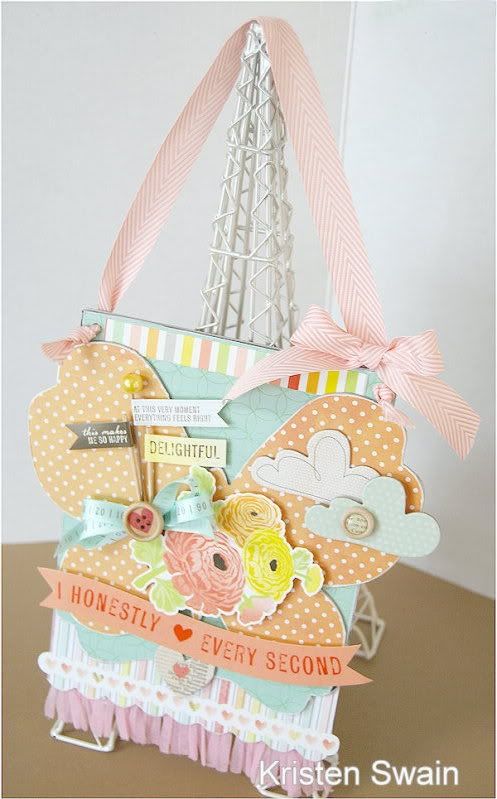
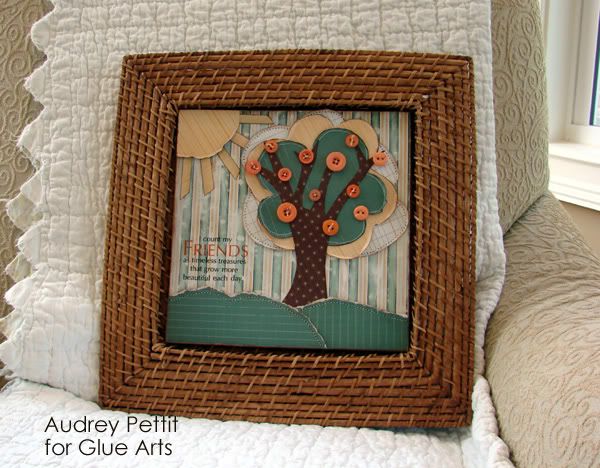
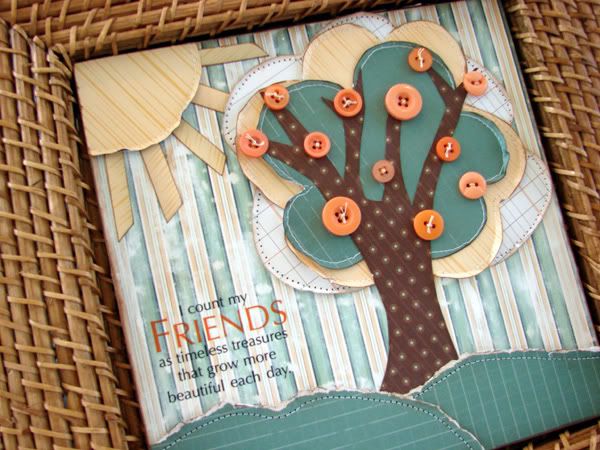
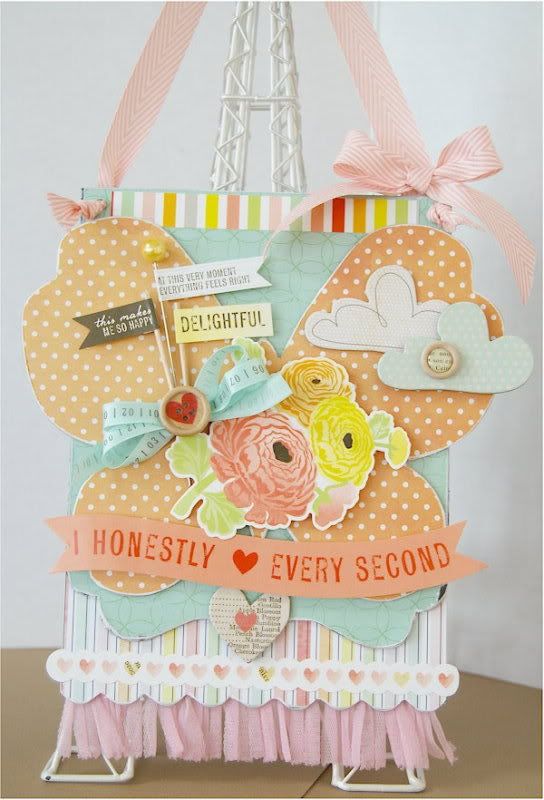
Delightful Wall Hanging
GlueArts Designer: Kristen Swain 

Supplies: 


American Crafts- Dear Lizzy collection- ribbon, paper, stickers, chipboard, ribbon,buttons


ribbon- May Arts
chipboard album- bobunny and Maya Road
sand paper
toothpicks


user posted image

Instructions:

1. Cover each album shape with paper, glue into place and sand off edges.


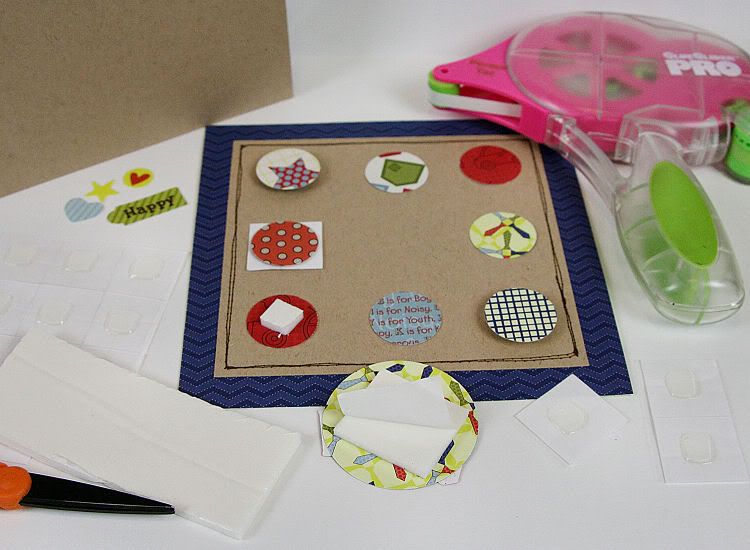
2. Adhere chipboard pieces together using Adhesive Squares.


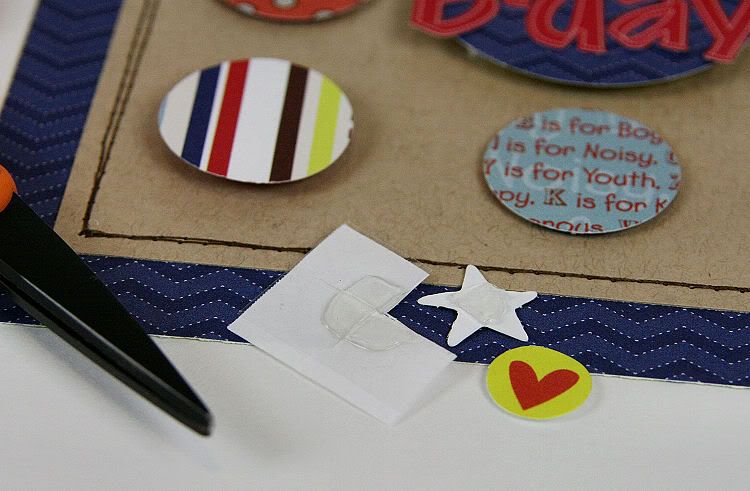
3. Add foam tape to back of stickers and chipboard and adhere to butterfly.

4. Adhere ribbon tulle to bottom of chipboard using Adhesive squares, also add ribbon bow and button on knot.


user posted image

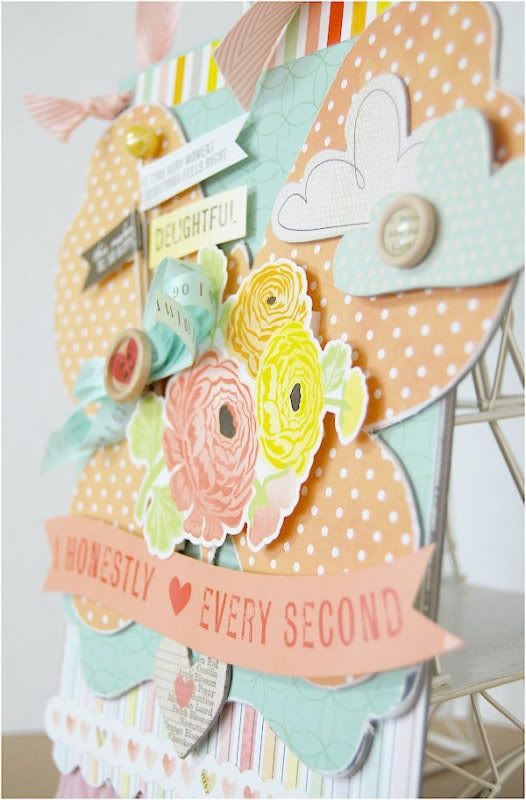
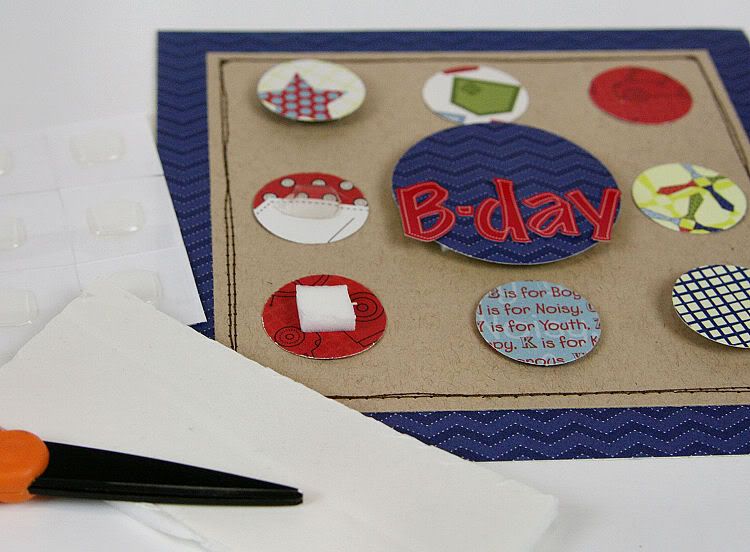
5. Add U Cut It Foam to large banner, then adhere to butterfly. Make banners with stickers, toothpicks and U Cut It Foam.


6. Punch holes at top of banner, thread ribbon through and tie knots.


user posted image

user posted image
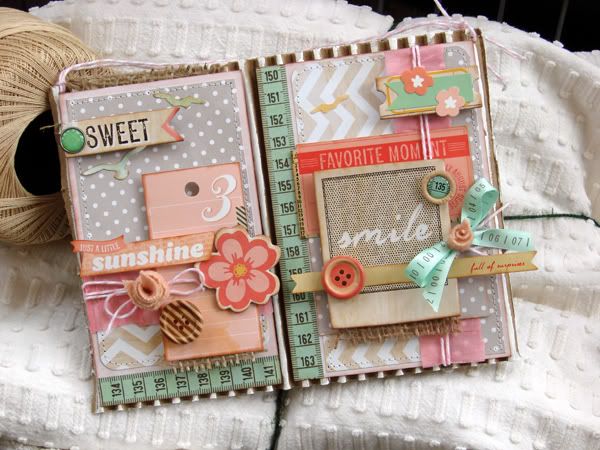
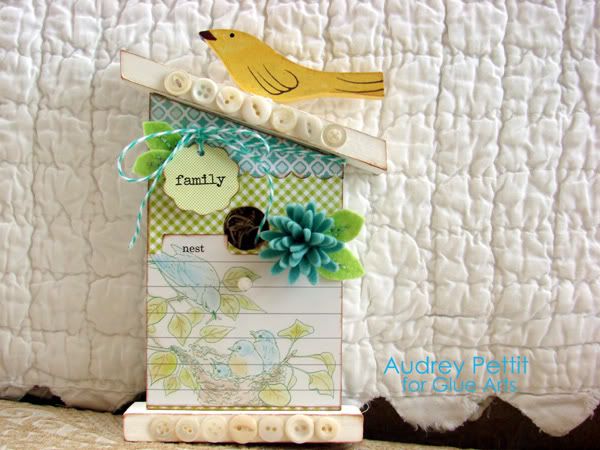
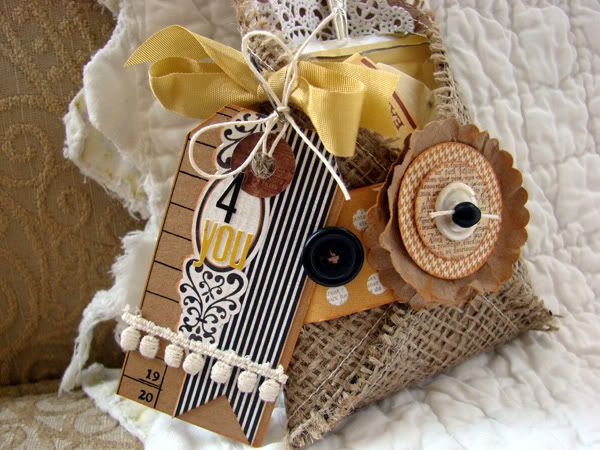
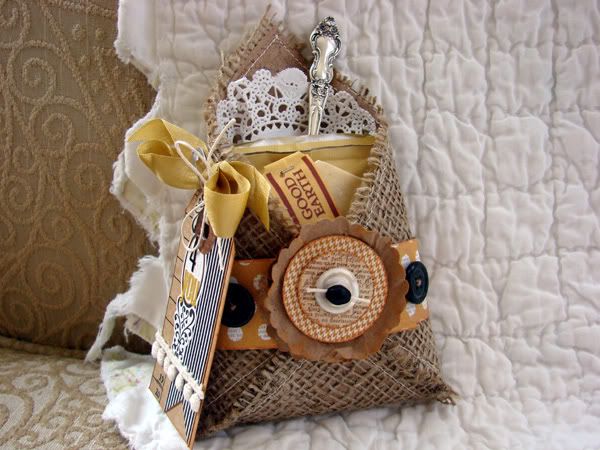
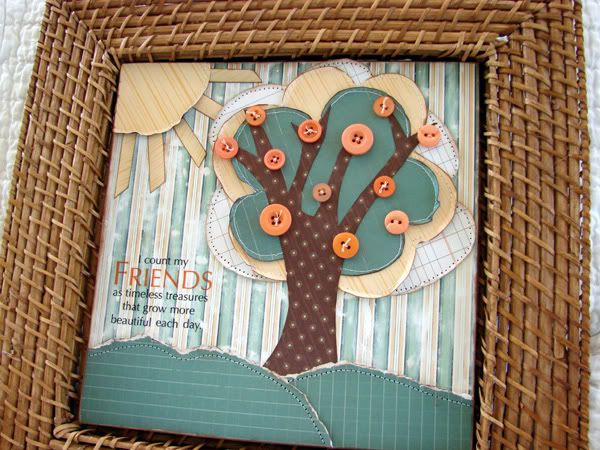
Just a Little Sunshine Hanging
GlueArts Designer: Audrey Pettit

Supplies:

Glue Arts Glue Glider Pro+ High Tac 
Glue Arts U Cut It Foam Adhesive
Glue Arts Extreme Adhesive Squares

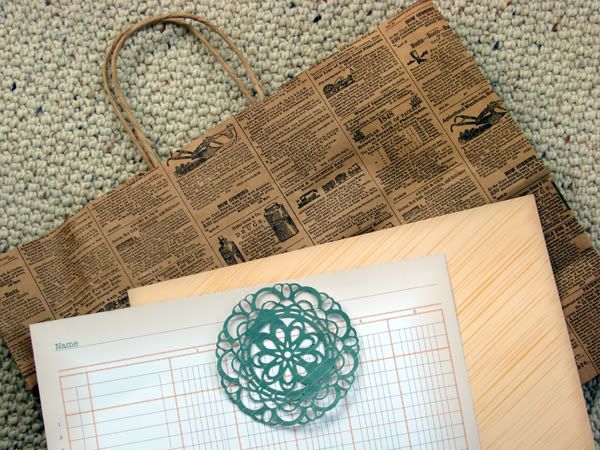
American Crafts- Dear Lizzie Neapolitan Collection:
Patterned Paper, Stitched Ruffle Paper, Accent & Phrase Stickers, Printed Chipboard Shapes, Ribbon, and Buttons & Accents

Corrugated Board: Zutter
Brad: Basic Grey
Twine: The Twinery
Ink: Clearsnap
Paint: Delta
Corner Rounder: EK Success
Wool Fabric and Burlap


user posted image

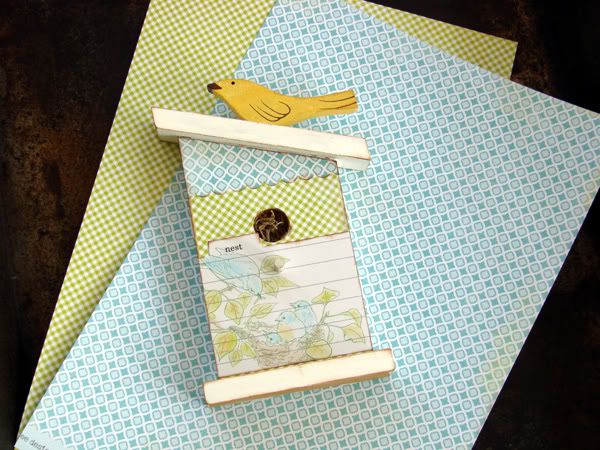
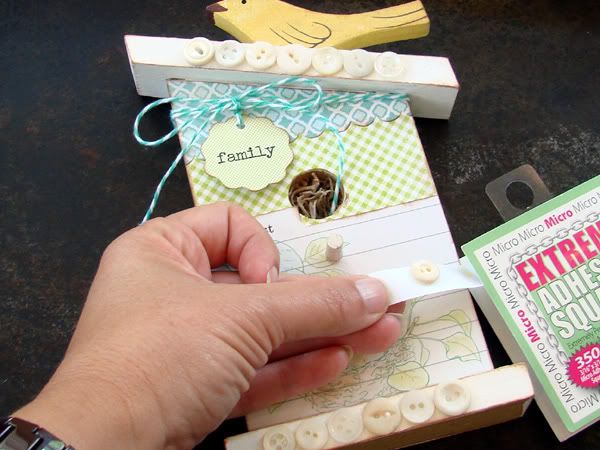
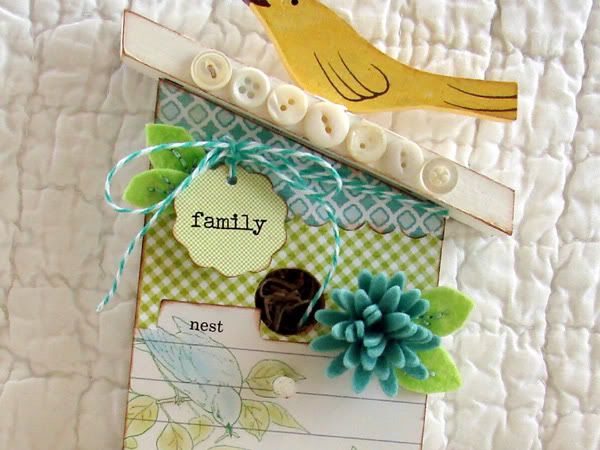
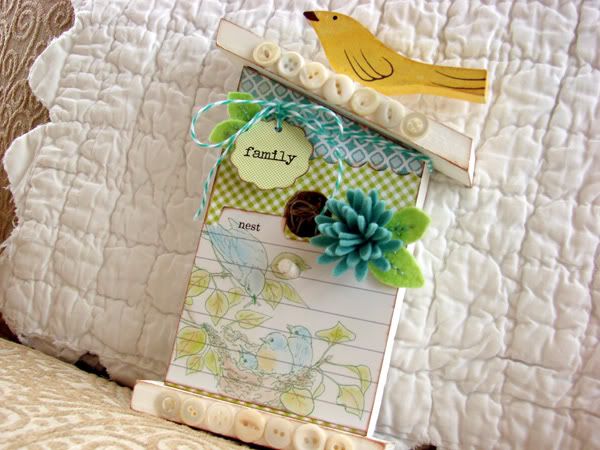
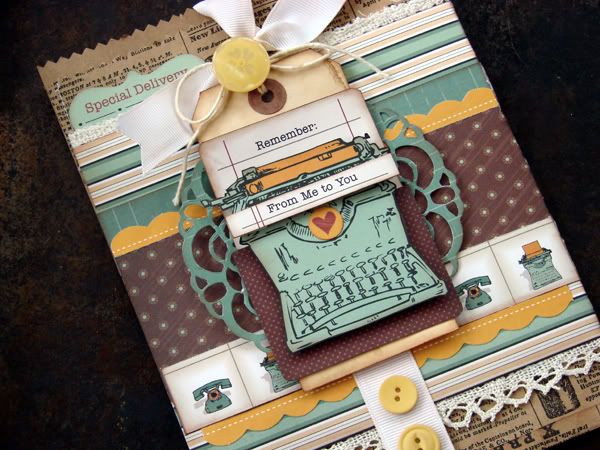
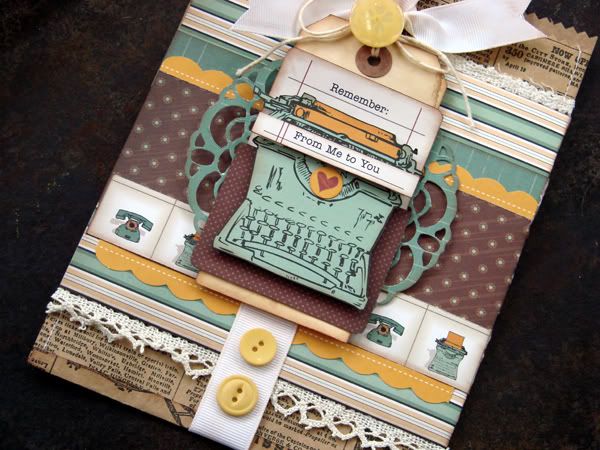
1. Paint corrugated board with white acrylic paint.

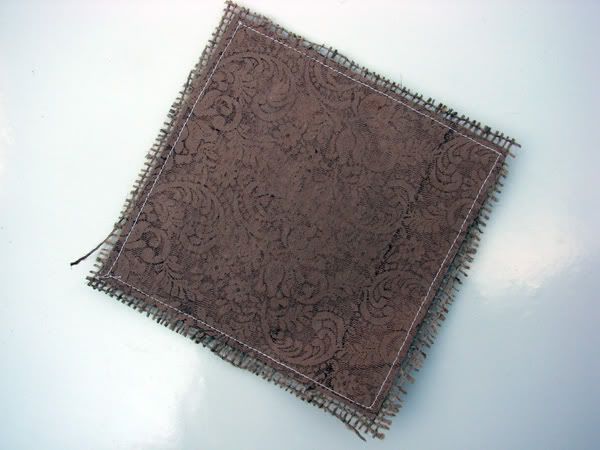
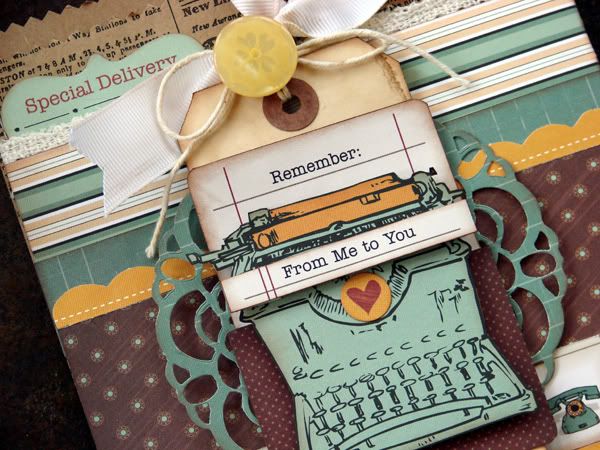
2. Cut two pieces of patterned paper to size for your corrugated board. Layer with contrasting papers. Round the corners of some of the papers and machine stitch in place. Edge blocks with brown ink and adhere to the base.

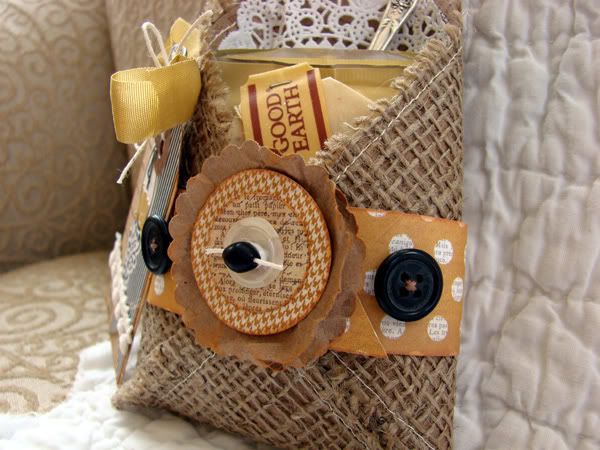
3. Adhere strips of Stitched Ruffle Paper. Wrap twine around the ruffle paper and tie into simple bows.


user posted image

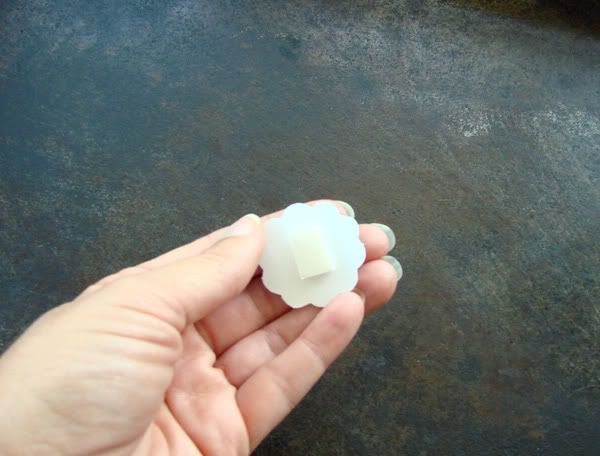
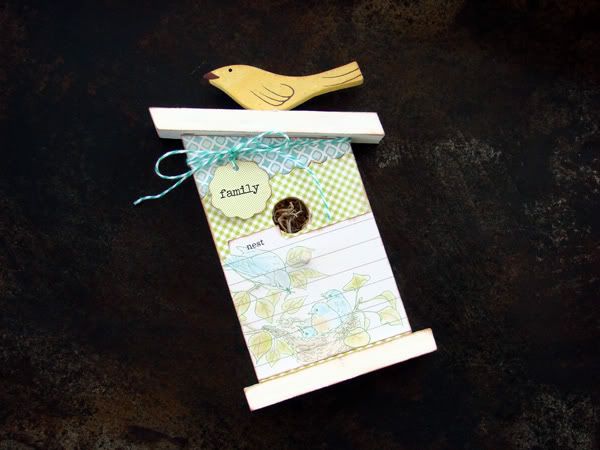
4. Embellish with cardstock stickers, chipboard, brad, and buttons. Adhere some of the pieces with Glue Arts U Cut It Foam Adhesive for dimension. Use Extreme Adhesive squares to attach others.

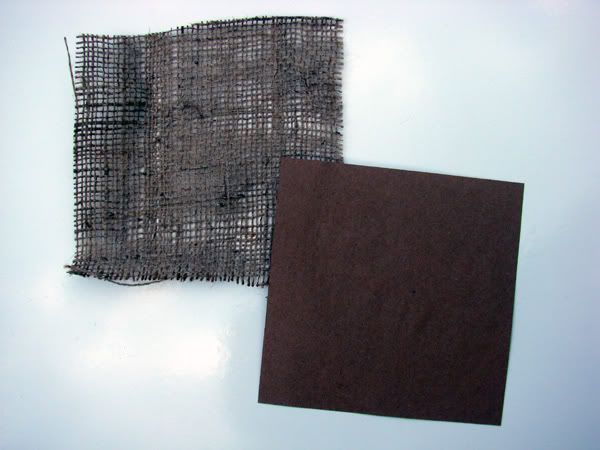
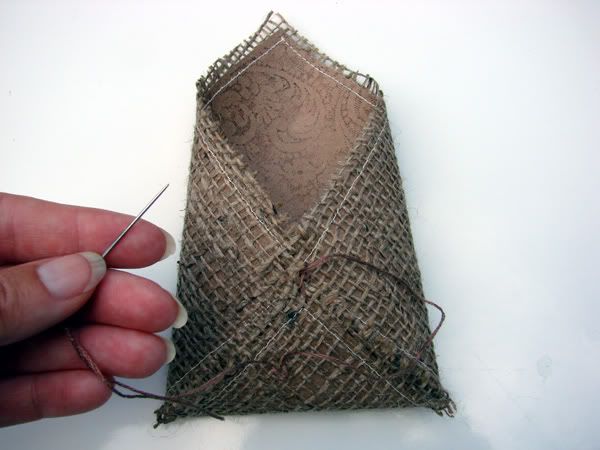
5. Roll small strips of wool fabric into flower rosettes and adhere using adhesive squares. Adhere small strips of burlap fabric for texture.


user posted image

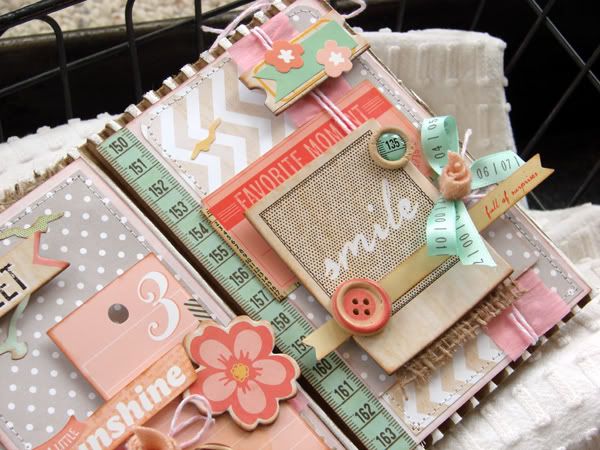
6. Punch two small holes in the top corners of the corrugated board. Tie with Twine to create a hanger. 
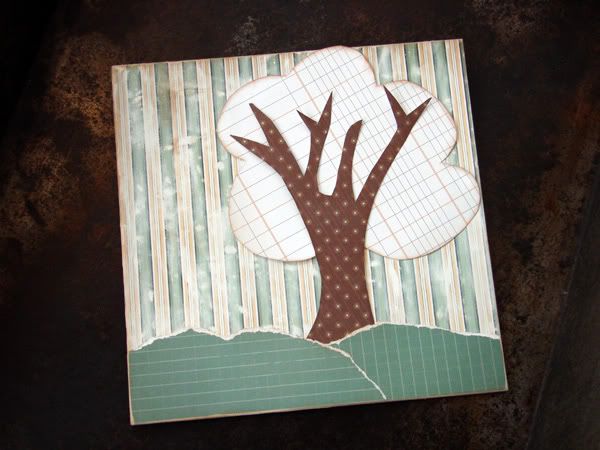
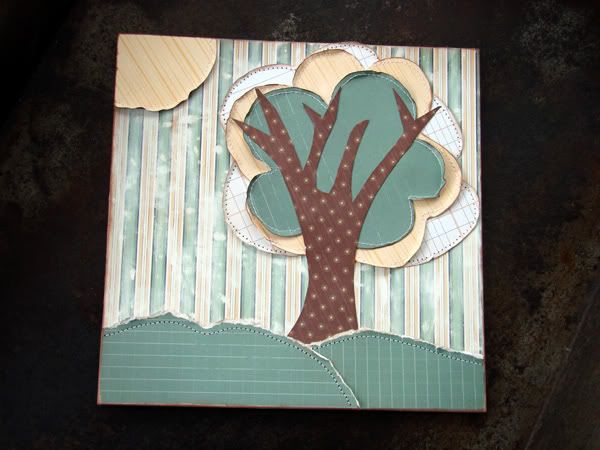
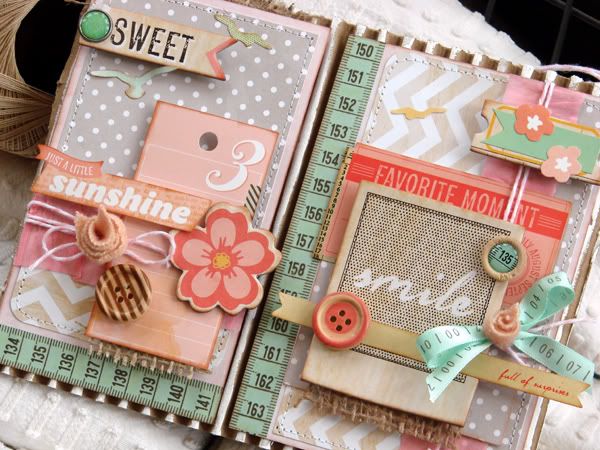


So tell us...are you are love with this amazing collection yet?


Our incredibly generous (did we say generous?/!!) friends at American Crafts were kind enough to send an amazing kit filled with the Dear Lizzy Neapolitan collection. It's filled with papers, stickers, buttons, alphabet stickers...and on and on. We'd like to send this to you...so please post us a comment. We'd love to hear how many of you are using GlueArts Adhesives. And if not...what is first on your list to try.

Then we'll select one random winner from this week's comment and post their lucky name right here next Monday. All it takes is one comment and it might be YOU!

Do stop by tomorrow...we have so many beautiful projects to share with you this week that we know you will not want to miss a day!
You have read this article Adhesive Squares / Audrey / Dear Lizzy / Glue Gilder Pro / High Tac / Kristen / Pro+ / U Cut It Foam with the title Audrey. You can bookmark this page URL http://skinnyminny22.blogspot.com/2012/05/lizzyyou-are-delightful-said-gluearts.html. Thanks!

Crafty Wishes To You!


Welcome to Day 5 of the Glue Arts and Want2Scrap Spring into Summer Blog Hop! 

We hope you enjoyed Day one of the hop and today is just as fantastic!! THIS we are sad to say is the last day. To get in on the prizes make sure to leave a comment on the Want2Scrap AND the Glue Arts Blogs.


AND


As we hope you know... Glue Arts provides a wide range of adhesive from our Glue Glider Gliider PRO+ Adhesive Squares, or Embellishments Adhesive. We have just what you need for your next scrapbook or crafting project.


Want2Scrap specialize in blingchipboard albums, laser designs, iPhone 4 cases and ribbons! Be sure to stop by their site too for a bit of online shopping!


We're wrapping up this amazing week with a beautiful card from talented Designer Audrey Pettit! Be sure to follow the links below to Audrey's blog to see the full tutorial!  


user posted image

Birthday Wishes Card 
GlueArts Designer: Audrey Pettit


Supplies:
Want2Scrap Donna Salazar Canvas ATCs
Want2Scrap Nestaboard Lattice Rectangles
Want2Scrap Say it in Pearls Adhesive Pearls
Kraft Outlet Cardstock
American Crafts Dear Lizzie Patterned Paper, Stitched Crepe Paper, Cardstock Stickers, and Buttons
Papertrey Ink and Stampin'Up Stamps
October Afternoon Sticker Tab
Spellbinders Flower Dies
Stampin'Up and The Twinery Trim
Stampin'Up and Clearsnap Inks
Burlap

Here's the last of the designers on our hop...

Audrey Pettit 
Nina Brackett 
Joe Morgan/Joe Rotella
Mimi Leinbach
Keely Yowler


To be entered for both prizes... make sure to leave a comment on the Want2Scrap AND the Glue Arts BlogsComments will be taken until Sunday May 27 at midnight.


Before you go...please be sure to post a comment and enter to win a GlueArts prize package of... 

a Glue Glider PRO+ and one PermaTac Cartridge, our Adhesives Squares and our 3D Combo Pac! Be sure to post a comment each day this week for more chances to win.


 And be sure to stop by the Want2Scrap blog to enter there too!! It's a must see and stop on your Spring into Summer Blog Hop!

You have read this article Audrey / Extreme Adhesive Squares / Glue Gilder Pro / High Tac / Ribbon Adhesive / Want2Scrap with the title Audrey. You can bookmark this page URL http://skinnyminny22.blogspot.com/2012/05/crafty-wishes-to-you.html. Thanks!

Lily Bee is in the GlueArts House!

lily bee design

As promised we're back this week in full swing with a fun promotion with Lily Bee Design! In fact...there's another company involved too...Epiphany Crafts! 

It's almost too good to be true when you combine Lily Bee, Epiphany Crafts and GlueArts! 

What that means for you is a week, over flowing with endless ideas and ways to use all three products and even better...we're quite certain of a giveaway or two throughout the week as well!

Our talented Audrey Pettit has a bird house that's almost too cute to inhabit! (or least we think so!) She's covered it with the beautiful Lily Bee Victoria Park collection and affixed it with our Glue Glider PRO+!!

user posted image

user posted image

Family Nest Birdhouse by Audrey Pettit


Supplies:

Glue Arts Glue Glider Pro+ and High Tac Adhesive
Glue Arts U Cut It Foam Adhesive
Glue Arts Micro Extreme Adhesive Squares
Glue Arts Glue Gun and Glue Sticks

Lily Bee Victoria Park Collection:
Patterned Papers, Index Journaling Card, and Bag of Bits Die Cut
Felt: Papertrey Ink and Craft Supply
Die: My Favorite Things
Twine: The Twinery
Floss: DMC
Buttons: Vintage
Chalk Pastels: Stampin'Up
Ink: Clearsnap
Paint: Delta
Border Punch: Stampin'Up
Upcycled Wooden Birdhouse

I love scouring second-hand stores and yard sales for fun pieces to alter, like this wooden birdhouse. I thought the bird on top was already cute, but the rest was in need of a little make-over.

Directions:

1. Start by painting the birdhouse white. I already liked the bird, so I left it as it was. Cut a piece of patterned paper to fit the front of the birdhouse. Add a second piece of contrasting paper across the top that has been punched with a scallop border punch. Adhere an Index Journaling Card to the bottom of the panel.
*Note: Edge all paper pieces with brown ink.
Using High Tac Adhesive, affix the panel to the front of the birdhouse.


user posted image

2. Add color to the images on the Index Journaling Card using chalk pastels.

user posted image

3. Add U Cut It Foam Adhesive to the back of the Family die cut from the Bag of Bits. Tie twine around the top of the birdhouse and through a hole punched into the die cut. Tie the die cut into the bow and adhere with the foam adhesive.

user posted image

4. Using Micro Extreme Adhesive Squares, add buttons to the base and top of the birdhouse.

user posted image

5. Die cut a spiral flower from blue felt. Roll the flower up and secure in the back using the Glue Arts Glue Gun. Adhere flower to the top of the Index Journaling Card using more hot glue. Freehand cut leaves from green felt. Stitch veins on the leaves with embroidery floss. Adhere leaves to the spiral flower and Family die cut using hot glue.

user posted image

user posted image


A big thank you to everyone who joined us for our NSD Card Challenge! We added a twist to it and our winner...is Michelle B and her too cute card!

http://wanderingscissors.blogspot.com/2012/05/pineapple-drink-card.html

Congrats to you Michelle! Please email me at Gluegirl@gluearts.com with your info. Be sure to visit the GlueArts blog all week long as we share more ideas and of course...giveaways!

Be sure to stop by the Epiphany Crafts Blog as well as the Lily Bee blog today for more ideas and ways to use all of our products! Have a great day!   
You have read this article Audrey / Extreme Adhesive Squares / Glue Arts Glue Gun / High Tac / Lily Bee / Pro+ / U Cut It Foam with the title Audrey. You can bookmark this page URL http://skinnyminny22.blogspot.com/2012/05/lily-bee-is-in-gluearts-house.html. Thanks!

Treats for Mom's, Teachers & More from GlueArts!


Good morning!

Hope everyone had a great National Scrapbook Day {weekend!}

This week we're sharing beautiful ideas for creating gifts for that special "Mom" in your life. Possibly a teacher, friend, Aunt, Grandma...we've got just the project.

Designer Audrey Pettit has created a beautiful tea pouch set out of burlap! This sweet gift along with a small flower would make such a wonderful gift...don't you agree??

user posted image

user posted image

user posted image

user posted image
Burlap Pouch Tea Set by Audrey Pettit

Supplies:
Glue Arts Glue Glider Pro+ and High Tac Adhesive
Glue Arts Extreme Adhesive Squares
Glue Arts Micro Extreme Adhesive Squares

Patterned Paper: My Mind's Eye
Text Weight Kraft Paper and Tag: The Kraft Outlet
Stamp: Stampin'Up
Alpha Stickers: LilyBee
Punches: McGill (scalloped circle) and Stampin'Up ( 1 3/8" circle and 1" circle)
Rub-Ons: Jenni Bowlin
Reinforcer Sticker: Tim Holtz
Trim: 7gypsies (seam binding), The Kraft Outlet (hang tag string), and Webster's Pages (lace)
Buttons and Bead: Craft Supply
Ink: Stampin'Up
Doily: Wilton
Burlap: Sewing Supply

Instructions:
1. To get started making your pouch, cut a perfect square in any size from burlap fabric. Cut a second square a 1/2" smaller from text weight kraft paper. My burlap square for this project was 7".

user posted image

2. Stamp a pattern onto the kraft paper using a large background stamp, if desired.
Machine stitch the kraft paper square to the center of the burlap square. This will give the burlap some stability and will keep it from continuing to unravel.

user posted image

3. Place the burlap square on the diagonal in front of you, so that you are looking at a diamond shape. Fold in the left and right corners until they meet in the center. Fold up the bottom corner until it also meets in the center. Hand stitch the points together with a few stitches in the center to create the pouch.

user posted image

4. Cut a 1 1/2" strip of patterned paper to go around the center of the pouch.. You may have to adhere two strips end to end to get enough length to go around. Wrap strip around the pouch and adhere the ends with Extreme Adhesive Squares.

5. Punch several layers of scalloped circles from the text weight kraft paper, and a variety of circles from patterned paper. Adhere the shapes together with Extreme Adhesive Squares. Top flower with a button and a bead threaded with hang tag string. Affix flower to the belly band using Extreme Adhesive Squares.

user posted image

6. Embellish a shipping tag with images cut from patterned paper and rub-ons. Add a sentiment created with small alpha stickers. Affix lace trim across the bottom using the Micro Extreme Adhesive Squares, and add a reinforcer sticker to the top hole. Tie a big bow at the top of the tag and pin the tag to the burlap pouch.

7. Tuck a doily inside the pouch and fill with your favorite small treat.

We at GlueArts want to show our thanks with something special for all the Mom's and more! Now through May 14th take advantage of our PRO+ bundle! Purchase 4 PRO+ refills and one PRO handle! Already have a handle...pass it along to a friend with a cartridge! While shopping don't forget to add to your basket our designers favorite U Cut It Foam and Adhesive Squares too!! 

You have read this article Audrey / Extreme Adhesive Squares / Extreme Adhesives Mini Squares / Glue Gilder Pro / High Tac with the title Audrey. You can bookmark this page URL http://skinnyminny22.blogspot.com/2012/05/treats-for-mom-teachers-more-from.html. Thanks!

Friendship Plaque from GlueArts


"The most I can do for my friend is simply to be his friend. I have no wealth to bestow on him. If he knows that I am happy in loving him, he will want no other reward. Is not friendship divine in this?"

 - Henry David Thoreau

This along with the beautiful quote on Audrey's Pettit both serve as reminders of how fortunate we are to have a friend in the world!

We count all of you...yes YOU are GlueArts fans are our friends and for that today...we're thankful!

And thankful to talented Designers such as Audrey Pettit for sharing this beauty with us!!

user posted image

user posted image

user posted image

Friends Plaque by Audrey Pettit


Supplies:


Nikki Sivils Scrapbooker Messages Collection
Rub-On: It Takes Two
Buttons: Foofala
Paint: Delta
Ink: Clearsnap
Recycled Chipboard
Sanding Block

Recently on a junk hunt, I found this rattan trivet that I thought would make a fun frame. I just measured the opening and cut a piece of raw chipboard to fit the opening. The chipboard sits in there without need of any further adhesive. I love the idea that I can change the image out easily with the seasons.


user posted image

1. Cut a piece of raw chipboard to size. Cover with patterned paper using Glue Arts High Tac Adhesive. Sand the paper lightly all over to create a vintage look. Give the entire board a light wash with white acrylic paint.

*Note: Edge all paper pieces with brown ink.

2. Freehand cut a tree trunk from brown patterned paper. Cut a tree topper in the shape of a puffy cloud form from contrasting patterned paper. Tear two pieces of green paper to create small hills at the bottom of the plaque. Adhere pieces with High Tac Adhesive.


3. Machine stitch along the edge of the grassy hills and around the tree top.


user posted image

4. Cut two more puffy cloud shapes from two different patterned papers and machine stitch the edges. Adhere to the tree top.


5. Cut a circle and small paper strips from yellow patterned paper. Machine stitch around the circle and adhere to the upper left corner. Cut off the overlapping edges. Adhere the paper strips in rays around the sun.


6. Apply a rub on sentiment.

7. Add buttons to the tree branches using Glue Arts Extreme Adhesive Squares.


A special thanks to everyone who stopped by from Nikki Sivils last week! Let's announce the lucky winner of the Lil Monster Kit and GlueArts Adhesives...


 Michelle said...


what a nice way to start my day...with a visit to your blog...and a fast mojo jump start!...i love nikki sivlis paper lines...the colors are always terrific an the prints are just my style!...
add a little glue arts adhesive...and you're ready...set...go...and on your way to being creative!
April 24, 2012 9:11 AM
Congrats to you Michelle! Please email me at Gluegirl@gluearts.com with your info! And speaking of winners...we're still seeking our winner from our 8,000 fan giveaway. Today is the final day to come forward and then we must give another fan a chance to win! So "Suba" if you're out there..please send us a note as well!


Suba said...
Hi!


Part of FB's Fan Fun.
Love the way you've used the Raisens. Can think of a bunch of uses.
Thanks for the chance to win!

April 22, 2012 10:32 PM

Thanks for stopping by today!! We'll see you soon with ideas for Mother's Day and more!
You have read this article Audrey / Extreme Adhesive Squares / Glue Gilder Pro / High Tac / Nikki Sivils with the title Audrey. You can bookmark this page URL http://skinnyminny22.blogspot.com/2012/04/friendship-plaque-from-gluearts.html. Thanks!

From GlueArts To You...Happy Crafting!

Happy Crafting!

 Usually those words bring a smile to the face and a million ideas that run through the mind for the next craft project! We're wrapping up this week with Nikki Sivils and her team and sending out good vibes to everyone for some happy crafting. And when you craft...be sure to chose GlueArts Adhesives so you too can make what Designer Audrey Pettit and Patti Milazzo share with us today!

user posted image

user posted image

user posted image

From Me to You Gift Bag 
GlueArts Designer: Audrey Pettit


Supplies:

Nikki Sivils Messages Collection:
Patterned Papers and Die Cut Sheet
Tag: The Kraft Outlet
Doily Die: Sizzix
Trim: Craft Supply
Buttons: Foofala
Ink: Clearsnap
Recycled Kraft Printed Shopping Bag
Pinking Scissors

Recently, while out shopping, I received a very fun kraft shopping bag with a vintage-ad print, which was way too cool to throw away. Although the bag was a bit too big for an average gift bag, I've saved it and cut it apart to create all new bags, like the one here. It's super easy to make your own bags, and it's earth-friendly and budget-friendly, too.

Instructions:

1. To get started, cut open the kraft shopping bag. Then cut two rectangles from the paper in the desired size of your finished new bag. Cut both pieces to the same width, but allow an extra 1/2" in height on the second piece. For my bag, I cut my two pieces at 6" x 8" and 6" x 8.5".


user posted image

2. Cut the tops of both pieces of printed kraft paper with pinking scissors. Lay the wrong sides of the paper together and then machine stitch down both sides. Fold up the bottom 1/4" of paper, edge with brown ink, and adhere flap using Glue Arts High Tac adhesive.


3. Cut various strips of 12" patterned paper in different widths. Adhere strips together. Add die cut scalloped border. Adhere lace trim to the top and bottom edge using Glue Arts Ribbon Adhesive.

4. Fold finished strip in half and adhere to the center of the bag using High Tac adhesive.

5. Tie inked ribbon around the center of the gift bag.


user posted image

6. Fussy cut a journaling card from patterned paper and adhere to the center of a shipping tag. Die cut a doily from patterned paper and adhere behind the tag. Fussy cut a typewriter from the patterned paper and adhere to the tag with U Cut It Foam adhesive.


7. Embellish with a sentiment strip cut from the paper, Messages die cuts, and matching yellow buttons.


user posted image
Happy Bday Card
GlueArts Designer: Patti Milazzo

Supply List: 
Glue Arts- 
Glue Glider Pro 1/4 Perma Tac Cartridge Refill - Pro
U-Cut-It Adhesive FoamRaise ‘Ns

Nikki Sivils: Noah Collection Kit


Instructions:
Create a 6" square card from kraft and set aside.

Cut a 6" square of blue pattern paper. Also cut a 5" square of kraft cardstock and adhere it to the front of the blue paper using the Glue Glider Pro with Perma Tac Adhesive. Machine stitch around the border of the kraft square twice.

Punch 9 circles from a mix of patterned paper. I used 1" circles around the outside and a 2.5" circle in the center. 


user posted image

Cut pieces of U-Cut-It Foam Adhesive to fit behind the center circle and a few of the smaller circles as well. Apply Raise 'Ns to the remaining circles for just a bit of dimension.

user posted image

Apply letter stickers for the sentiment on the center circle. Use more U-Cut-It Adhesive Foam to add the "Happy" tag and heart die-cut.

user posted image

Add additional tiny die-cuts to the circles by cutting the Raise 'Ns - leave the paper and clear plastic backing on to cut the Raise 'N into 4 small pieces.

Use the Glue Glider Pro again to adhere the embellished card front to the 6" kraft card to complete.


user posted image


We hope you've enjoyed our week with Nikki Sivlis!!


We're giving away this fun My Lil' Monster Kit from Nikki Sivlis...perfect for Father's Day, cute kids, grandkids...you name it...we're sure you'll find just the right things to use it for! 

Simply post a comment and we'll enter you to win this fun collection kit filled with paper, stickers and much more! And to help you with your crafting, we're going to include our Glue Glider PRO Handle (already own one...no problem we'll offer you a second cartridge!) and our PRO+ Perma Tac Cartridge plus we'll tuck in our must have 3D Combo Pac. It's filled with our GlueArts U Cut It Foam (used here today!) along with our Raisen's! Now that's a giveaway!

We'll collect all the comments and pick one random winner next Monday! Please remember to visit the Nikki Sivlis Blog and her talented Doghouse Diva's to see what they've created this week with GlueArts products! Be sure to visit the Nikki Sivils page on Facebook and give them a like!! Let them know GlueArts sent you by! If you would!  

We'd also like to extend a sincere thank you to Nikki and her team for working with us!!
You have read this article Audrey / Extreme Adhesive Squares / Glue Gilder Pro / High Tac / Nikki Sivils / Patti / Pro+ / Ribbon Adhesive / U Cut It Foam with the title Audrey. You can bookmark this page URL http://skinnyminny22.blogspot.com/2012/04/from-gluearts-to-youhappy-crafting.html. Thanks!