

Usually those words bring a smile to the face and a million ideas that run through the mind for the next craft project! We're wrapping up this week with Nikki Sivils and her team and sending out good vibes to everyone for some happy crafting. And when you craft...be sure to chose GlueArts Adhesives so you too can make what Designer Audrey Pettit and Patti Milazzo share with us today!
From Me to You Gift Bag
GlueArts Designer: Audrey Pettit
Supplies:
Nikki Sivils Messages Collection:
Patterned Papers and Die Cut Sheet
Tag: The Kraft Outlet
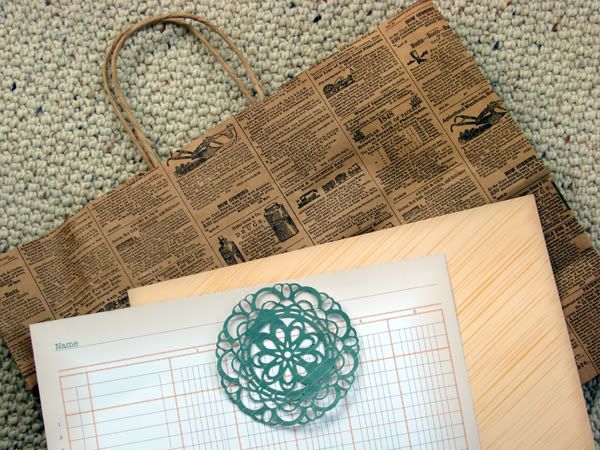
Doily Die: Sizzix
Trim: Craft Supply
Buttons: Foofala
Ink: Clearsnap
Recycled Kraft Printed Shopping Bag
Pinking Scissors
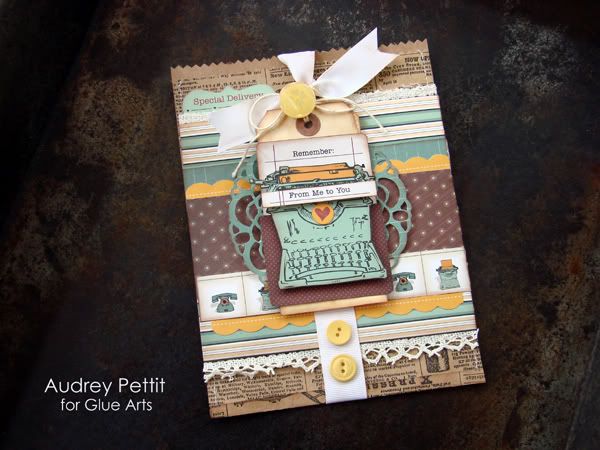
Recently, while out shopping, I received a very fun kraft shopping bag with a vintage-ad print, which was way too cool to throw away. Although the bag was a bit too big for an average gift bag, I've saved it and cut it apart to create all new bags, like the one here. It's super easy to make your own bags, and it's earth-friendly and budget-friendly, too.
Instructions:
1. To get started, cut open the kraft shopping bag. Then cut two rectangles from the paper in the desired size of your finished new bag. Cut both pieces to the same width, but allow an extra 1/2" in height on the second piece. For my bag, I cut my two pieces at 6" x 8" and 6" x 8.5".
2. Cut the tops of both pieces of printed kraft paper with pinking scissors. Lay the wrong sides of the paper together and then machine stitch down both sides. Fold up the bottom 1/4" of paper, edge with brown ink, and adhere flap using Glue Arts High Tac adhesive.
3. Cut various strips of 12" patterned paper in different widths. Adhere strips together. Add die cut scalloped border. Adhere lace trim to the top and bottom edge using Glue Arts Ribbon Adhesive.
4. Fold finished strip in half and adhere to the center of the bag using High Tac adhesive.
5. Tie inked ribbon around the center of the gift bag.
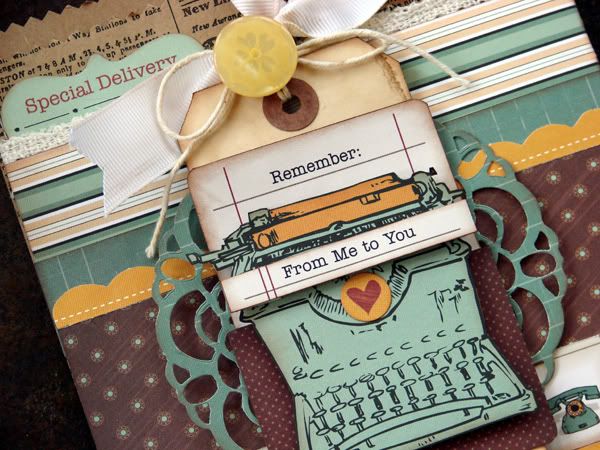
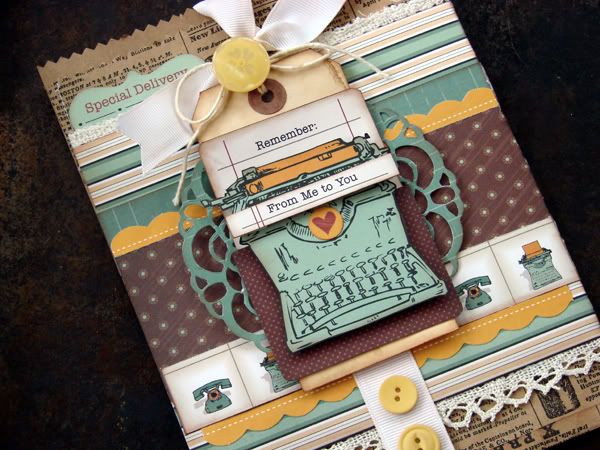
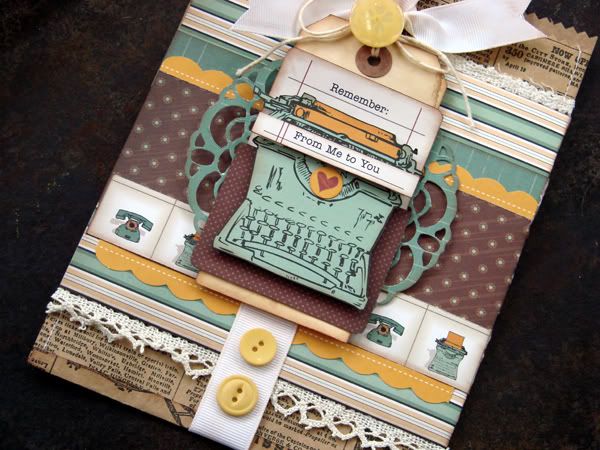
6. Fussy cut a journaling card from patterned paper and adhere to the center of a shipping tag. Die cut a doily from patterned paper and adhere behind the tag. Fussy cut a typewriter from the patterned paper and adhere to the tag with U Cut It Foam adhesive.
7. Embellish with a sentiment strip cut from the paper, Messages die cuts, and matching yellow buttons.
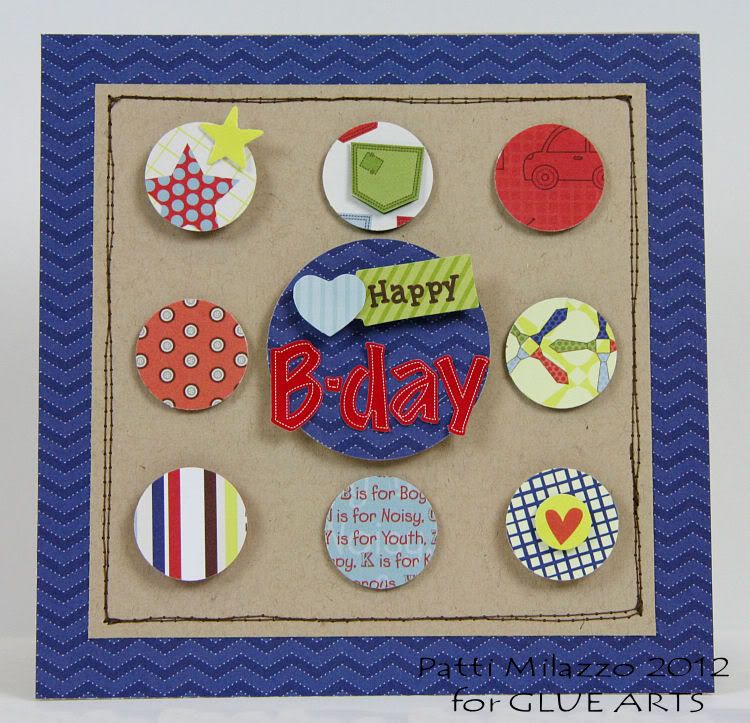
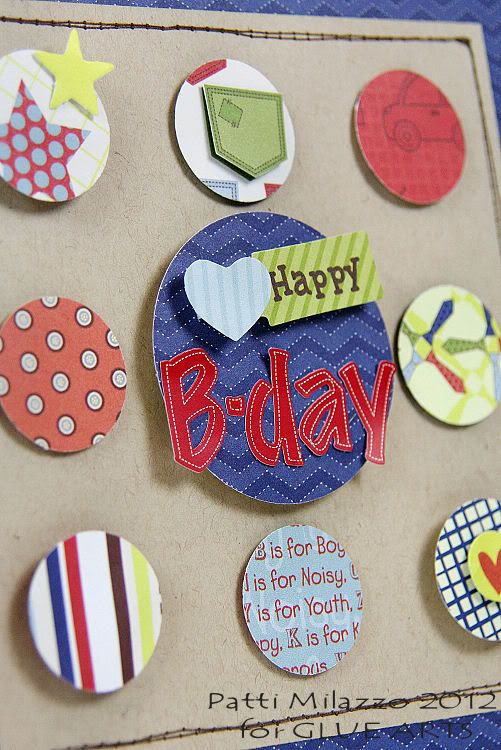
Happy Bday Card
GlueArts Designer: Patti Milazzo
Glue Arts-
Glue Glider Pro 1/4 Perma Tac Cartridge Refill - Pro
U-Cut-It Adhesive FoamRaise ‘Ns
Nikki Sivils: Noah Collection Kit
Instructions:
Create a 6" square card from kraft and set aside.
Cut a 6" square of blue pattern paper. Also cut a 5" square of kraft cardstock and adhere it to the front of the blue paper using the Glue Glider Pro with Perma Tac Adhesive. Machine stitch around the border of the kraft square twice.
Punch 9 circles from a mix of patterned paper. I used 1" circles around the outside and a 2.5" circle in the center.
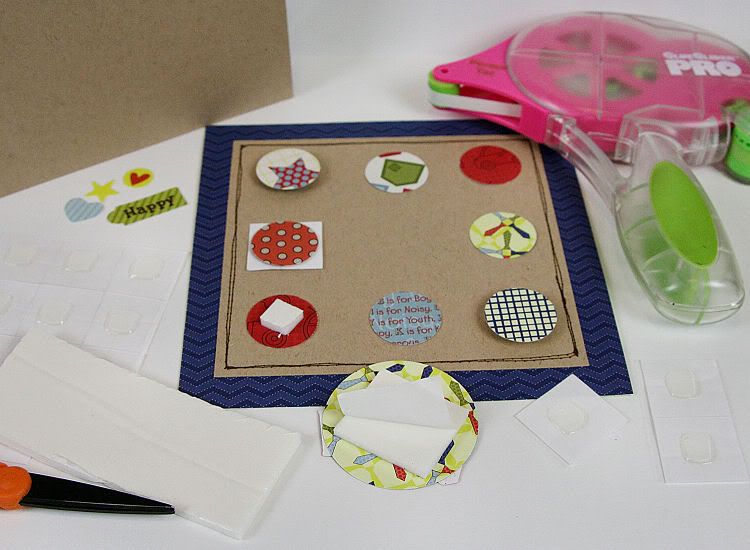
Cut pieces of U-Cut-It Foam Adhesive to fit behind the center circle and a few of the smaller circles as well. Apply Raise 'Ns to the remaining circles for just a bit of dimension.
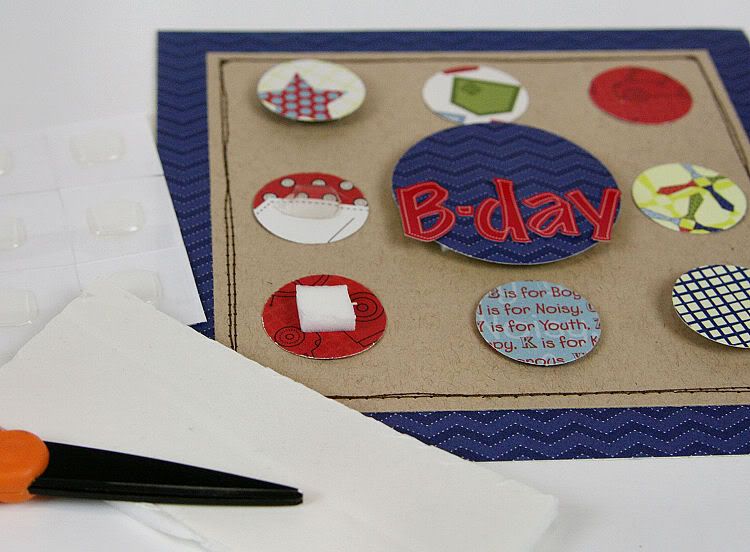
Apply letter stickers for the sentiment on the center circle. Use more U-Cut-It Adhesive Foam to add the "Happy" tag and heart die-cut.
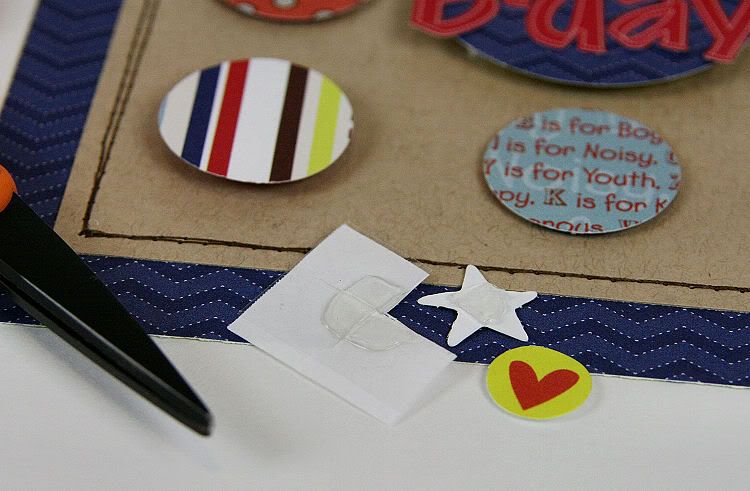
Add additional tiny die-cuts to the circles by cutting the Raise 'Ns - leave the paper and clear plastic backing on to cut the Raise 'N into 4 small pieces.
Use the Glue Glider Pro again to adhere the embellished card front to the 6" kraft card to complete.
We hope you've enjoyed our week with Nikki Sivlis!!
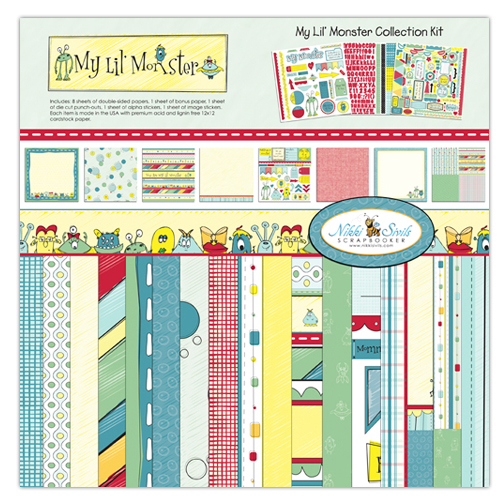
We're giving away this fun My Lil' Monster Kit from Nikki Sivlis...perfect for Father's Day, cute kids, grandkids...you name it...we're sure you'll find just the right things to use it for!
Simply post a comment and we'll enter you to win this fun collection kit filled with paper, stickers and much more! And to help you with your crafting, we're going to include our Glue Glider PRO Handle (already own one...no problem we'll offer you a second cartridge!) and our PRO+ Perma Tac Cartridge plus we'll tuck in our must have 3D Combo Pac. It's filled with our GlueArts U Cut It Foam (used here today!) along with our Raisen's! Now that's a giveaway!

We'll collect all the comments and pick one random winner next Monday! Please remember to visit the Nikki Sivlis Blog and her talented Doghouse Diva's to see what they've created this week with GlueArts products! Be sure to visit the Nikki Sivils page on Facebook and give them a like!! Let them know GlueArts sent you by! If you would!
We'd also like to extend a sincere thank you to Nikki and her team for working with us!!
You have read this article Audrey /
Extreme Adhesive Squares /
Glue Gilder Pro /
High Tac /
Nikki Sivils /
Patti /
Pro+ /
Ribbon Adhesive /
U Cut It Foam
with the title From GlueArts To You...Happy Crafting!. You can bookmark this page URL http://skinnyminny22.blogspot.com/2012/04/from-gluearts-to-youhappy-crafting.html. Thanks!


