Showing posts with label Pink Paislee. Show all posts

My Creative Scrapbook - Recreating Banners

Hi There,

I have a little tutorial to share for recreating the banner as seen on my layout created for My Creative Scrapbook with their Limited Edition June Kit.
Banners or Buntings are not only super sweet but are also super fun to make.  I must confess that they are often a feature of my creations from time to time.
They can be made from your scraps of patterned papers and are a quick and easy way of adding a customized accent to your paper crafting project.

To recreate a banner/bunting as seen on my layout -‘Little Girls have magic all of their own’
Create a curved line – I traced around part of a dessert bowl to create the curve and then draw the triangles along the curved line. 
Then simply cut out around the lines which you have drawn 
The banner was attached with foam dots to add some dimension.  Die Cut elements from the My Creative Scrapbook June Limited Edition Kit were then attached over the top.
Try altering the size of the banner by adjusting the length and curvature of the line.  The size and shape of the ‘flag’ can also be adjusted. 

'She’s a little Princess’
 Instead of a triangle why not try a different shape as I have done here. 


You have read this article GDT / Layout / My Creative Scrapbook / Pink Paislee / Prima Flowers / Tutorials with the title Pink Paislee. You can bookmark this page URL http://skinnyminny22.blogspot.com/2012/07/my-creative-scrapbook-recreating-banners.html. Thanks!

My Creative Scrapbook Reveals

Hello!!

Earlier in the week, I shared some sneak peaks of my creations using the My Creative Scrapbook June Limited Edition Kit.
 This kit ROCKS with Pink Paislee London Market and Prima Flowers.

Here is my first creation from this totally gorgeous kit. 
Little girls have a magic all their own.

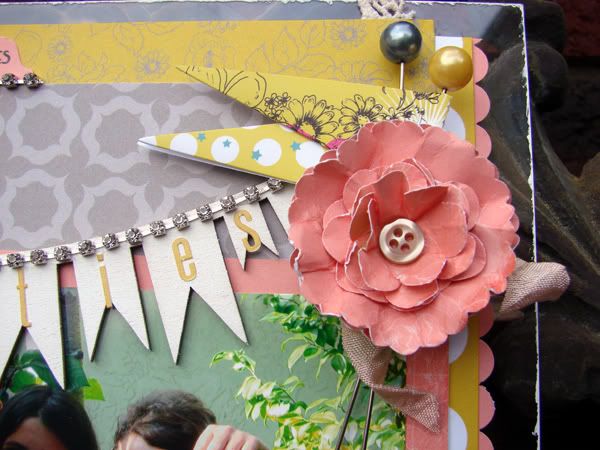
Everything you see is from the MCS June Limited Edition kit - oh except for the title sentiment and I used some white card for this. 
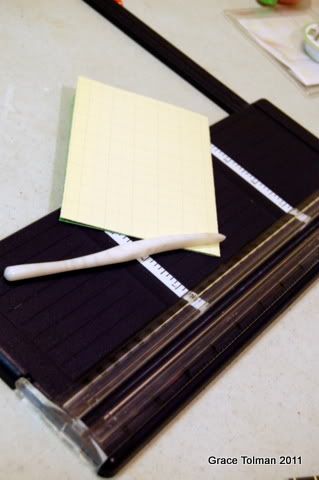
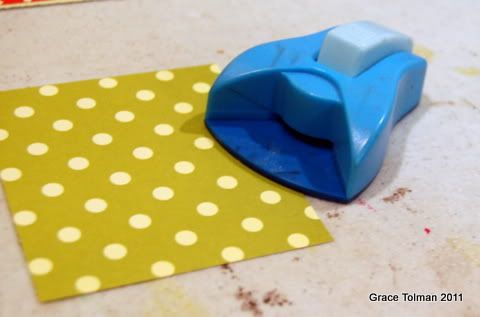
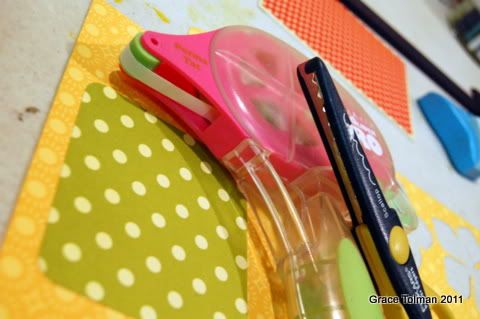
I did get scissor happy with some fussy cutting
 And layered it up with the fussy cut elements, London Market Ephemera, Prima Flowers and ribbon.
The Eiffel Tower and little tag element sitting on the bird cage were cut out from a couple of the tags which are part of the Ephemera pack.
Prima Flower Packaging was used to layer behind the photo.
 How sweet are the London Market Spool Covers? - These are also part of the kit.  I have another project idea for these, but more about this later :) 
***************
My second layout  has the gorgeous Pink Paislee London Market 'Royal Charm' paper for the base.
A larger banner/bunting  was created from patterned paper.

Pink Paislee packaging was also used - some behind the photo and the floral elements that sit on the crown were also cut from the same packaging. 
The larger Prima bloom was altered with Tattered Angels Patina Glimmer Mist to coordinate.

 A London Market Jumbo Number also features along with the crown from the Ephemera pack, a spool cover and  some more Prima Flowers.
***************

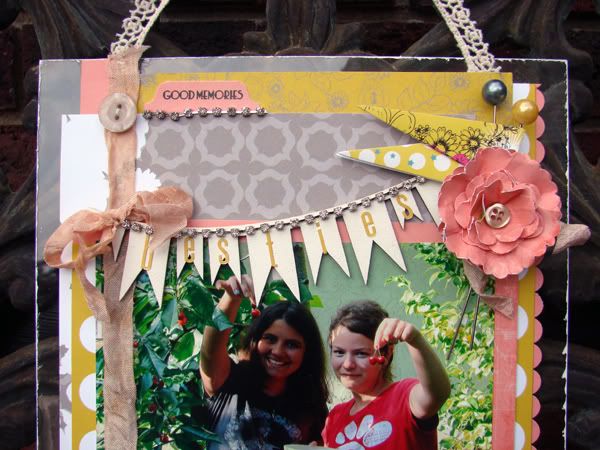
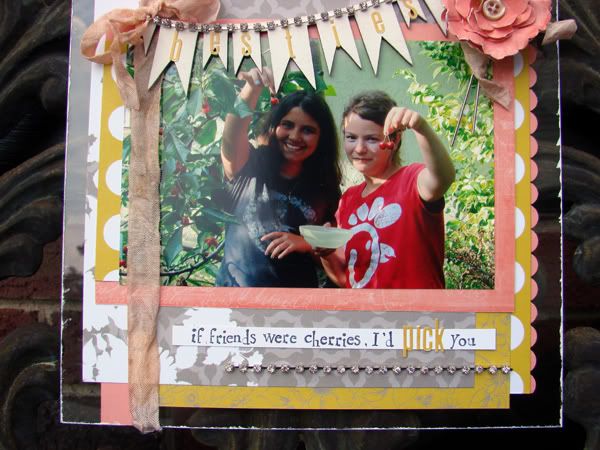
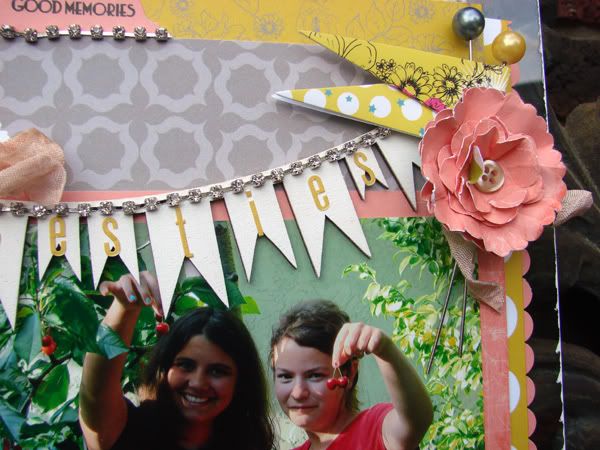
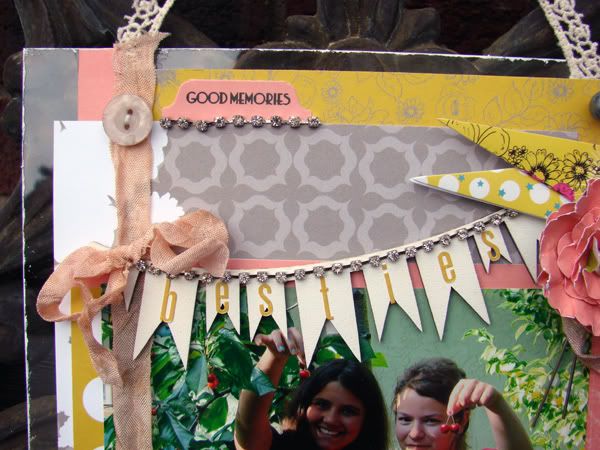
For my following project, I was inspired to create somewhat of a garden theme and wanted it to appear as if Miss E and Missy N were meandering their way through it.
I wonder how many butterflies they found?
Once again I got scissor happy - gosh these patterned papers are perfect for cutting out elements and so pretty.
I used one of the bases from the Twiddleybitz Opening Gates Set as a template to trace around to create the arch that sits behind the photo.  The removed middle insert created the open gate effect - I also removed the centre piece to leave a thin border all the around before attaching.

 The Limited Edition Kit contains gorgeous Prima blooms - here are a few which I have clustered together. 
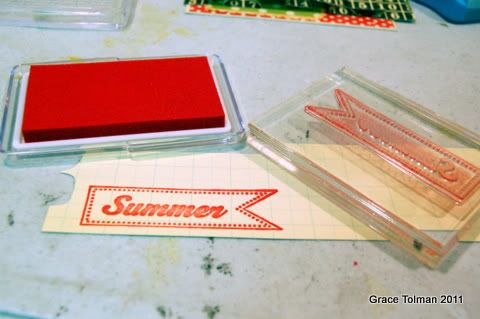
I also incorporated some of the Prima flower packaging    - the sentiment banners were cut out from this.
*******************
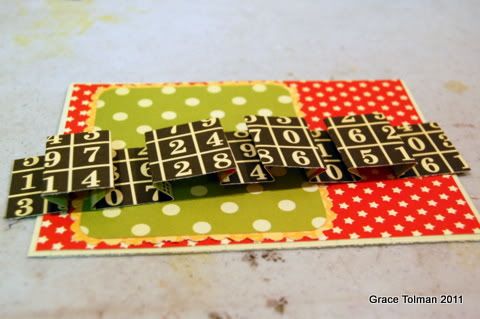
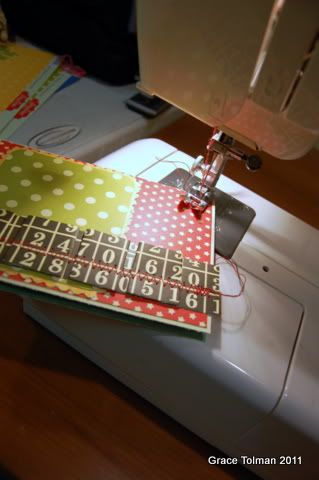
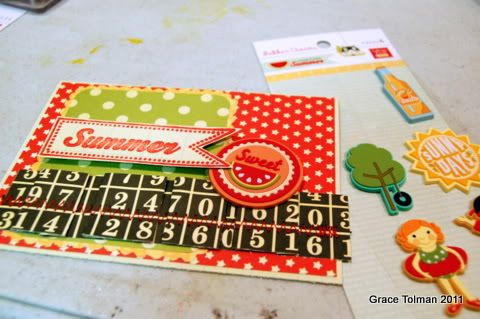
For my final project reveal, this is perhaps a little different to my 'usual thing' but just the same, still had lots of fun putting it together. 
I wanted to make the London Market Jumbo Numbers a feature and have overlapped a number series along one side of the photo.
I again have incorporated some of the Pink Paislee packaging and included travel elements to tie in with the 'world' theme.  
Totally **heart** these gorgeous Prima blooms.  

I loved working with this kit and thank Pam and My Creative Scrapbook for the wonderful opportunity of Guest Designing this month and last.

Before I sign off this post, I must also tell you about the fantastic contest that My Creative Scrapbook are running at the moment.

Feast your eyes on the grand prize

 Head on over to the My Creative Scrapbook Blog HERE for all the details for how you go about entering to win this gorgeous kit.
  
Thanks so much for dropping by,

Hugs,
T  
You have read this article GDT / Layout / My Creative Scrapbook / Pink Paislee / Prima Flowers with the title Pink Paislee. You can bookmark this page URL http://skinnyminny22.blogspot.com/2012/06/my-creative-scrapbook-reveals.html. Thanks!

We've Gone Vintage Vogue with Pink Paislee & GlueArts

Sweet summer sips!

Is it just our family or does yours seem to consume more Popsicles, ice cream, slushies, snowcones and all the other sweet summer treats during these past few weeks?

Our freezer is filled with all sorts of fun treats...and drinks as well!

Designer Lesley Langdon celebrates summer sweet sips with a colorful layout using Pink Paislee's Hometown Summer collection along with our GlueArts adhesives. Time and time again she reaches for our U Cut It Foam which offers the perfect foam dimension and leaves no waste!!

Our very talented Guest Designer, Lynn Ghahary has a new project for you today using the Brand New just released Pink Paislee Vintage Vogue collection that we know you're just going to love! Be sure to visit Lynn's blog for more projects and layouts!! As well as Pink Paislee's website and blog!!


Vintage Vogue Altered Photo Tray
GlueArts Guest Designer: Lynn Ghahary


Supplies:
Pink Paislee Vintage Vogue 6x6 Petite Paper Pack
Pink Paislee Vintage Vogue Chipboard Pops
Pink Paislee Vintage Vogue Paper Rosettes
Pink Paislee Vintage Vogue Brads
Pink Paislee Vintage Vogue Ephemera 
7 Gypsies Photo Tray
Silhouette SD Electronic Die Cutting Machine
Spellbinders Nestabilities
Sizzix Big Shot

Instructions:
I snapped these photos of my brother and his wife along with my adorable little niece Gia this past spring.  As soon as I saw the gorgeous Vintage Vogue collection by Pink Paislee I just knew this collection and these photos would be perfect together!  I decided to create an altered photo tray and plan on giving it to my brother and sister in law as a gift for their home.  

1) To create this altered photo tray I began by cutting 6 different patterned papers from the Vintage Vogue Petite Paper Pack to size (approximately 4" x 6") and adhered them to the photo tray using Glue Arts Glue Glider High Tac Adhesive.  
2) Once I had my background papers adhered I simply began filling in each of the sections with photos, embellishments, and additional papers as needed.  
3) I used the Glue Arts U Cut It Foam Adhesive to pop up my photos as well as many of my embellishments to give my project lots of dimension and detail.  

4) Even though the Vintage Vogue Chipboard Pops come with adhesive I used the Glue Arts Extreme Adhesive Squares to give them extra staying power since this is a project that will be on display and I don't want any little pieces to accidentally fall off and get lost.   


Sweet Summer Sips
GlueArts Designer: Lelsey Langdon


Supplies:
Glue Arts U Cut It Foam
Glue Arts Glue Glider Pro (Perma Tac Adhesive)

Pink Paislee Collage Press Hometown Summer Collection (Impressions, Baubles, Rubber Charms, Patterned Papers)
Spellbinders Die Templates (Creative Pages, Donna's Alphabets)
Cereal Box Board
Spellbinders Grand Calibur Die Cut Machine
Clearsnap Ink
Watercolor Paper
Bazzill Cardstock (White Textured)

Instructions:
1. Die cut Creative Pages our of Pink Paislee's Hometown Summer patterned paper. Ink edges and layer on top on each other on layout using Glue Arts Glue Glider Pro.


user posted image

2. Adhere photo.

user posted image


user posted image


3. Ink stamps and stamp onto thick watercolor paper, trim and adhere to layout with Glue Arts Perma Tac adhesive and Glue Arts U Cut It foam. Add journaling to the bubble cloud.


user posted image


4. To make your own chipboard alphas, die cut letters with cereal box board, then again with patterned paper, adhere together with Glue Arts Perma Tac adhesive. Draw line around each letter and ink edges and paper with yellow and brown.
user posted image
5. Adhere letters to layout using both Glue Arts U Cut It foam for 2 letters and Glue Arts Perma Tac adhesive for the other 2.

user posted image

6. Adhere Pink Paislee embellishments (Baubles and Rubber Charms).


We hope you've enjoyed the past two weeks filled with projects using Pink Paislee's Hometown Summer collection and their Soiree collection! We would like to send a special note of thanks out to Rebecca and Pink Paislee for their generosity and to our Guest Designer, Lynn Ghahary for sharing her beautiful projects with us! (and you!) 

To wrap up this final week we would like to ask you to leave us a comment! 


We'll enter you to win the beautiful Pink Paislee Soiree paper collection along with our must have Glue Glider Pro, 

our GlueArts Ribbon Adhesive and our must try...must use...Extreme Adhesive Squares! (you're going to love them!)  

Be sure to visit our GlueArts Facebook page...we have lots of fun things planned for the weekend as we're hoping to celebrate our 6,000th fan! Don't miss out on the fun!
You have read this article Glue Arts Glue Gun / Lesley / Pink Paislee with the title Pink Paislee. You can bookmark this page URL http://skinnyminny22.blogspot.com/2011/07/we-gone-vintage-vogue-with-pink-paislee.html. Thanks!

Slip n' Slide With GlueArts and Pink Paislee

Summer fun and the living is easy!

Summer is the perfect time for outdoor fun. Although many of us are battling heat warnings that make being outdoors a bit too much!

So if you're inside to cool off from the heat...here are some fun ways you can use GlueArts Adhesives and Pink Paislee's Hometown Summer collection to capture those memories and moments from your HOT summer!


Sweet Summer Card
GlueArts Designer: Grace Tolman


Supplies:
Glue Arts Perma Tac
Glue Arts U Cut it Foam
Glue Arts Raisen’s
Pattern papers, stamp and stickers- Hometown Summer, Pink Paislee
Scallop scissors- Fiskars
Thread – Walmart
Sewing Machine- Kenmore
Corner rounder- Marvy Uchida
Circle punch- EK Success

Instructions:
1. Gather your supplies
user posted image

2. Make the card base that is sized 4 x 5 ½” from grid pattern paper. Cut a piece from red star paper that is 1/8” smaller than the card base and adhere to the card.
user posted image

3. Cut a piece from green dot paper that is 3 x 3 ½” and round the corners.
user posted image

4. Adhere the green paper onto the yellow paper with GlueArts Perma Tac adhesive and trim the edges with a scallop scissor. Adhere to the left side of the card.
user posted image

5. Stamp the summer banner image onto the grid paper and trim.
user posted image

6. Create pleats with a strip of the number paper. Machine stitch it onto the bottom of the card.
user posted image

user posted image


7. Add the stamped summer image, using foam adhesive to the card. Also adhere the rubber sticker onto the card.
user posted image

8. Punch out a circle from pattern paper, add Raisen’s adhesive on the back of the circle and adhere to the card.
user posted image

9. Layer a star bubble sticker onto the circle.
user posted image


Besties Hanging 
GlueArts Designer: Audrey Pettit

Glue Arts Supplies:
Glue Glider Pro with Perma Squares Adhesive
Extreme Adhesive Squares
Micro Extreme Adhesive Squares
U Cut It Foam Adhesive

Pink Paislee Supplies:
Soiree Collection: Patterned Papers, Flags & Banner Stickers, Designer Pins, Wooden Shapes & 12" Rhinestone Chain

ClearScraps 12"x12" Clear Acrylic Sheet

Cut an 8x10 piece of clear acrylic sheet. Embellish with layers of patterned papers, a wooden banner, designer pins and flags, ribbons, bows, a handmade flower, and rhinestone chain. Add tiny alpha stickers for the title work, journaling strips, and a lace handle. Enjoy!

user posted image

user posted image

user posted image

user posted image

user posted image


Slip n' Slide Layout
GlueArts Guest Designer: Lynn Ghahary

Supplies:

Pink Paislee Hometown Summer Collection 
Pink Paislee Hometown Summer Baubles 


We would like to invite you to post a comment today for a chance to win products from the beautiful Pink Paislee Soiree collection! We're also going to tuck in our Glue Glider Pro

Ribbon Adhesive and our Extreme Adhesive Squares. Simply post a comment each day this week and we'll select another random winner next Monday!
Please join us tomorrow for more ideas and inspiration from our Guest Designer Lynn Ghahary and our Glue Girls!!! Please be sure to visit the Pink Paislee blog for endless ideas and inspiration where our Guest Designer, Lynn Ghahary can be found with more projects! 


You have read this article Audrey / Extreme Adhesive / Extreme Adhesives Mini Squares / Glue Gilder Pro / Grace / Guest Designer / Perma Tac / Pink Paislee / Raisen's / U Cut It Foam with the title Pink Paislee. You can bookmark this page URL http://skinnyminny22.blogspot.com/2011/07/slip-n-slide-with-gluearts-and-pink.html. Thanks!