Once Upon A...Sketch August 1 Challenge is LIVE

Howdy!

The August 1 challenge is now LIVE on the Once Upon A...Sketch Blog.

Once again, Nadia Cannizzo has designed a super sketch

The challenge is to combine the sketch as follows
with the following journalling criteria which is

Finish this line "A PERFECT DAY IS....." .

Your journalling has to be at least2 lines long, and with the theme of a whatever a perfect day for you is or a perfect day that you have had already e.g. a birthday, a holiday, a childhood memory, a wedding day, graduation day etc. Your journalling can be ANY type : handwritten, typed, etc...

Make sure you check out the fantastic challenge interpretations from the Design Team and Guest Designers. There are also some fantastic prizes available from the sponsors which are Tidbitz in Time and Pretty Paper Petals. Check out the creations and prize details HERE


You have read this article Once Upon A...Sketch with the title . You can bookmark this page URL http://skinnyminny22.blogspot.com/2011/08/once-upon-asketch-august-1-challenge-is.html. Thanks!

GlueArts U Cut It Foam Shakes It Up!

Shake it up!

Come on shake it up!

How many of you have ever made a shaker card or shaker element?

Designer Patti Milazzo has brought shakers back to the spotlight with her fun, fishy shaker card. GlueArts U Cut It Foam makes it a snap to create this dimensional card. Create a larger shaker with our 8 1/2 by 11 U Cut It Foam sheet for a fun room decoration, school lockers...the possibilities are endless!


Supplies: 
Glue Arts:
U-Cut-It Adhesive Foam (large sheet)
Glue Glider Pro with 1/4 Perma Tac Cartridge Refill - Pro
Mini Adhesive Squares
Adhesive Squares

Other:
Echo Park:
Splash Pattern Papers – Big Waves, Borders (fish), Whales, Fish, and Diagonal Stripes
Splash Element Stickers
Splash Alpha Stickers

Instructions:
1. To create the circle shakers as I have here, start by cutting rings out of a large sheet of Glue Arts U-Cut-It Adhesive Foam. You can use a die cutting machine or other tools to do this. I used a circle template and circle cutting tool along with a craft knife to cut through the foam. The foam is VERY easy to cut through. I cut 3 rings – 1.5” opening, 2” opening and 2.5” opening.

user posted image

Tip: To decrease waste, but the circles concentrically if possible. I started with my smallest ring and cut the opening first. Then I cut around that to complete the ring. I continued in the fashion until I had 3 rings that I’d already determined would fit on my 5.5” x 7.5” card.

2. Next, cut and prepare what you’ll need to make each individual shaker. I wanted my shakers to be a bit sturdier and with a different background pattern paper so I made them each separately rather than attaching them directly to the card. For this, you need 4 pieces – the foam ring; a background circle the same diameter as the ring; a clear acetate circle also the same diameter as the foam ring; and a pattern paper ring that has the same opening diameter as the foam ring. For this outer paper ring, I cut it a bit larger and trimmed it with scallop edge scissors. The larger size allowed for a little overlap to cover up the foam a bit.

user posted image

3. I used a blue marker to lightly color the inner and outer sides of the foam ring. This helped blend the foam with pattern paper.

user posted image

4. Prepare the pieces to be placed inside each shaker. I used a combination of stickers and cut out paper shapes for accents. For some of these pieces, I cut the U-Cut-It Adhesive Foam in half so that these pieces would not sit as high inside the shaker. I attached this cut foam to the back of a fish sticker shape with a Mini Adhesive Square on the cut side. I left on the peel away backing and brushed a bit of baby powder onto the back of the sticker to remove the stickiness – this keeps other items inside the shaker from sticking to it.

user posted image

5. Partially assemble the shaker. Remove the peel away backing from one side of the foam ring. Attach the background circle to the ring and press firmly. Apply the foam backed stickers/paper shapes inside the shaker and press to secure. Brush the inside of the shaker with a bit of baby powder to remove any stickiness inside the shaker. Also, gently rub a dryer sheet over the inside surface a bit. This will cut down on any static inside the shaker. Now add any loose items inside the shaker – more stickers (powder the back), small seed beads, etc.

user posted image

6. Next, carefully peel away the paper backing on the top of the ring and apply the acetate circle to seal the shaker. Use Mini Adhesive Squares around the edge of the acetate to attach the paper scalloped circle ring. Repeat this to create each circle shaker accent.
7. For the card, create a 5.5” x 7.5” card from white cardstock. Then cut the wave pattern paper a bit taller than the card, cutting out the wave shape at the top if possible. Adhere this to the card with the Glue Glider Pro with Perma Tac Adhesive. Cut a curvy strip of tan paper for the sand at the bottom and adhere that to the card again using the Perma Tac Adhesive. Add some U-Cut-It Adhesive Foam to the back of the cute little crab sticker and attach him to the bottom left of the card along with a couple of foam backed bubble stickers.

user posted image

8. Use Adhesive Squares on the back of each circle shaker accent to secure them to the front of the card, as shown.

user posted image

9. Pop up alpha stickers with a small strip of U-Cut-It Adhesive Foam (or directly to the card front) for the greeting to complete the card.

user posted image

10. Now give it a shake!

user posted image


We invite you to post a comment today! Let us know have you made any shaker cards or elements? How will you use our U Cut It Foam?


We'll enter you to win our 3D Combo Pack filled with our 4 by 4 sheets of our U Cut It Foam along with our Raisen's (that we know you'll love too!) plus we'll include our full 8 1/2 by 11 sheet of our U Cut It Foam...


perfect for running through your Sizzix, Spellbinders, Cuttlebug and other die cut systems. And last we would like you to try out our Extreme Adhesive Squares. We'll pick a random winner next Monday to enjoy the goodies!

Thanks for stopping by the GlueArts blog!

You have read this article Adhesive Squares / Mini Adhesive Squares / U Cut It Foam with the title . You can bookmark this page URL http://skinnyminny22.blogspot.com/2011/08/gluearts-u-cut-it-foam-shakes-it-up.html. Thanks!

GlueArts U Cut It Foam For Dimension


"A new baby is like the beginning of all things, hope, a dream of possibilities."


"Every child born into the world is a new thought of God, an ever fresh and radiant possibility."


Possibilities! GlueArts offers possibilities to you by giving you new options and ways to use our adhesive products.


One of our favorite products is our GlueArts U Cut It Foam. Our foam is simply amazing. (it is!) You can cut it, diecut it, glitter it, bead it...the skies the limit! Today Designer Ania Lexander has a sweet new baby card that comes together beautifully with our GlueArts Glue Glider Pro and of course...our U Cut It Foam!


Baby Jonas Card
GlueArts Designer: Ania Lexander 


Glue Arts supplies:
Hot Glue Gun
U Cut It Foam Adhesives
Raisen's
Glue Glider Pro - PermaTac

Other:
Pink Paislee
Martha Stewart punches
Crate Paper letters
Hambly Screenprint transparency
Kort & Godt flowers
Maya Road trinkets


user posted image
I'd like to share my favorite trick with the U Cut It Foam - it makes it so much easier to line up letters shaped like a block.

user posted image

Line up your letters on the edge of a ruler to measure how much adhesive you need. Cut the U Cut It foam slightly shorter than your sentiment/word.

user posted image

Adhere the letters to the foam. The foam also makes it easier to pin pins onto it.

user posted image
Adhere U Cut It Foam to the mat of your card - don't forget the middle. Then assemble.


GlueArts 

U Cut It Foam Adhesive comes in two convenient sizes perfect for all your crafting needs!
Our 4 by 4 U Cut It Foam size is just right for all your cards, embellishments and more! Our new larger 8 1/2 by 11 size offers you the freedom to run the foam through your personal die cut systems for beautiful, unique pieces.

We'd like you to be able to try our U Cut It Foam along with our 3D Raisen's and more! 


We'll enter you to win our 3D Combo Pack filled with our 4 by 4 sheets of our U Cut It Foam along with our Raisen's (that we know you'll love too!) plus we'll include our full 8 1/2 by 11 sheet of our U Cut It Foam...


perfect for running through your Sizzix, Spellbinders, Cuttlebug and other die cut systems. And last we would like you to try out our Extreme Adhesive Squares. We'll pick a random winner next Monday to enjoy the goodies!

You have read this article Ania / U Cut It Foam with the title . You can bookmark this page URL http://skinnyminny22.blogspot.com/2011/08/gluearts-u-cut-it-foam-for-dimension.html. Thanks!

GlueArts U Cut It Foam For Beautiful Cards!


All week long we'll be sharing ideas and projects with you using our GlueArts U Cut It Foam!

GlueArts foam has quickly become a favorite amongst our Glue Girls for many reasons...one is clearly shown today.

Designer Lesley Langdon shows just how easily you can run the U Cut It Foam through your die cut system and then yes....micro bead it to make a unique and beautiful card.


Forgiveness 5x7 Card
GlueArts Designer: Lesley Langdon


Designer Tip: I love Glue Arts U Cut It foam for all of its possibilities. I especially appreciate the larger 8.5x11 sheets that I can use to cut different shapes in my die cut machine. It can be inked, colored, glittered, or painted. Think about all the shapes it can be cut into, with scissors and die cut machines. It gives you immediate dimension with an adhesive on the back! For this project, I used a die template and two different glitters and Glossy Accents to make a dimensional bird cage.

Supplies:
Glue Arts U Cut It Foam
Glue Arts Glue Glider MAX (Perma Tac Adhesive)
Spellbinders Die Template (Bird Sanctuary)
Spellbinders Grand Calibur Die Cut Machine
Doodlebug Designs Beetle Black Glitter
Art Glitter Institute Marine Glitter
Ranger Glossy Accents
Bo Bunny Patterned Paper (Gabrielle)
Clearsnap Ink (Blue Lagoon)
Ranger Distress Inks (Tattered Rose, Victorian Velvet)
Memories Black Ink by Stewart Superior
Unity Stamp Co. (Love Never Fails - sentiment, Carte Postale - bird, Advent - sentiment)
Singer Sewing Machine
White Cardstock


Instructions:
user posted image


user posted image
1. To make bird cage, die cut Glue Arts U Cut It Foam using Bird Sanctuary or similar die template. Run it through the die cut machine 2 times, and then once with a paper on top to make sure it cuts through.

user posted image
2. Poke the excess pieces through and save for future projects (there are no scraps with U Cut It Foam - all pieces can be used).

user posted image

user posted image
3. Peel off one side of the bird cage and apply black glitter. Shake off excess. The larger the glitter, the more space you will have left, so next, apply a finer glitter on top of the black glitter. Use a scrap piece of paper to put over top and press firmly to ensure all the glitter is adhere to the adhesive.

user posted image
4. Shake off excess glitter and then apply a coat of Glossy Accents. To have a little variation of color on the cage, apply fine glitter on top of the Glossy Accents on the TOP OF THE CAGE ONLY. Let dry.

user posted image
5. To make card, cut 5x7 piece of patterned paper, ink edges and stamp sentiments (love never fails, forgiveness) and bird image. Add some stitching to the one side.

6. Adhere the glittered and glossed U Cut It bird cage.
user posted image
7. Mount onto white cardstock.


How would you use our U Cut It Foam? What kind of project do you have in mind? 


Simply post a comment here on our blog and we'll enter you to win our 3D Combo Pack filled with our 4 by 4 sheets of our U Cut It Foam along with our Raisen's (that we know you'll love too!) plus we'll include our full 8 1/2 by 11 sheet of our U Cut It Foam...perfect for running through your Sizzix and other die cut systems. And last we would like you to try out our Extreme Adhesive Squares. We'll pick one random winner next Monday to enjoy the goodies!


You have read this article Glue Glider Max / Lesley / Perma Tac / U Cut It Foam with the title . You can bookmark this page URL http://skinnyminny22.blogspot.com/2011/08/gluearts-u-cut-it-foam-for-beautiful.html. Thanks!

GlueArts U Cut It Foam


GlueArts is well known for our Glue Glider Pro and interchangeable cartridge system.

What you may not know are the other products that we are equally proud of and well...think are outstanding!

GlueArts introduced one of my personal favorites and now a designer favorite...
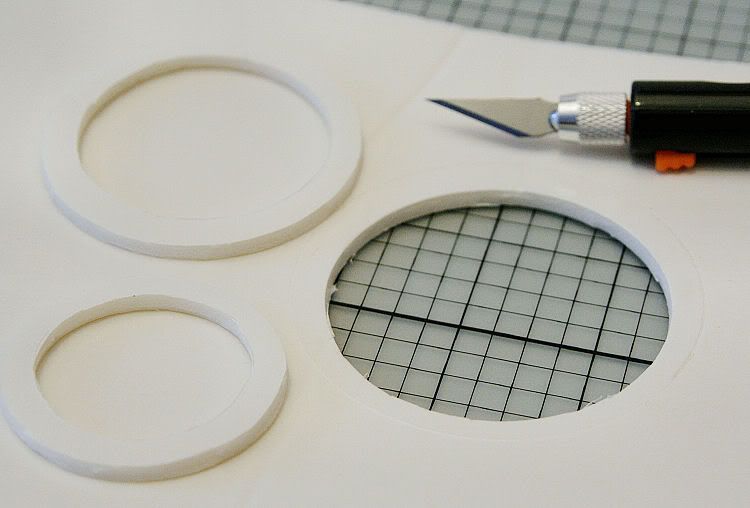
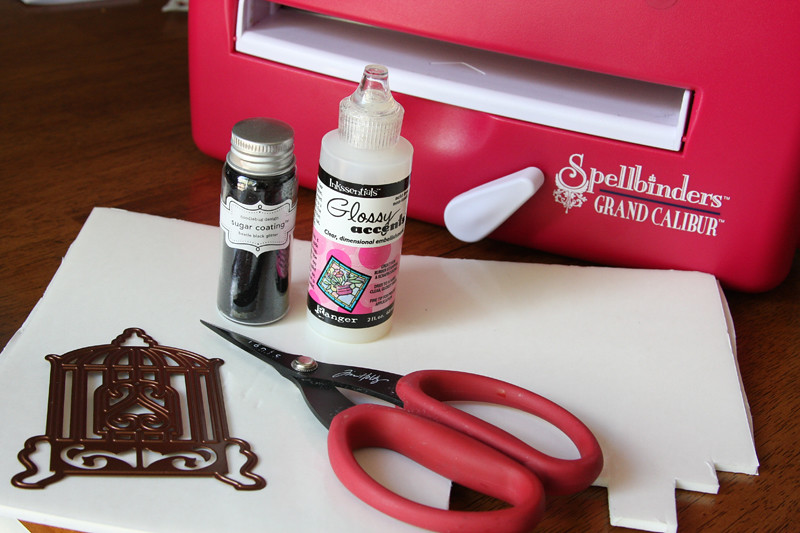
U Cut It Foam!

What makes it special?

GlueArts U Cut It Foam is a full sheet of foam adhesive blanks. This means zero waste! And even better...you can cut it to fit your exact project needs. Our U Cut It Foam is also the perfect height...measuring 1/8" thick. Simply cut the size you need, peel off the bottom liner, press into place and then remove the top liner. It's just that simple and that good!!

Today 
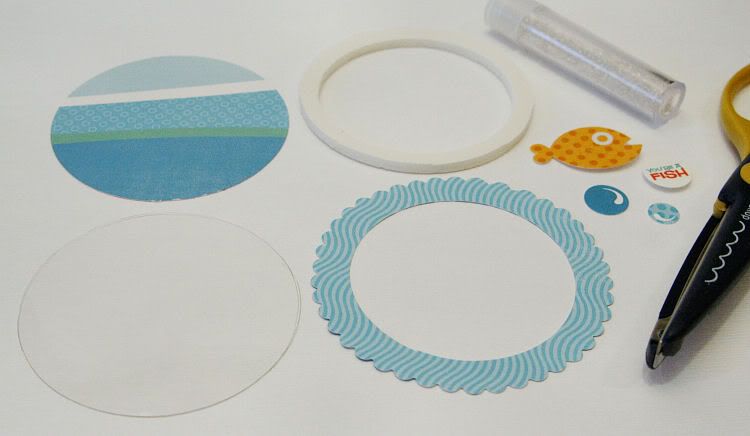
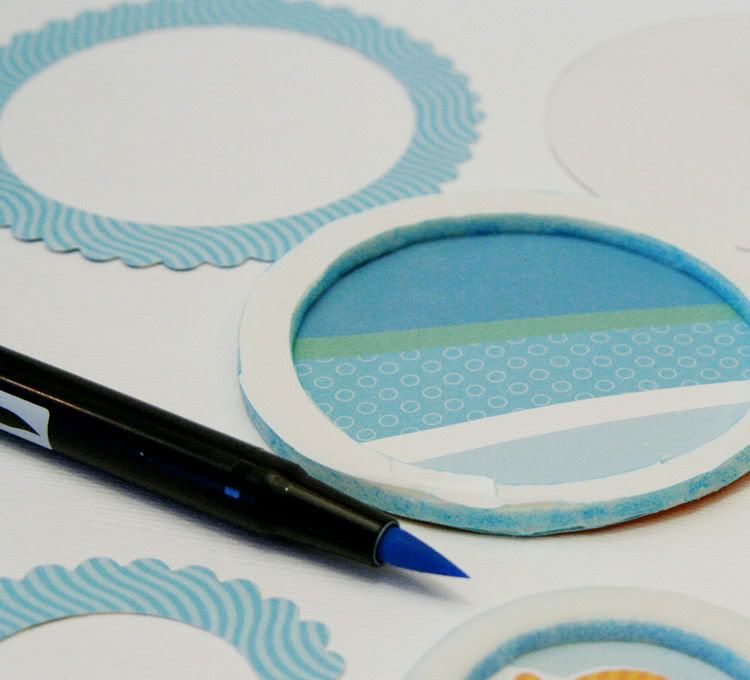
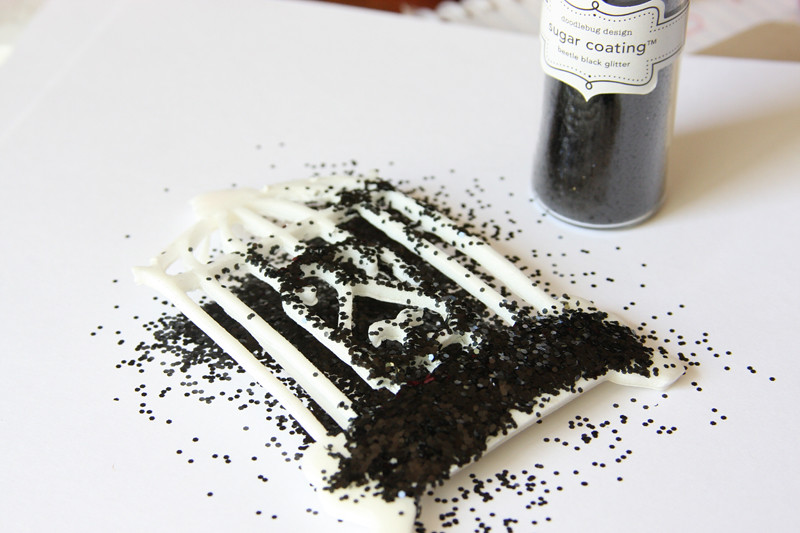
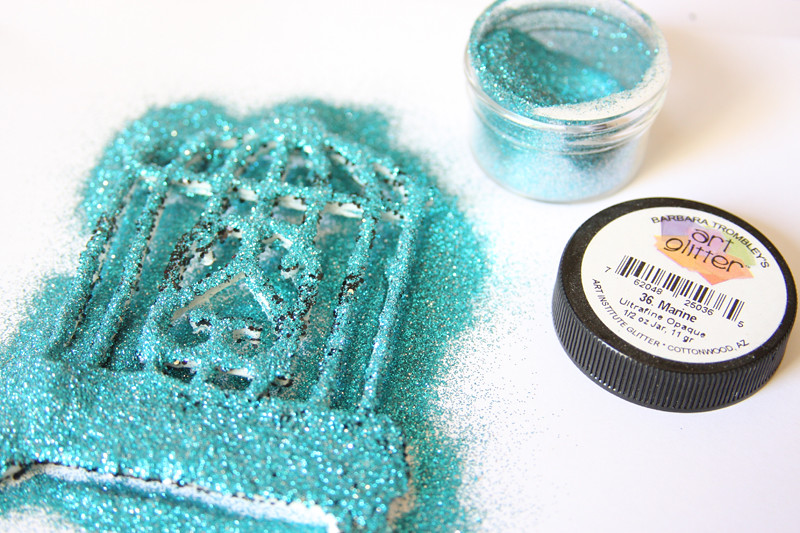
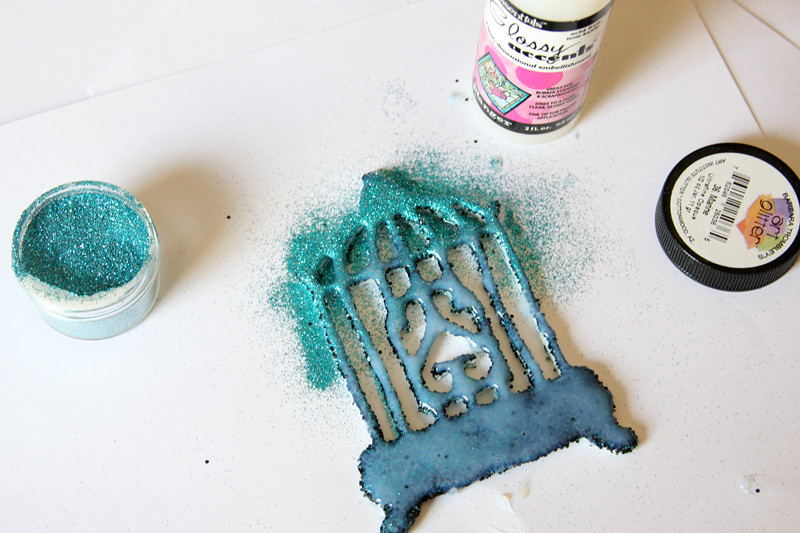
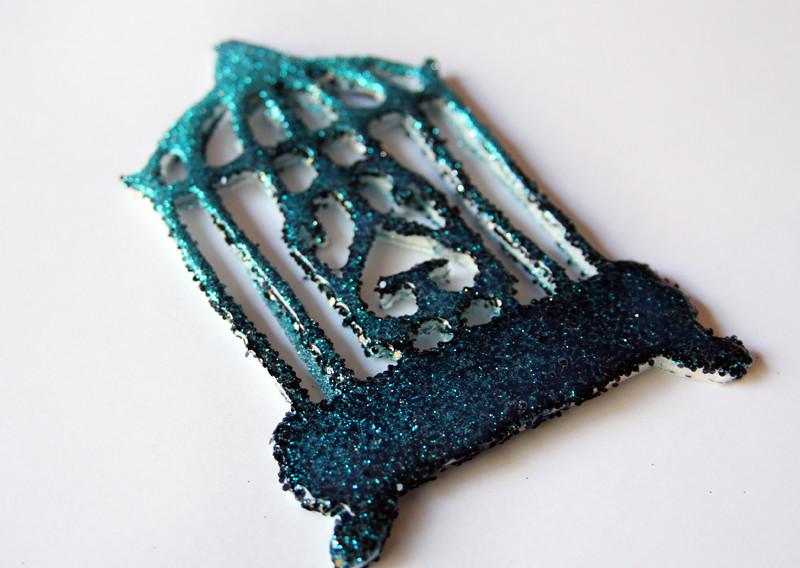
Designer Kristen Swain has a beautiful Thank You card that comes to life with the added height of our U Cut It Foam! And look how she glittered the foam! Yes...glittered the foam!


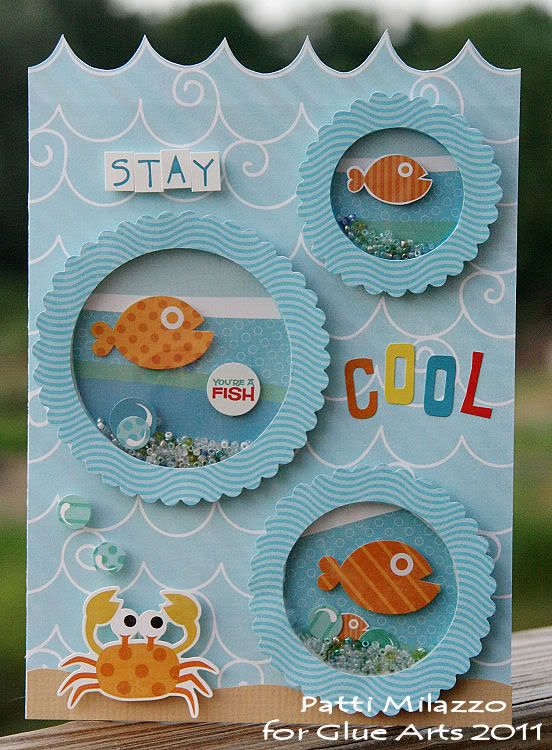
GlueArts Glue Glider Pro and Perma Tac
crinkled ribbon- www.scrapinkris.etsy.com
Paper/stickers/brad- My Mind's Eye
Flower- craft supply
Pearls- Kaisercraft
Glitter- craft supply
Journal spot- Maya Road
Punch- Eksuccess

Instructions:

user posted image

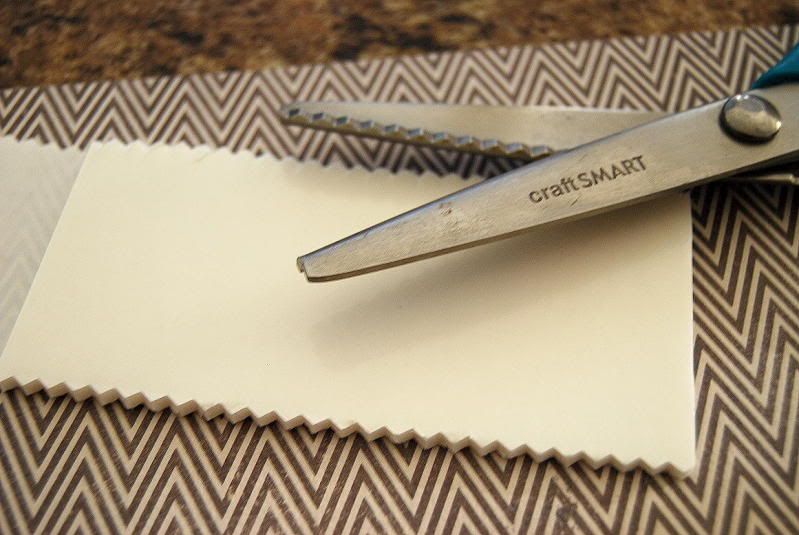
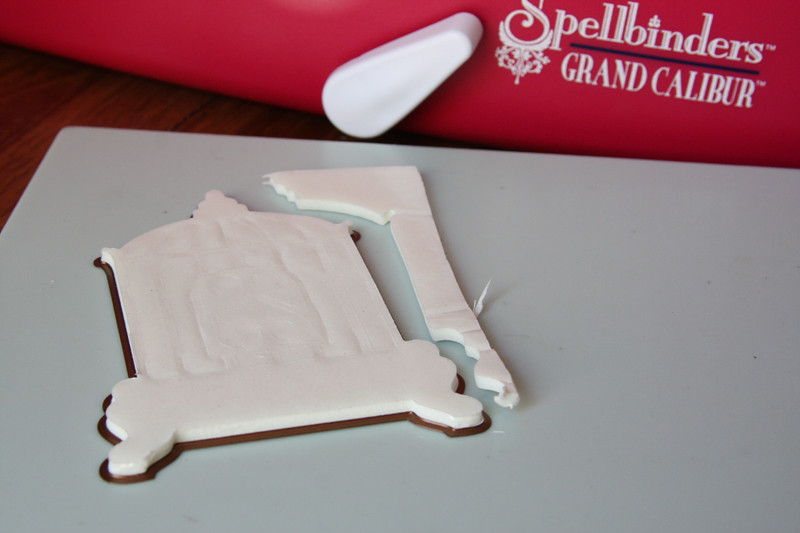
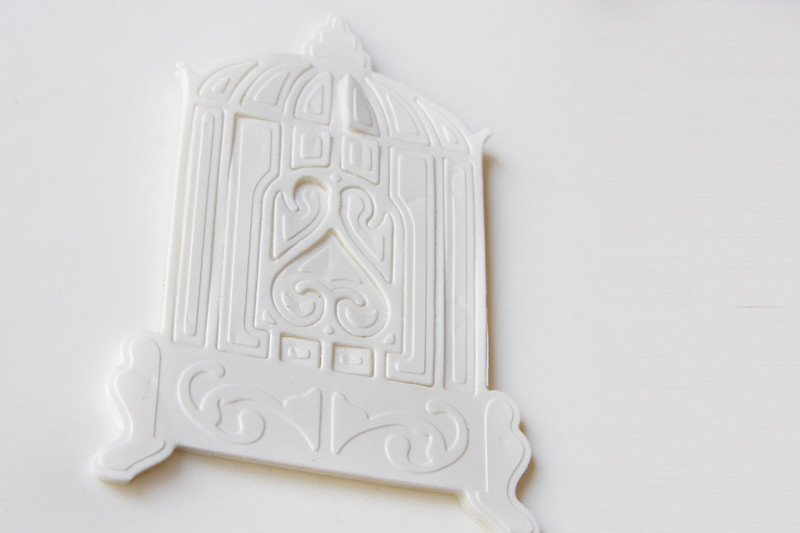
1. Cut strip of UCutIt foam with pinking sheers to size of card.

user posted image

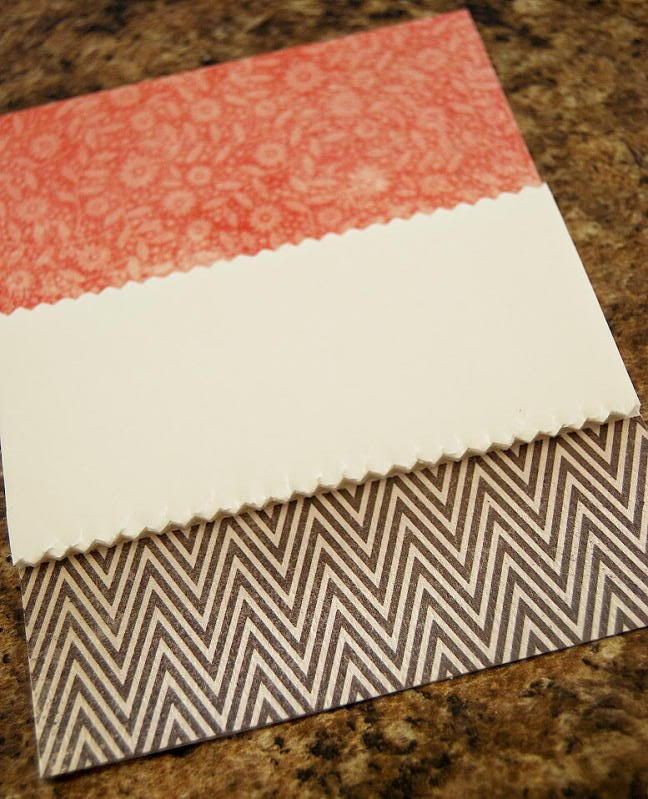
2. Cut and add strips to card, adding larger strip to top of card, and smaller to bottom of card, adding punched strips to top and bottom of UCutIt. Adhere strip of UCutIt foam to card.

user posted image

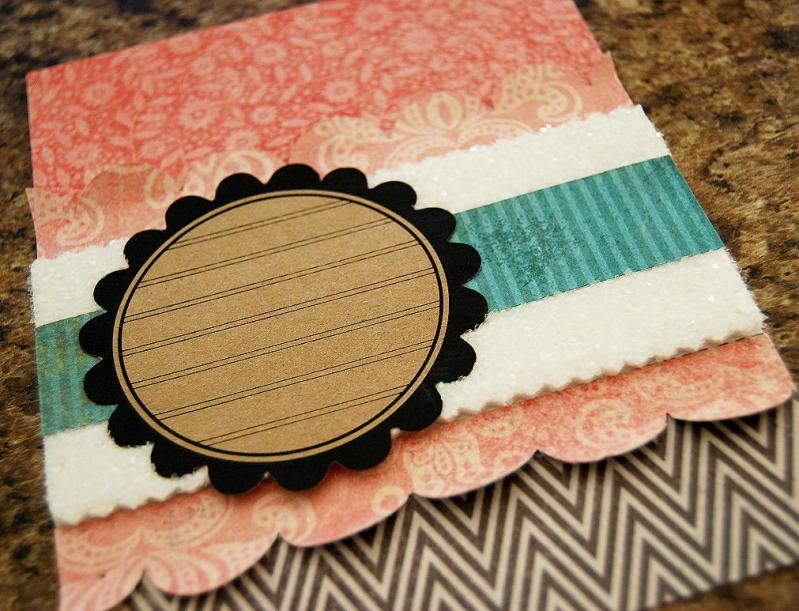
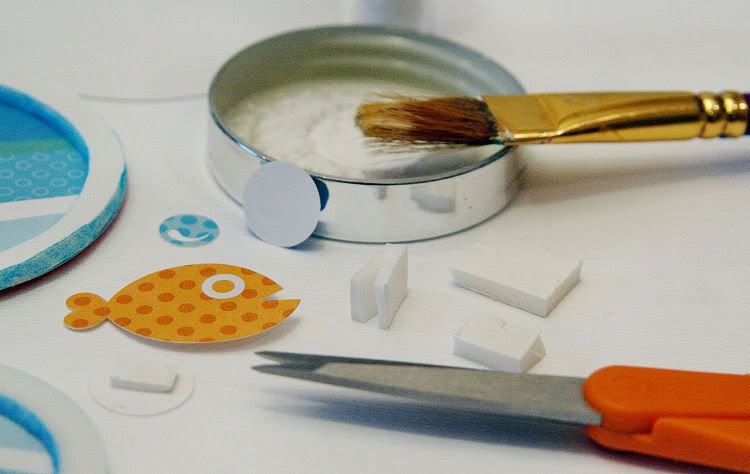
3. Remove sticker backing from UCutIt foam, then adhere strip of paper across foam, then adhere journal spot on foam. Sprinkle glitter across top of foam, pressing glitter into foam adhesive.

user posted image

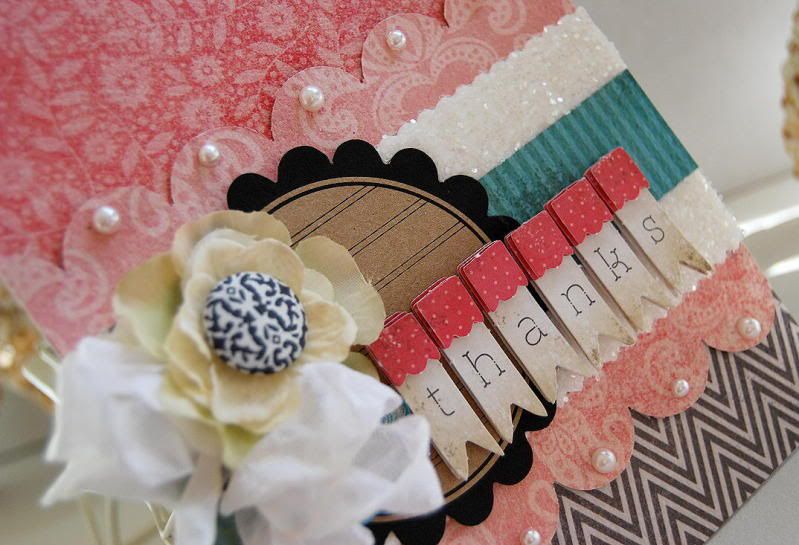
4. Decorate card with Crinkled Ribbon bow, flower with brad center, small brad and cut out flower, and Thanks banner sticker.

user posted image

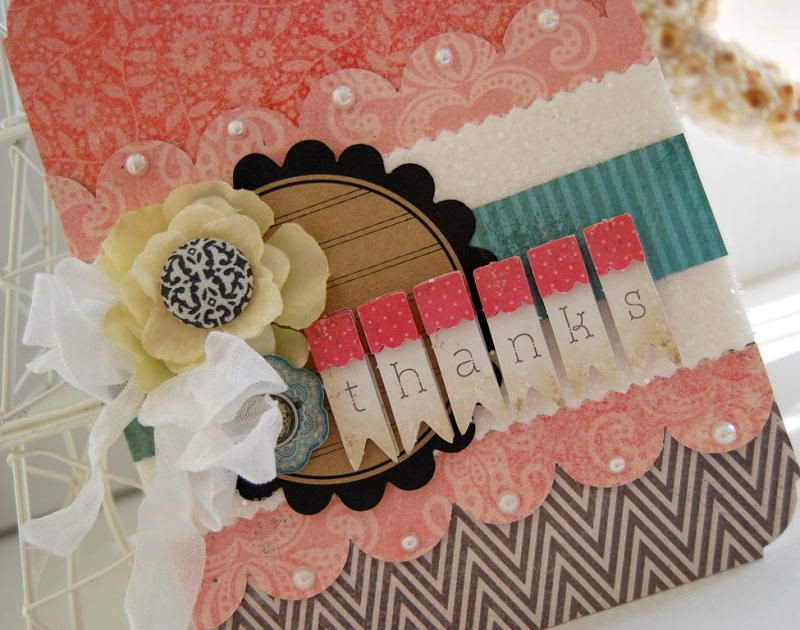
5. Adhere pearls to scalloped strips.

user posted image

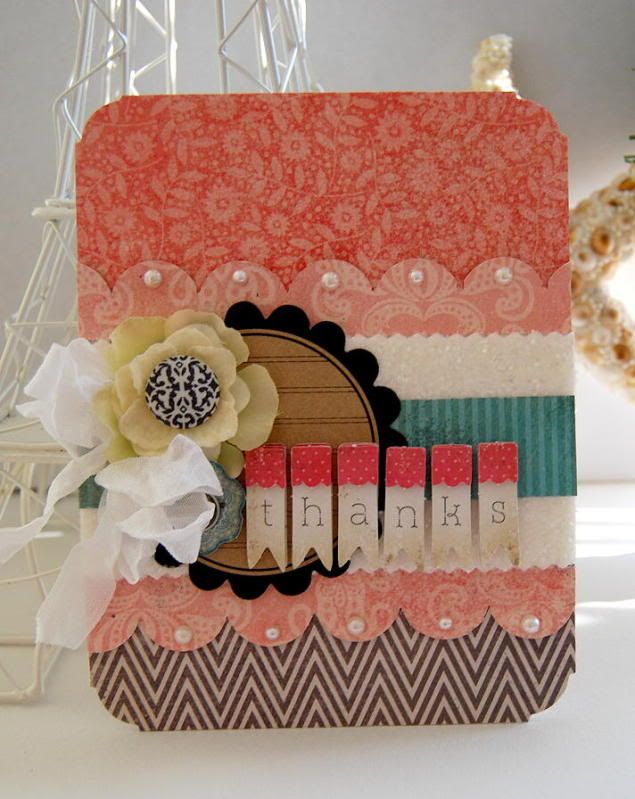
Glittered U Cut It Card
GlueArts Designer- Kristen Swain


So how would you like to try our GlueArts U Cut It Foam?


Simply post a comment here on our blog and we'll enter you to win our 3D Combo Pack filled with our 4 by 4 sheets of our U Cut It Foam along with our Raisen's (that we know you'll love too!) plus we'll include our full 8 1/2 by 11 sheet of our U Cut It Foam...perfect for running through your Sizzix and other die cut systems. And last we would like you to try out our Extreme Adhesive Squares. We'll pick on random winner next Monday to enjoy the goodies!

And speaking of goodies...we need to announce our last week's winner of the Pink Paislee Soiree paper collection along with our GlueArts Glue Glider Pro and more! Our winner is: 


McVic said...


oh love love love the projects today!! They are beautiful!
kace
July 28, 2011 1:01 PM


Kace... our congrats to you! Thanks for the comment and please email us at Gluegirl@gluearts.com! 

We'd like to send out a special thanks to Pink Paislee for generously sponsoring our team and giveaways! And to our Guest GlueArts designer...Lynn Ghahary for sharing with all of your her beautiful work!
We'll see you back here tomorrow with more projects, ideas and of course....GlueArts adhesives!


You have read this article Kristen / U Cut It Foam with the title . You can bookmark this page URL http://skinnyminny22.blogspot.com/2011/08/gluearts-u-cut-it-foam.html. Thanks!