What you may not know are the other products that we are equally proud of and well...think are outstanding!
GlueArts introduced one of my personal favorites and now a designer favorite...U Cut It Foam!
What makes it special?
GlueArts U Cut It Foam is a full sheet of foam adhesive blanks. This means zero waste! And even better...you can cut it to fit your exact project needs. Our U Cut It Foam is also the perfect height...measuring 1/8" thick. Simply cut the size you need, peel off the bottom liner, press into place and then remove the top liner. It's just that simple and that good!!
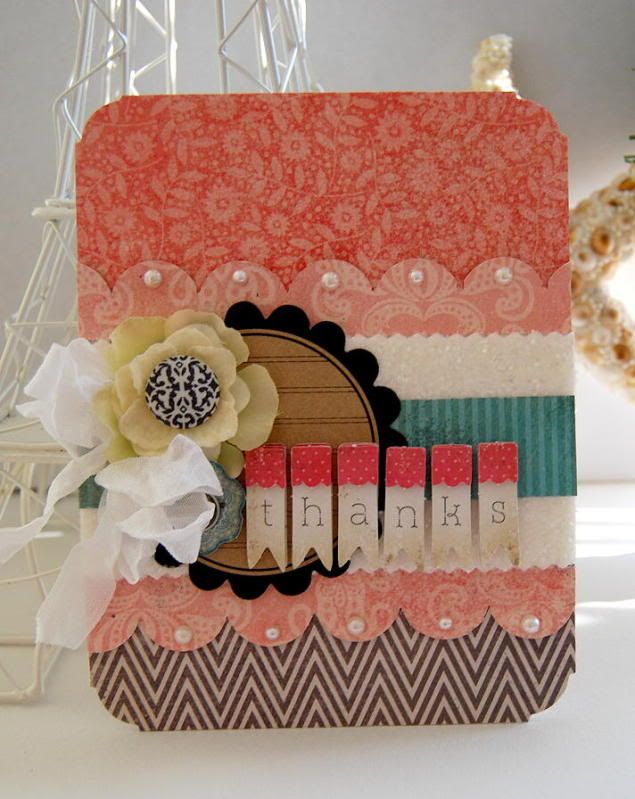
Today Designer Kristen Swain has a beautiful Thank You card that comes to life with the added height of our U Cut It Foam! And look how she glittered the foam! Yes...glittered the foam!
Supplies:
Glue Arts- U Cut It foam
GlueArts Glue Glider Pro and Perma Tac
crinkled ribbon- www.scrapinkris.etsy.com
Paper/stickers/brad- My Mind's Eye
Flower- craft supply
Pearls- Kaisercraft
Glitter- craft supply
Journal spot- Maya Road
Punch- Eksuccess
Instructions:
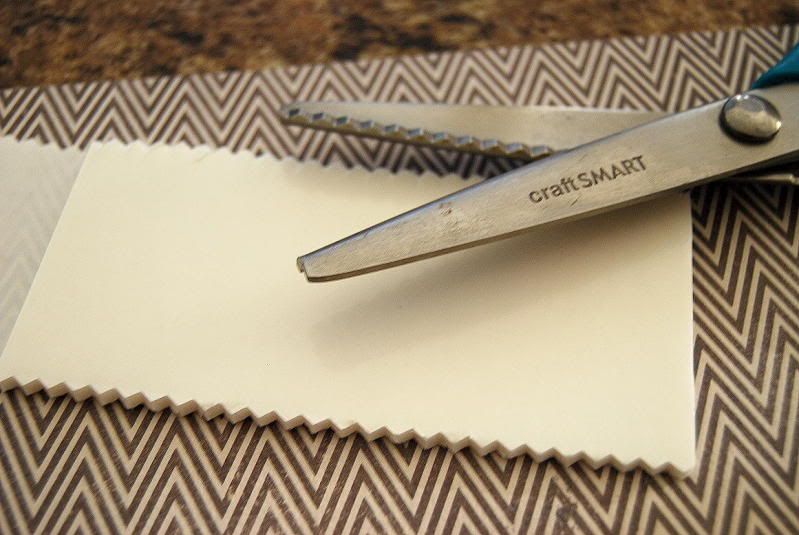
1. Cut strip of UCutIt foam with pinking sheers to size of card.
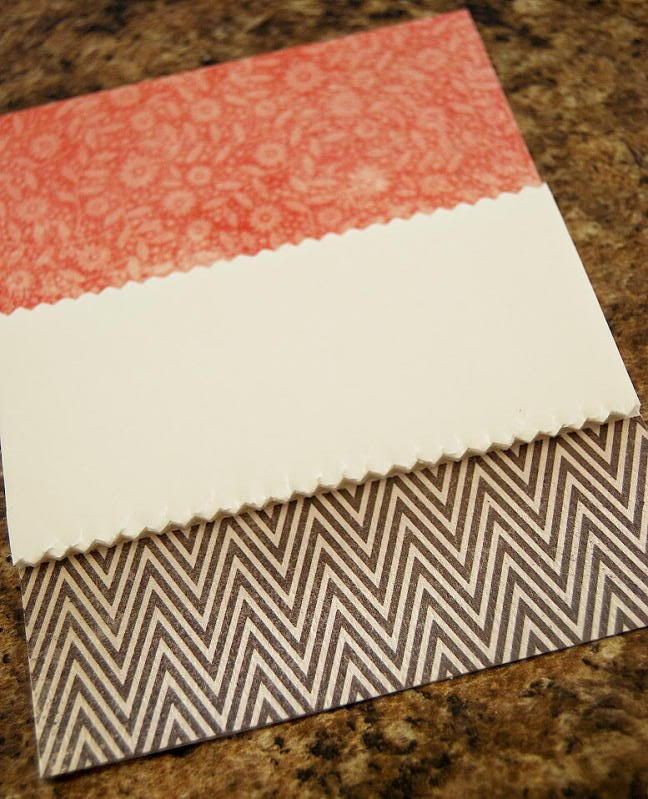
2. Cut and add strips to card, adding larger strip to top of card, and smaller to bottom of card, adding punched strips to top and bottom of UCutIt. Adhere strip of UCutIt foam to card.
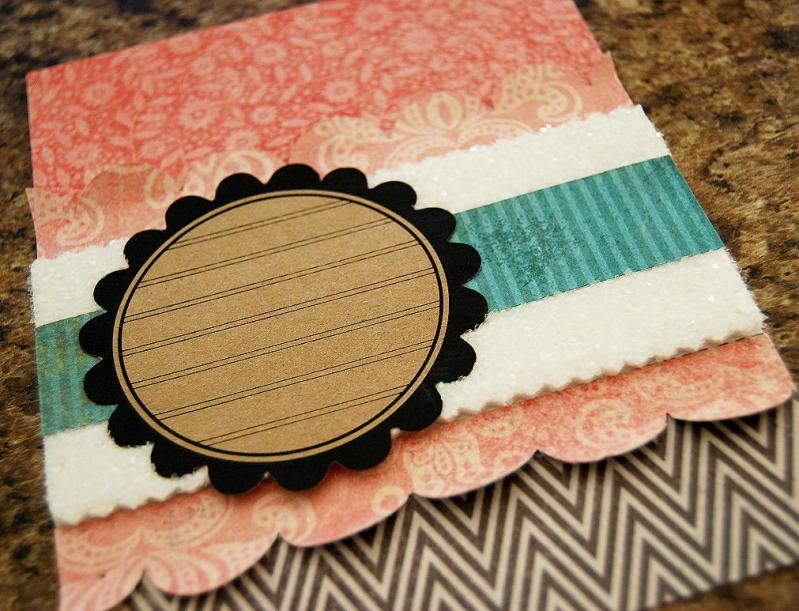
3. Remove sticker backing from UCutIt foam, then adhere strip of paper across foam, then adhere journal spot on foam. Sprinkle glitter across top of foam, pressing glitter into foam adhesive.
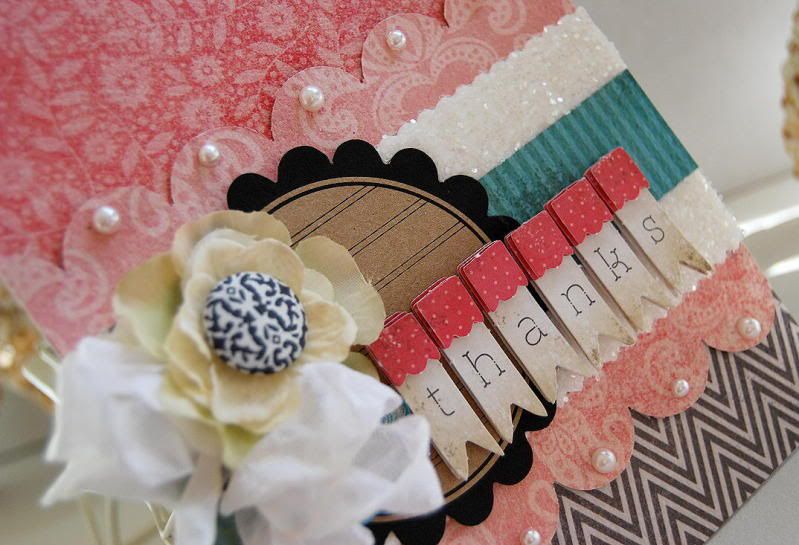
4. Decorate card with Crinkled Ribbon bow, flower with brad center, small brad and cut out flower, and Thanks banner sticker.
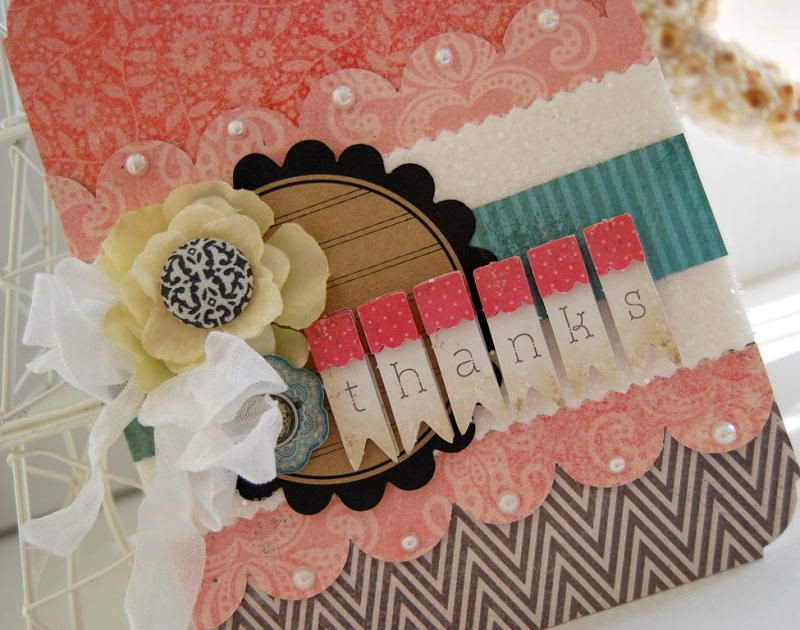
5. Adhere pearls to scalloped strips.
crinkled ribbon- www.scrapinkris.etsy.com
Paper/stickers/brad- My Mind's Eye
Flower- craft supply
Pearls- Kaisercraft
Glitter- craft supply
Journal spot- Maya Road
Punch- Eksuccess
Instructions:

1. Cut strip of UCutIt foam with pinking sheers to size of card.

2. Cut and add strips to card, adding larger strip to top of card, and smaller to bottom of card, adding punched strips to top and bottom of UCutIt. Adhere strip of UCutIt foam to card.

3. Remove sticker backing from UCutIt foam, then adhere strip of paper across foam, then adhere journal spot on foam. Sprinkle glitter across top of foam, pressing glitter into foam adhesive.

4. Decorate card with Crinkled Ribbon bow, flower with brad center, small brad and cut out flower, and Thanks banner sticker.

5. Adhere pearls to scalloped strips.

Glittered U Cut It Card
GlueArts Designer- Kristen SwainSo how would you like to try our GlueArts U Cut It Foam?
Simply post a comment here on our blog and we'll enter you to win our 3D Combo Pack filled with our 4 by 4 sheets of our U Cut It Foam along with our Raisen's (that we know you'll love too!) plus we'll include our full 8 1/2 by 11 sheet of our U Cut It Foam...perfect for running through your Sizzix and other die cut systems. And last we would like you to try out our Extreme Adhesive Squares. We'll pick on random winner next Monday to enjoy the goodies!
And speaking of goodies...we need to announce our last week's winner of the Pink Paislee Soiree paper collection along with our GlueArts Glue Glider Pro and more! Our winner is:
oh love love love the projects today!! They are beautiful!
kace
kace
You have read this article Kristen /
U Cut It Foam
with the title GlueArts U Cut It Foam. You can bookmark this page URL http://skinnyminny22.blogspot.com/2011/08/gluearts-u-cut-it-foam.html. Thanks!


