Showing posts with label Jaime. Show all posts

GlueArts Has a Message for You!


user posted image  


You're just our type!!!

And so are the gang at Nikki Sivlis!!

We're back today with two new projects from Designers Jaime Warren and Kristen Swain featuring Nikki Sivlis products and GlueArts Adhesives! What more could you want!!!


user posted image

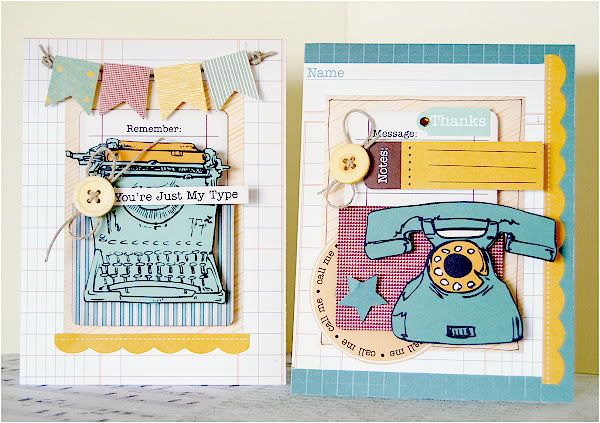
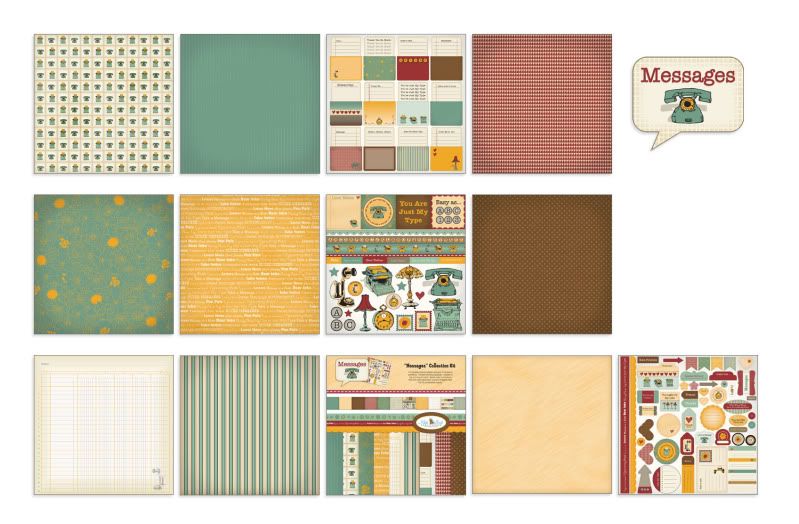
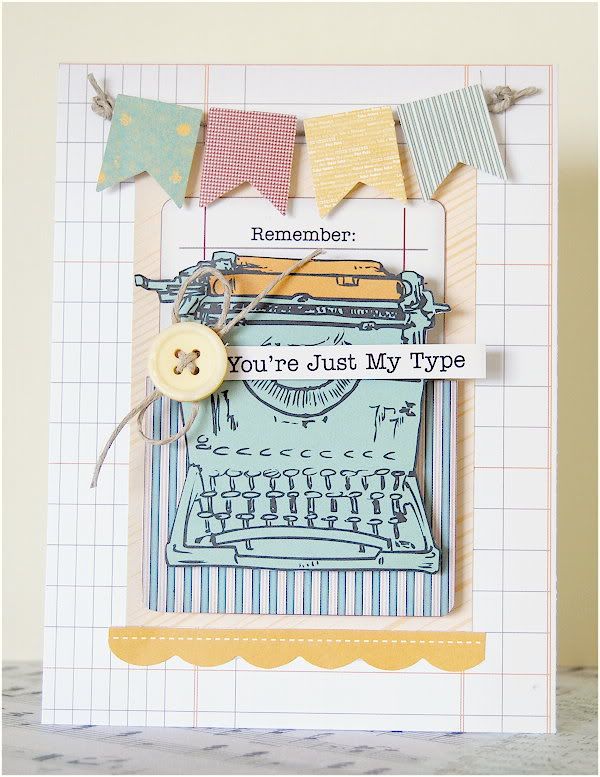
Set of "Messages" Cards
GlueArts Designer- Kristen Swain


user posted image
Supplies:


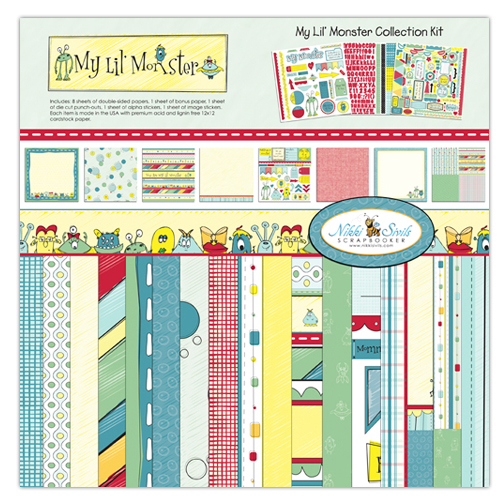
Nikki Sivilis Messages Collection
twine/buttons


user posted image

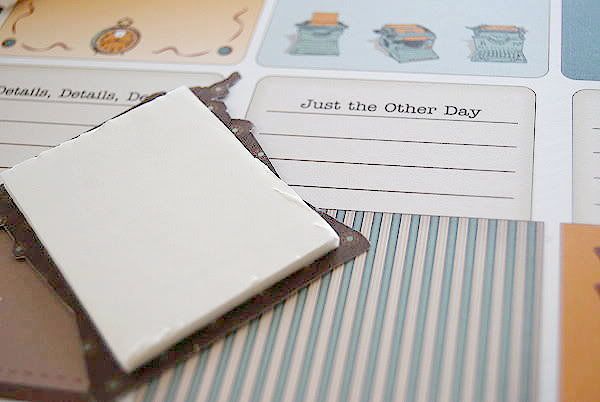
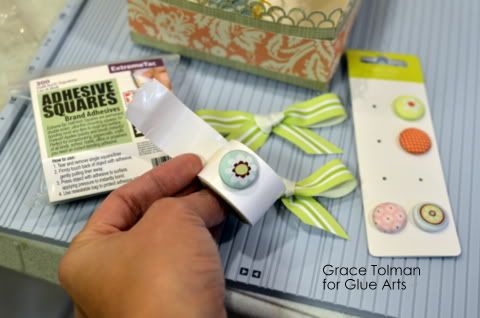
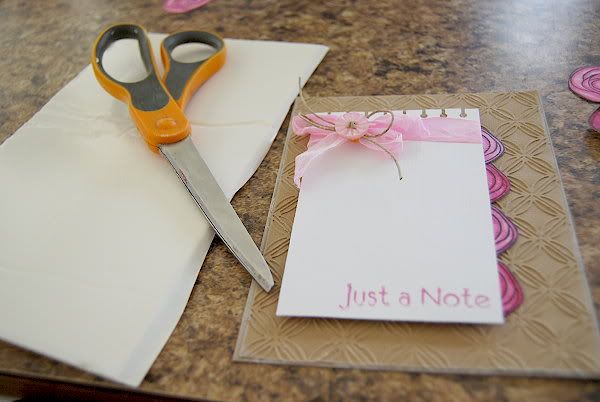
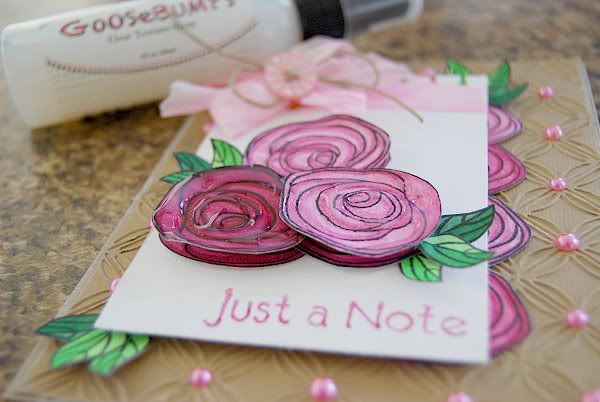
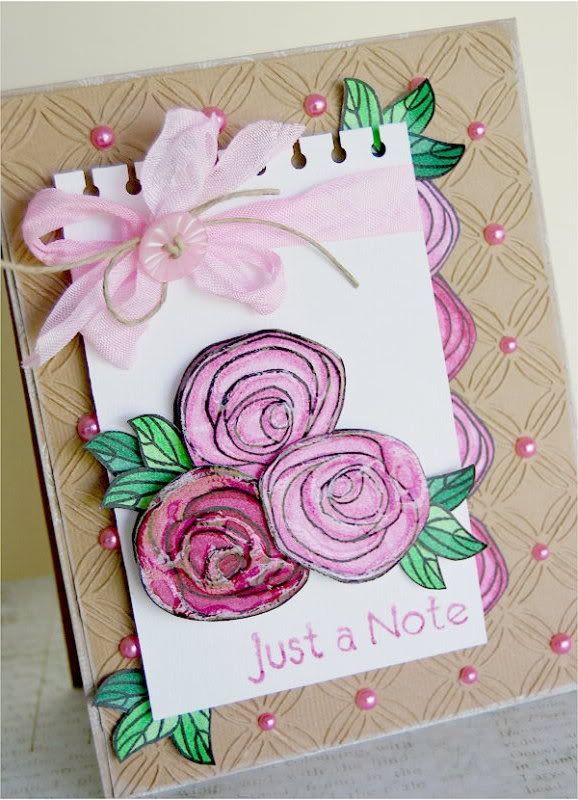
1. Use UCutIt foam to pop up cut outs from the paper collection.

user posted image

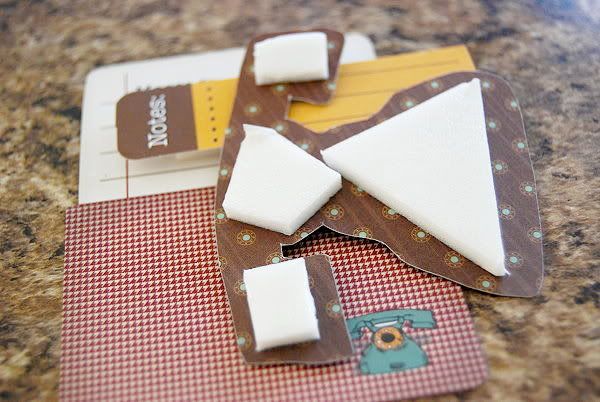
2. Cut blocks of paper and adhere to card base with Perma Tac. Then cut out images from paper and adhere with more UCutIt foam.

user posted image

3. Decorate cards as shown with UCutIt foam, use buttons and twine to finish.

user posted image


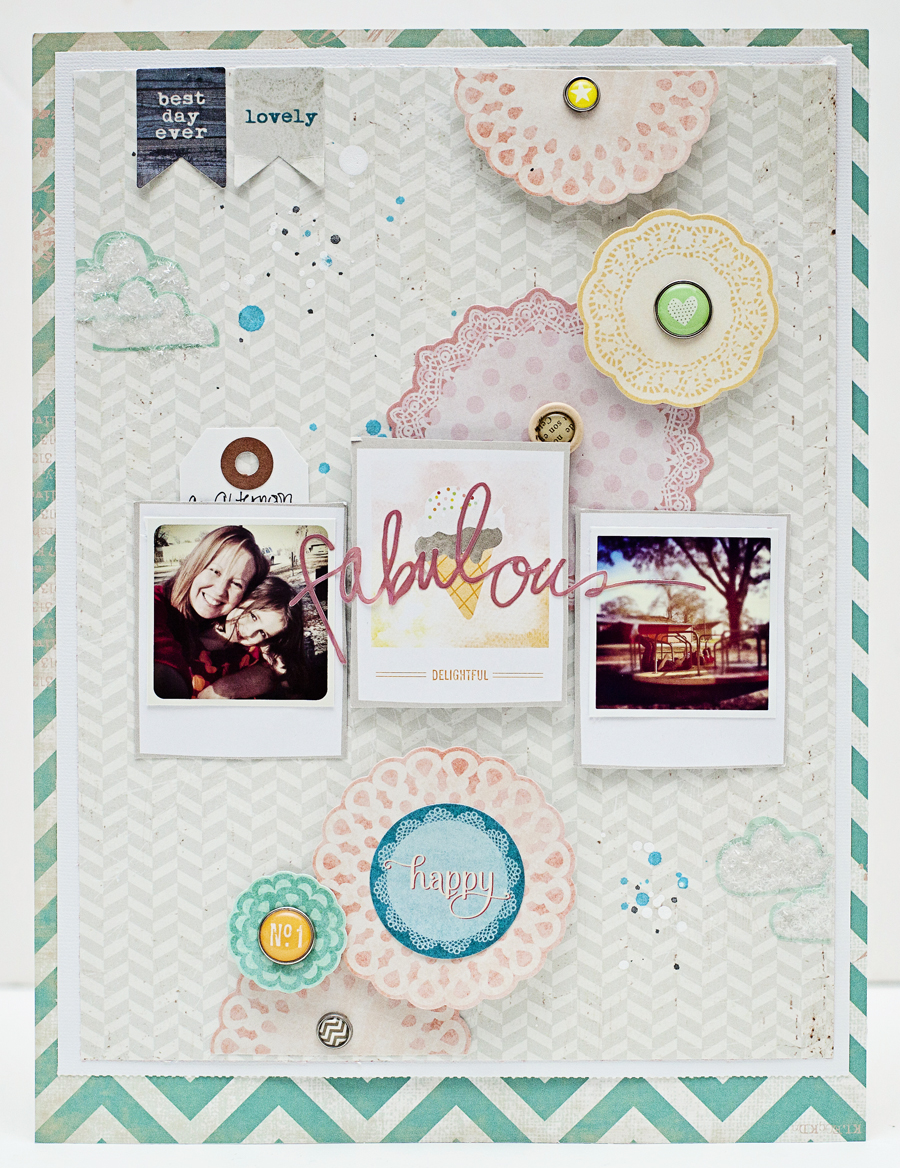
"An Adventure Together" Layout
GlueArts Designer:  Jaime Warren

Hi everyone!  Jaime Warren here with you today to share a layout I created using some fabulous Nikki Silvis & Glue Arts products!  

Supplies:
 
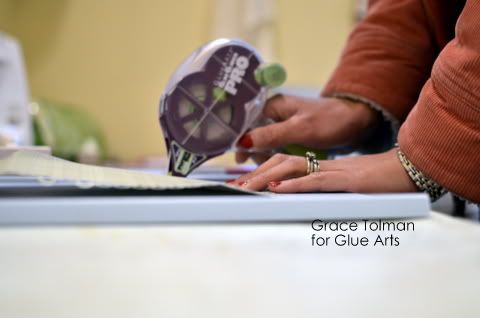
For this layout I pulled out my trusty and well loved stencil set and put the circle stencils to work!  I loved all of the different patterned papers and I wanted to be able to incorporate several of them on my layout.  The circles were the perfect way to do just that!  I started by creating a slightly off center design with my circles and then placed my photos in the middle of those.  I started attaching the smaller circles using both the Glue Glider Pro and U Cut It Foam.


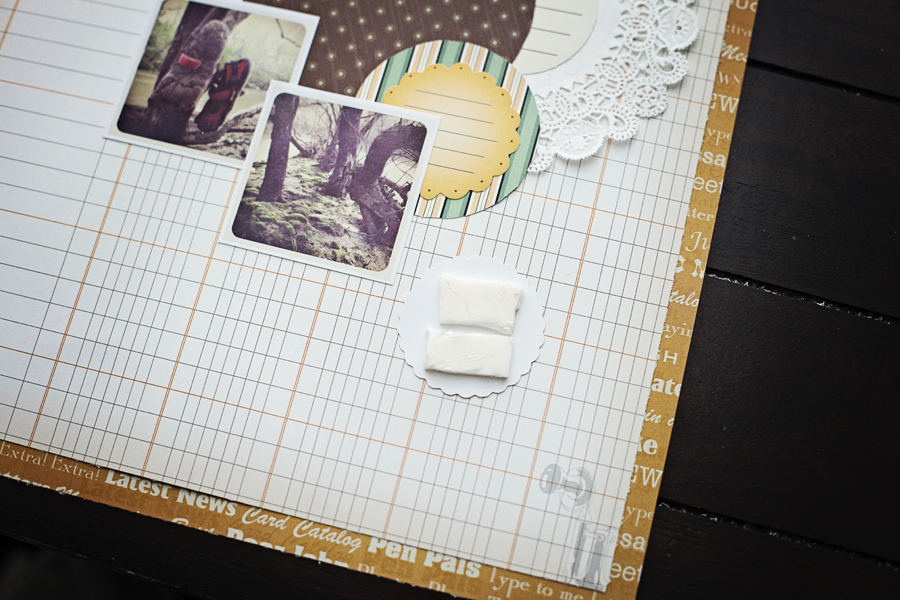
I then cut several circles in half and attached them with U Cut It Foam to the sides of the layout.  I placed my title over my photos, in the center of my main design.  I loved all of the die cut pieces so I incorporated those by trimming them down and attaching to the sides of my layout.
 
After a few splashes of mist, I used my scallop punch to punch out my border and attached using my Glue Glider Pro. 


The final result:


I hope you enjoyed my project today!  Thanks for stopping by the Glue Arts blog!!


So let's hear it....how do you like giveaways? And how about winning this cute brand new kit from Designer Nikki Sivlis? And and and....wait...what about if we include some GlueArts Adhesives in this giveaway!

Simply post a comment and we'll enter you to win this fun collection kit filled with paper, stickers and much more! And to help you with your crafting, we're going to include our Glue Glider PRO Handle (already own one...no problem we'll offer you a second cartridge!) and our PRO+ Perma Tac Cartridge plus we'll tuck in our must have 3D Combo Pac. It's filled with our GlueArts U Cut It Foam (used here today!) along with our Raisen's! Now that's a giveaway!

We'll collect all the comments and pick one random winner next Monday! Please remember to visit the Nikki Sivlis Blog and her talented Doghouse Diva's to see what they've created this week with GlueArts products!   

You have read this article Glue Gilder Pro / Jaime / Kristen / Nikki Silvis / Perma Tac / Pro+ / U Cut It Foam with the title Jaime. You can bookmark this page URL http://skinnyminny22.blogspot.com/2012/04/gluearts-has-message-for-you.html. Thanks!

We Love to Laugh at GlueArts!

"I Love That Contagious Laugh Of Yours" 

GlueArts Designer: Jaime Warren
 
If there is one thing I love on my layouts it's dimension!  I absolutely love that Glue Arts has so many incredible products, like Raisens that help me get the dimension I desire.
 
For this layout I used a combination of Raisens and U Cut It Foam.  There were a couple of embellishments that I wanted just a little dimension and the Raisens were perfect.


I love layering my embellishments and making the top layer pop off the page.  I attached my mini banner flag using the Raisens and placed it on top of my doily/photo layer.  I then attached the bottom sticker with the Raisens.

  
I placed part of my title on top of the little banner and then started building more embellishments around my centered design.  I used PermaTac Minis to attach my vellum clouds to my layout.
 
 
I used the Raisens again on the cut out flowers around the edges of my layout.  They were perfect for slightly popping the flowers off of the doilies.  After finishing my title work I tucked a simple shipping tag behind the center doily for my journaling.


Thanks for stopping by the Glue Arts blog today - I hope you enjoyed my project!!


Leave us a comment today and let us know how you would use ourGlueArts Raisen's for your next project! We'll enter you to win two pack of our Raisen's along with a pack of our U Cut It Foam! Both products are perfect for adding just a bit of dimension for your crafts and more! We'll pick one random winner next Monday!


Can't wait...no need! You can shop online right from the convenience of your home, Ipad, Iphone, Android phone! GlueArts offers safe shopping and best...FREE SHIPPING all month!  


You have read this article Jaime / Raisen's / U Cut It Foam with the title Jaime. You can bookmark this page URL http://skinnyminny22.blogspot.com/2012/04/we-love-to-laugh-at-gluearts.html. Thanks!

A Tisket A Basket of Goodies from GlueArts!

Easter holidays for many are filled with church services, new clothes, family get togethers, egg hunts and yes...Easter Baskets.

Designer Grace Tolman has a cute and easy to make idea for making your own treat baskets! How sweet would these be on the table or at individual place settings? GlueArts Glue Glider PRO+ makes assembling these as easy as 1,2 and yes...3!

Jaime Warren has a light and very pretty card for you to make! Doilies are all the rage and our Glue Glider PRO+ once again makes creating this card a delight!!! (well we think so! ;-))

user posted image

user posted image

user posted image

user posted image
Easter Paper Baskets
GlueArts Designer: Grace Tolman


Surprise your loved ones on Easter morning with these treat bags. They are super easy and with the help of Glue Arts adhesive, you can make these babies in a snap!


Supply list:


Pattern papers- Nantucket, Pink Paislee
Border punch- Martha Stewart Crafts
Brads- Pebbles
Ribbon- (blue dot) Hobby Lobby; (green stripe) Michael’s Craft store
Tool- Scor Pal Scoring Board


user posted image

user posted image

Quick instructions:


1. Make the box from a 10" square paper. Punch out a decorative edge on all sides (don't worry about the corners cause you'll cut those up). Score at 2 1/2" on all sides. Cut a slit on two sides to create the box. Use Perma tac adhesive to close it up.


2. Cut two pieces of 1 1/2" x 12" paper strip, scor at 5" points and adhere to the center of the box outside. 
3. Cut a 2 1/2" x 12" strip of paper. Punch a border on both long ends. Cut another strip of paper that is 1 x 12" in width, adhere to the center of the wider strip. Adhere the ends on the inside portion of the box to create the handle. 

4. Make two bows for each box from 3/4" wide ribbon. Adhere a brad on the center and adhere the bow on the front and back side of the box lining it up with the handle using Glue Arts Extreme square. 
5. Fill up with grass and Easter goodies!

"Happy Easter Card" 
GlueArts Designer:  Jaime Warren
 
I openly admit that I always struggle when creating cards.  They just don't come easily to me.  Thankfully this one came together much easier than I anticipated!

Supplies:

 
Instructions:
To start I took three sheets of 6x6 patterned paper (trimming the top layer to fit in the center) and, using my Glue Glider Pro, attached all three together.  I then sewed the edges together, leaving an edge of about an inch and a half.  Once I was finished with my sewing I simply trimmed until I had the card to the preferred size.


I created a layering of embellishments, starting out with a doily.  I used my PermaTac Mini's to attach the doily.


I trimmed the second layer of my embellishment "stack"  out of patterned paper and attached it to the doily.  Then, using U Cut It Foam I attached my "Happy" sticker to the top.  I attached my butterfly to the outer edge of the "Happy" sticker.  Under the embellishment "stack" I used my letter stickers to finish the "Happy Easter" sentiment.


The very last step was to punch a scalloped border for the top and bottom of my embellishment "stack."  


I hope you enjoyed my little Easter card!!  


Have you joined us yet for our GlueArts Egg Hunt? Simply find the five letters posted yesterday through Friday to reveal your promotion code for 20% off your entire online order! The code will be active April 7 & 8th! And even better...we're offering free shipping as well! 

So put your sleuthing skills to work and find those eggs we've hidden for you!! Then unscramble and you've got your promotion code for some shopping fun! 
You have read this article Glue Gilder Pro / Grace / Jaime / Pro+ with the title Jaime. You can bookmark this page URL http://skinnyminny22.blogspot.com/2012/04/a-tisket-basket-of-goodies-from-gluearts.html. Thanks!

Feeling Fabulous with Tsukineko and GlueArts!!

Fabulous Layout
GlueArts Designer: Jaime Warren

Glue Arts Products:

U Cut It Foam
Perma Tac Minis
Glue Glider Pro

Tsukineko products:

The Essential Glue Pad
Fireworks in Tuxedo Black
Fireworks in Bahama Blue

Hi everyone!!! Jaime Warren with you today to share a fun little layout using Tsukineko and Glue Arts products! Let me start by telling you how impressed I was with the Fireworks mists - WOW!!! Gorgeous, rich color and amazing sparkle. I loved them!

I decided to change up my layout size this time and went with an 8.5x11 instead of my typical 12x12. I love to change the sizes - it helps me when my creativity feels low. I layered my patterned paper over white cardstock (again, changed it up from my usual layering style!)


I adhered the two sheets using my Glue Glider Pro. Once attached I used the spray nozzle from the Tsukineko Fireworks and lightly dripped the mist in random areas around my layout. I let the first color dry and then did the same with the second color.


I then started attaching my photos and cut out patterned paper embellishments using the Glue Glider Pro and U Cut It Foam. I then started layering on my stickers using the U Cut It Foam. Once they were attached I used my paper piercer to make holes for my brads.

I cut out my little clouds from my vellum sheet and attached using Perma Tac Minis. I then used my finger to apply the Tsukineko Glue Pad to my clouds and covered them in glitter.


The next to last step is my journaling which I have "hidden" behind one of my photos. I used a simple shipping tag and then tucked it behind the photo! The finishing touch was layering the entire layout over my last piece of patterned paper - leaving the bottom larger than the rest for a "polaroid" feel!


The final result:


Thanks for stopping by everyone!!!


Just a Note Card
GlueArts Designer: Kristen Swain


Supplies:
Tsukeniko Staz-On Black and White
Tsukeniko Goosebumps Spray
Tsukeniko Fabric Markers-- Arboretum 
Tsukeniko Fireworks spray in Rosebud
Stamps by Inkadinkado
American Crafts cardstock
Cricut Geometric Rings Embossing Folder
punch- eksuccess
 pearls- Joann's 

user posted image

1.Fold tan cardstock to 4x6.5, then ink edges of cardstock with white Staz-On. Stamp flowers on white cardstock using black Staz-On. 

2. Color in with Fabric Markers. Cut out. Stamp, color and cut out leaves.


user posted image

3. Emboss tan cardstock using Cuttlebug, adhere to front of card using Perma Tac, then ink edges with white Staz-On. Cut out rectangle of white cardstock, punch with notebook punch, stamp sentiment on bottom and attach to card with UCutIt foam tape, adhering several flowers as border underneath.

4. Spray crinkled ribbon with Fireworks spray, dry and tie onto card, using button in center of bow. Attach cut out flowers to card using UCutIt foam to pop flowers up, attach leaves with mini adhesive squares.


user posted image

5. Use goosebumps spray and layer onto flowers to add dimension, by unscrewing cap and using end of tube. Let dry.

6. Attach pearls to card.


user posted image 


Absolutely beautiful don't you agree! Both Jaime and Kristen used Tsukineko's new Fireworks! sprays! Click here to see them online at Tsukineko's website! Don't forget to be a friend of Tsukineko's on Facebook. Let them know GlueArts sent you!!

So let's have some fun this week...we'd love to see your projects using Tsukineko Inks and products! Link up your work from your blog, galleries (using our Inlinkz) and more and we'll enter you to win this spring prize filled with: Tsukineko Memento Inks, Jolee's Boutique Dimensional Sticker, the new March Card Maker magazine, bag of springs pink buttons from Blumenthal Lansing's Favorite Findings collection and three brand new stamps! Two wood block and one large cling butterfly!


Plus that's not all...we'll also send to you a roll of our GlueArts Adhesive Squares and a pack of our Raisen's also perfect for cardmaking! Simply link to your project or post a comment to be entered to win! We'll select one random winner next Monday! And if you haven't already "liked" Tsukineko on Facebook...stop by and give them a warm hello from GlueArts!

You have read this article Glue Gilder Pro / Jaime / Kristen / Tsukineko / U Cut It Foam with the title Jaime. You can bookmark this page URL http://skinnyminny22.blogspot.com/2012/03/feeling-fabulous-with-tsukineko-and.html. Thanks!

Make A Fun Album with GlueArts


Hi everyone!! 
Jaime Warren here with you today with a fun little project for that child or teen in your life!! My girls love to make paper bag mini albums for their personal albums - Jill for her American Girl dolls, Hailey for her animals, etc.


I start out by punching two holes in the paper bags, right along the edge. I layered each page with two different patterned paper sheets, attaching with the Glue Glider Pro. Using the U Cut It Foam I attached my embellishments giving them extra dimension. I used a combination of sticker embellishments, die cuts and chipboard.

 I will give my girls scraps and embellishments that I have purged from my stash to use in their albums. It's the perfect way to de-stash and help your kids get creative! The best part is that they can create one for anything and everything.

 My girls love going back through their albums, reading their journaling, looking at their photos. I love how inexpensive it is - if one page isn't quite turning out how they want, grab another lunch bag - easy peasy!

Supplies:
GlueArts Glue Glider PRO+ Perma Tac
GlueArts U Cut It Foam
GlueArts Adhesive Squares


Hope you guys have enjoyed this simple kids/teen project!! This can be made for boys...perhaps to scrapbook a baseball game they attended, or maybe they just finished a boy scout camping trip, photos from a favorite weekend...you name it!!


We'd like to help you make some "Kid Approved" crafts and give you a chance to win! Post a comment and let us know what your planning for your spring break or kids crafts! We'll enter you to win our Glue Glider PRO+,  Adhesive Squares and our Raisen's! (our amazing dimensional adhesive squares)


Simply post a comment and we'll select one random winner that we'll announce right here next Monday! It's just that easy! Looking for GlueArts Adhesives...shop online from the convenience of your home on our safe and easy to navigate GlueArts website!! 
You have read this article Glue Gilder Pro / Jaime / Kid Friendly Craft / Pro+ / U Cut It Foam with the title Jaime. You can bookmark this page URL http://skinnyminny22.blogspot.com/2012/03/make-fun-album-with-gluearts.html. Thanks!