
Fiskars has long been known for their quality scissors and sewing tools. Today Fiskars offers punches, paper trimmers, school craft supplies, outdoor gardening trimmers, pruners and even lawnmowers! Please visit the Fiskars site to learn more about Fiskars and their entire line up of consumer products.
Today is our final day and we're going out with a 4th of July BANG!!
Designer Lisa Day as a beautiful layout...with a wonderful bucket list" of items Lisa would like to do during her 34th year. The Fiskars cloud punch is a perfect tool for this layout!
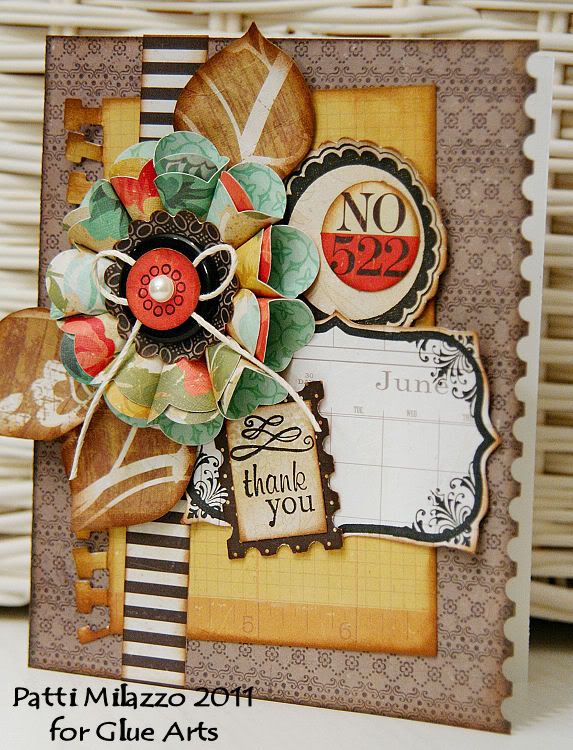
Designer Patti Milazzo is not only a Glue Girl but can be found showcasing her craft skills for Fiskars design team as well! Patti has made a unique card using small paper cones...we know you'll want to try this!!

34 during 34 List
GlueArts Designer:by Lisa Day
Supplies:
Glue Arts - Glue Glider Pro & Extreme Tac Adhesive, U Cut It Adhesive, Raisens and Ribbon Adhesive
Fiskars - Fingertip Detail Knife, Notebook Border Punch, Cloud Squeeze Punch, Accents Simple Stick™ Repositionable Rubber Stamps, SureCut™ Scrapbooking Paper Trimmer
Patterened Paper - Pink Paislee
Digital Paper - melstampz
Ribbon & Embellishments -The Girls’ Paperie
Letters - American Crafts
Directions:
1. Start with a 12x12 piece of cardboard or chipboard (something solid) and apply a generous amount of extreme tac to adhere the paper to.

2. Adhere a 6x12 piece of patterned paper to the right side of the chipboard. Then using the Fiskars Fingertip Knife trim out sections from the Pink Paislee paper and adhere using extreme tac in layers to the left side of the chipboard. Leave some of the right side unglued so you can slide your next layers underneath.

3. Using the Fiskars Cloud punch, punch out 3 clouds and attach to your page using U-Cut foam to hide any gaps.

4. Using the Fiskars Notebook border punch punch out a strip of paper and add some extreme tac to the inside edge of the paper and adhere under the second layer of papers. Leave the right side of the notebook unglued so you can slide in your list.

5. Add a strip of ribbon to the left side of your projects using ribbon adhesive. Bunch it up as you go along, but leave a flat spot for your title.

6. Using the finger tip knife and trip out a piece from the Pink Paislee paper to use as your title and adhere some U-cut it foam to the back. Position on your project over the flat spot in your ribbon and then add your title.

7. Print out your list and using the Fiskars paper trim, trim your paper to size. My finished size was 6x10.

8. Apply extreme tac to the back of the list and slide under the paper that has been punched with the notebook border punch and smooth out. Add adhesive anywhere that needs it still.

9. Remove the large stamp shown in this image from the stamps and cut in 1/2 length wise and then stamp a border to the right side of your list.


10.Adhere a small cupcake holder and star to the bottom of your list using Raisen's.

11. Using the Fiskars fingertip scissors trim out an arrow from the Pink Paislee paper and adhere over that using U-Cut foam

12. Add a Raisen to the back of a metal clock and adhere to your page. Use the Finger Knife to poke a hole to attach with a brad.


13. The back of some buttons can have that big bulky spot to attach it with. I don't like how it looks on my project so I simply snip off the back and attach with a Raisen!


Thank You Card
GlueArts Designer: Patti Milazzo
GlueArts Designer: Patti Milazzo
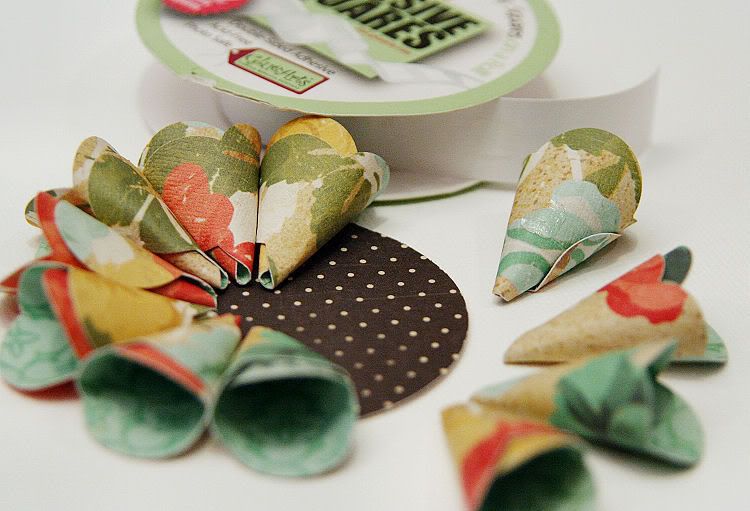
I created a flower accent for my card that was inspired by paper cone wreaths. I used Fiskars Cloud Squeeze Punch to create the scalloped petals by rolling them into tiny cone shapes and then securing them in place with Glue Arts Mini Adhesive Squares.
Supplies:
Glue Arts:
Glue Glider Pro with 1/4 High Tac Cartridge Refill - Pro
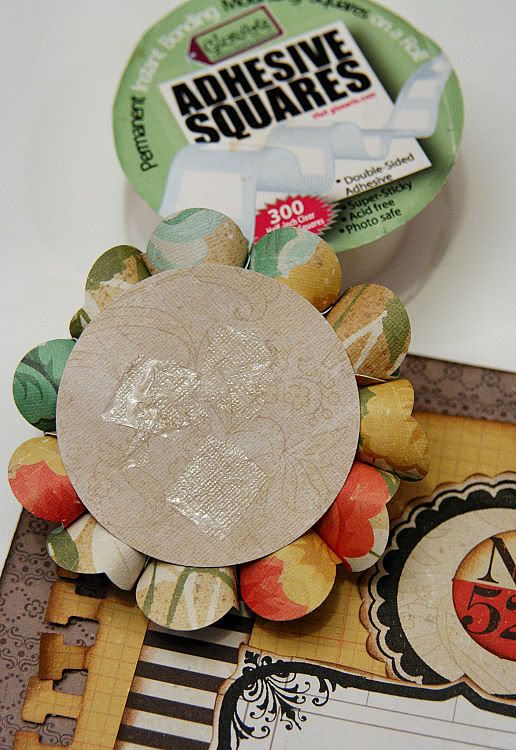
Mini Adhesive Squares Adhesive Squares
U-Cut-It Adhesive Foam
Fiskars Americas:
Extra Large Squeeze Punch – Cloud
Extra Large Squeeze Punch – Postage
Border Punch – Notebook
Border Punch – Postage Stamp
Simple Stick Repositionable Rubber Stamps – Accents
Retractable Fingertip Detail Knife
Non-Stick Scissors
12” Trimmer
Other:
Crate Paper Portrait Collection – Pattern Paper and Accents
Hemp; pearl accent; black and brown ink; black button
Glue Arts:
Glue Glider Pro with 1/4 High Tac Cartridge Refill - Pro
Mini Adhesive Squares Adhesive Squares
U-Cut-It Adhesive Foam
Fiskars Americas:
Extra Large Squeeze Punch – Cloud
Extra Large Squeeze Punch – Postage
Border Punch – Notebook
Border Punch – Postage Stamp
Simple Stick Repositionable Rubber Stamps – Accents
Retractable Fingertip Detail Knife
Non-Stick Scissors
12” Trimmer
Other:
Crate Paper Portrait Collection – Pattern Paper and Accents
Hemp; pearl accent; black and brown ink; black button
Instructions:
1. Cut a 5 ¼” x 6” piece of black/gray pattern paper to be the front of the card. Then use the Postage Stamp Border Punch along the right side of the card front. Ink edges.
2. Cut a 4 ½” x 5” piece of yellow pattern and use the Notebook Border Punch along the left side. Ink edges and distress/crumple the notebook border a bit. Then adhere it to the front of the background at an angle with the Glue Glider Pro with High Tac Cartridge.
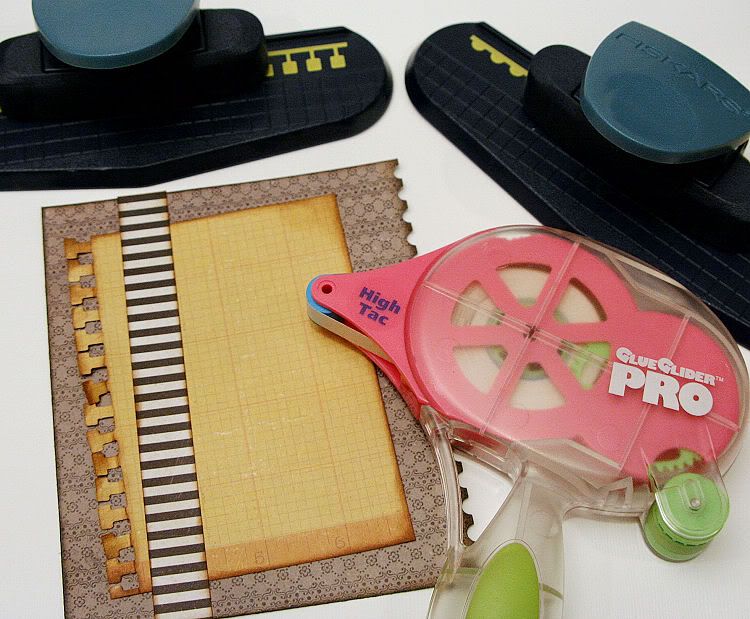
3. Cut a 1” x 6” strip of striped pattern paper and adhere it over the above again with High Tac.
4. With the Fiskars Simple Stick Accent Stamps, stamp circle designs and the large flourished journal frame on patterned papers.
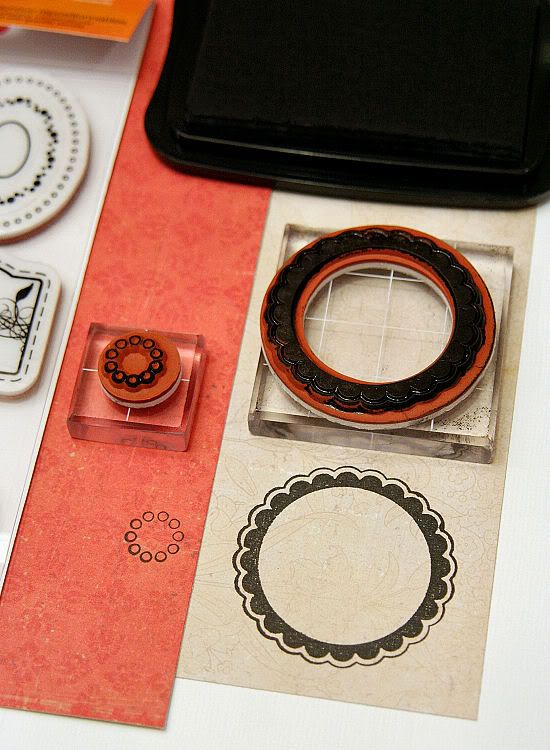
5. Use the Craft Knife to cut out the stamped frame and scalloped circle. Use a ¾” circle punch for the small stamped circle.
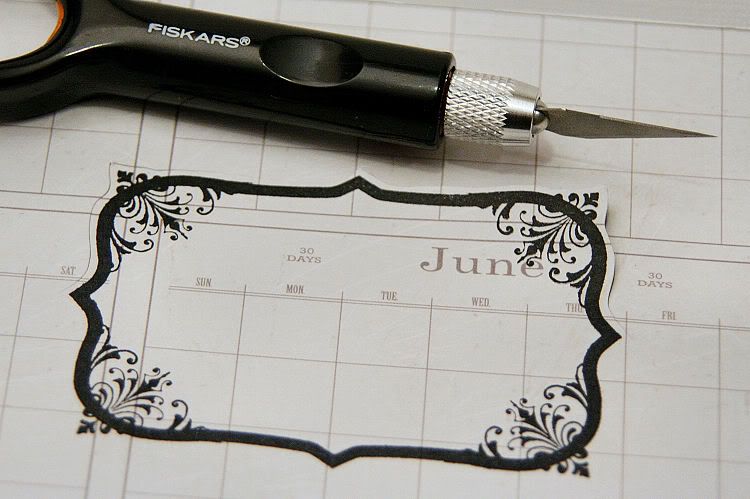
6. Add a paper accent to the scalloped circle and adhere this to the top right of the notebook edged paper. Use the Glue Glider Pro with High Tac Adhesive again to adhere the journal frame just below the scalloped circle.
7. Squeeze Punch 10 – 12 Clouds from double sided pattern paper. Curl the clouds to create tiny scalloped cones. These will be the flower petals. Apply Mini Adhesive Squares to adhere the cones into shape.
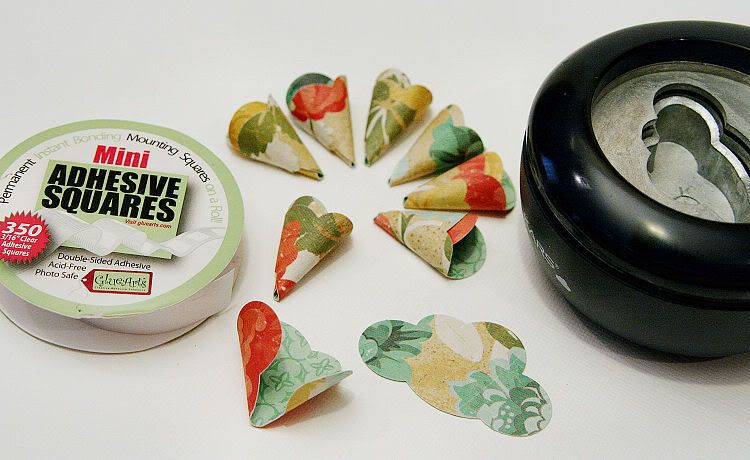
8. Punch a 2” circle from pattern paper and again use the Mini Adhesive Squares to adhere the cones onto the circle to form a small “wreath”. Leave a 1” opening in the center.
9. Apply Adhesive Squares to the back of the flower and adhere it to the front of the card as shown.
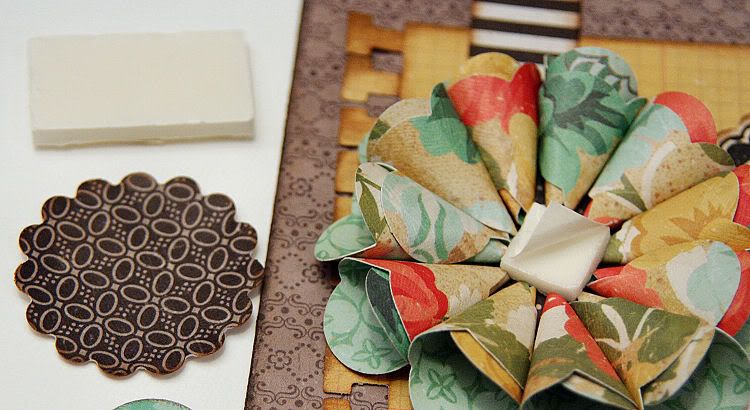
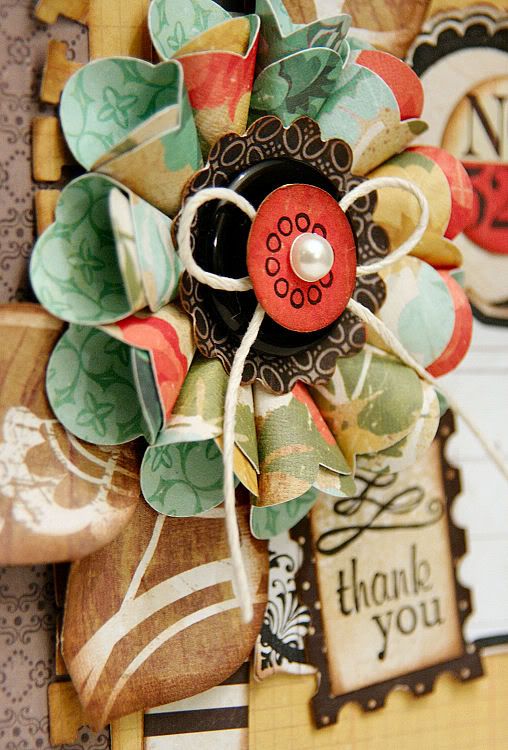
10. Add a small square of U-Cut-It Adhesive Foam to the center of the flower to apply a scalloped edged circle punch. Tie hemp to a black button and adhere the small stamped red circle to the center. Apply an Adhesive Square to the back of the button and press onto the scalloped circle in the center of the flower.
11. Punch/cut leaves from pattern paper and attach to the flower with Adhesive Squares.
12. Squeeze Punch a Postage Stamp from black dotted pattern paper, add a small rectangle to the center and stamp/write card sentiment (thank you). Use an Adhesive Square again to attach this just below the flower.
13. To complete the card, create a 4 ¾” x 6” card from cardstock and adhere the above to the front.
1. Cut a 5 ¼” x 6” piece of black/gray pattern paper to be the front of the card. Then use the Postage Stamp Border Punch along the right side of the card front. Ink edges.
2. Cut a 4 ½” x 5” piece of yellow pattern and use the Notebook Border Punch along the left side. Ink edges and distress/crumple the notebook border a bit. Then adhere it to the front of the background at an angle with the Glue Glider Pro with High Tac Cartridge.
3. Cut a 1” x 6” strip of striped pattern paper and adhere it over the above again with High Tac.
4. With the Fiskars Simple Stick Accent Stamps, stamp circle designs and the large flourished journal frame on patterned papers.
5. Use the Craft Knife to cut out the stamped frame and scalloped circle. Use a ¾” circle punch for the small stamped circle.
6. Add a paper accent to the scalloped circle and adhere this to the top right of the notebook edged paper. Use the Glue Glider Pro with High Tac Adhesive again to adhere the journal frame just below the scalloped circle.
7. Squeeze Punch 10 – 12 Clouds from double sided pattern paper. Curl the clouds to create tiny scalloped cones. These will be the flower petals. Apply Mini Adhesive Squares to adhere the cones into shape.
8. Punch a 2” circle from pattern paper and again use the Mini Adhesive Squares to adhere the cones onto the circle to form a small “wreath”. Leave a 1” opening in the center.
9. Apply Adhesive Squares to the back of the flower and adhere it to the front of the card as shown.
10. Add a small square of U-Cut-It Adhesive Foam to the center of the flower to apply a scalloped edged circle punch. Tie hemp to a black button and adhere the small stamped red circle to the center. Apply an Adhesive Square to the back of the button and press onto the scalloped circle in the center of the flower.
11. Punch/cut leaves from pattern paper and attach to the flower with Adhesive Squares.
12. Squeeze Punch a Postage Stamp from black dotted pattern paper, add a small rectangle to the center and stamp/write card sentiment (thank you). Use an Adhesive Square again to attach this just below the flower.
13. To complete the card, create a 4 ¾” x 6” card from cardstock and adhere the above to the front.
We invite you to visit the Fiskars Facebook wall and like them! Because we know you do like them!! Then visit the GlueArts Facebook wall and let us know you've done this! We'll enter you to win our Adhesive Squares Combo Kit!!
We're also giving away a a Fiskars Trimmer, Cloud Squeeze Punch, Stamp Border Punch, Postage Stamp punch, Acrylic Stamps and more!

And guess what....we need to include some GlueArts adhesives with this prize! So we'll ALSO include our Glue Glider Pro and a roll of our Adhesive Squares! Now you're definitely ready to craft!
Simply leave us a comment and we'll enter you to win! Monday we'll select one winner to enjoy these goodies!!
You have read this article Extreme Tac /
Fiskars /
Glue Gilder Pro /
High Tac /
Lisa /
Mini Adhesive Squares /
Patti /
Raisen's /
Ribbon Adhesive /
U Cut It Foam
with the title A Special Thank You To Fiskars!. You can bookmark this page URL http://skinnyminny22.blogspot.com/2011/07/a-special-thank-you-to-fiskars.html. Thanks!


