Sticks to just about every surface...and as our Designer show you today...makes the perfect way to personalize water bottles, luggage tags and yes...your solar lights!
Accent It All comes in 11 fun colors... Apple Cider, Blackout, Daisy Yellow, Goin' Green, Plum Crazy, Pumpkin Patch, Razzle Dazzle Red, Sterling Silver, Tickle Me Pink, Wild Blue Yonder and White Out.
With such a large array of colors at your fingertips and a full 12 by 12 sheet to work with...the skies the limit for what you can make and decorate around your home this summer with GlueArts Accent It All vinyl!
Designer Lesley Langdon has a personalized tag...perfect for those trips to camp, slumber parties and yes...trips out of town. Consider making tags for backpacks, suitcases and even your own laptop case or pool tote!
Glue Girl Patti Milazzo provides the perfect inspiration for a summer party! Have kids decorate their own water bottles! Consider a trip to the dollar store and pick up some reusable bottles, cups, plates and more. Let them decorate their own and take home after the fun!
Designer Jan Hennings has a fun fun holiday set! Don't worry that the 4th is over...we still have Labor Day and many other holidays or celebrations that this idea would be perfect for! Love that she decorated her solar lights! (Now why didn't I think of that!)
Accent It All Beverage Labels
GlueArts Designer: Patti Milazzo
Try making these personalized beverage labels for your next party or get together. You can create any theme for any sized bottle or cup with a few punches or die cuts. And because they’re made with Glue Arts’ Accent It All vinyl, they are waterproof and can easily be removed and transferred to another beverage bottle when your guest is ready.
Supplies:
Glue Arts: Accent It All – Wilde Blue Yonder
*Note* A 12” x 12” sheet of Accent It All can make 10 – 8 ½” x 1 ½” strip labels.
Accent It All - Goin’ Green Accent It All – White Out Accent It All – Apple Cider Accent It All – Pumpkin Patch Accent It All – Tickle Me Pink Accent It All - Daisy Accent It All – Plum Crazy
Other: dry beverage bottles/containers/cups
Instructions:
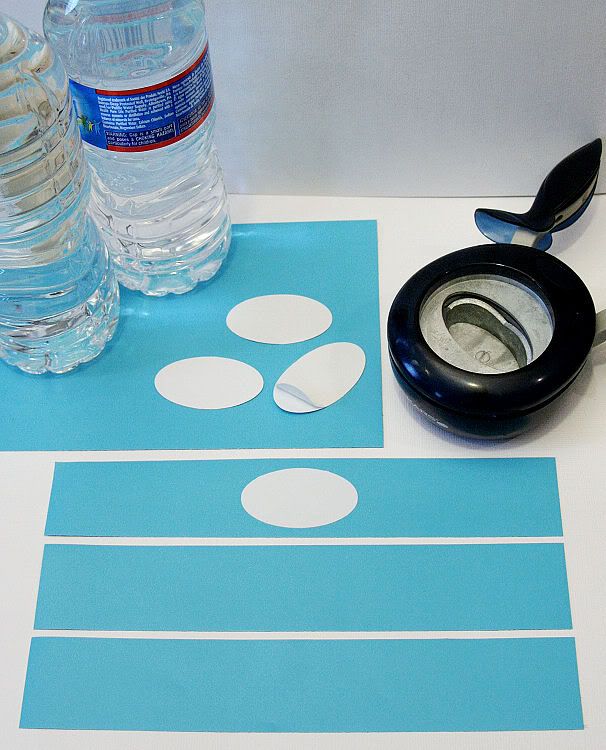
1. Determine the size of your beverage bottle(s) and cut a strip that is wide enough to wrap around the bottle with a ½” overlap. For the water bottles used in my project, I cut the blue vinyl to 8 ½” x 1 ½” which is just a bit wider than the original water bottle labels. Leave the backing on these strips.
2. Punch / die cut a shape to be used for writing guest names and apply it in the center of the strip.
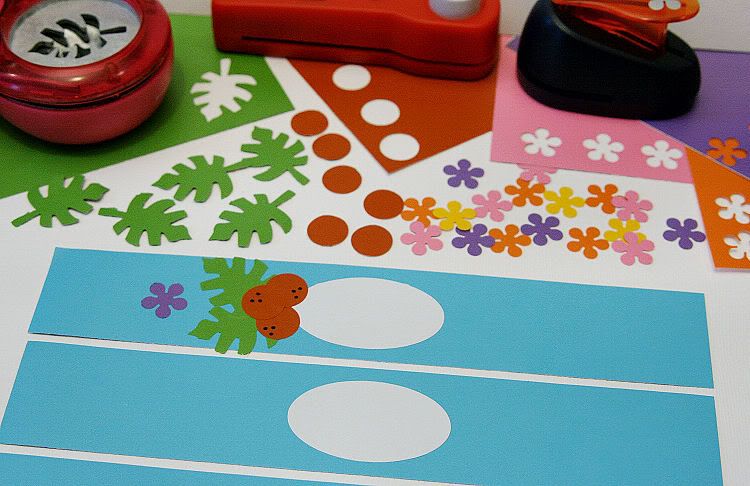
3. Then punch / die cut whatever designs you wish to use to match the theme of your party or gathering. Since my daughter’s birthday is in the summer, she often picks a tropical or Luau theme for her parties. I punched leaves and circles to imitate a palm tree and several flowers from various Accent It All colors. Apply the designs around the label as you wish.
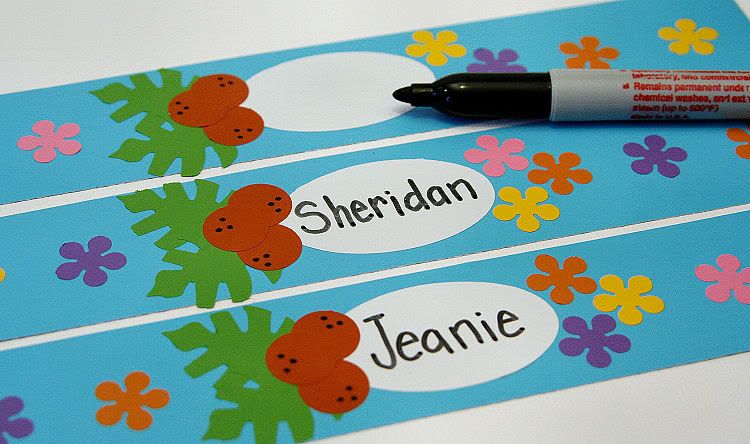
4. Once the labels are decorated, write guest names or have your guests write their own names with a permanent marker.
5. Remove the backing from the label strip and apply the labels to dry beverage bottles. Guests can remove their label and reapply it to another beverage bottle as needed.
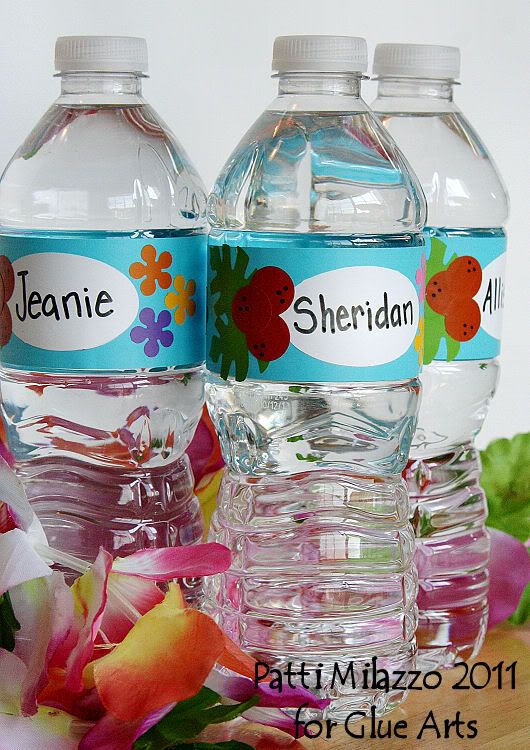
Notes: This project can be as simple or as elaborate as you like. You can make them ahead of time, have the kids create these labels themselves or use it as a party craft. Whatever you decide, these labels are sure to add some color and fun to your next occasion and reduce waste by preventing any drink mix-ups.
Glue Arts: Accent It All – Wilde Blue Yonder
*Note* A 12” x 12” sheet of Accent It All can make 10 – 8 ½” x 1 ½” strip labels.
Accent It All - Goin’ Green Accent It All – White Out Accent It All – Apple Cider Accent It All – Pumpkin Patch Accent It All – Tickle Me Pink Accent It All - Daisy Accent It All – Plum Crazy
Other: dry beverage bottles/containers/cups
Instructions:
1. Determine the size of your beverage bottle(s) and cut a strip that is wide enough to wrap around the bottle with a ½” overlap. For the water bottles used in my project, I cut the blue vinyl to 8 ½” x 1 ½” which is just a bit wider than the original water bottle labels. Leave the backing on these strips.
2. Punch / die cut a shape to be used for writing guest names and apply it in the center of the strip.

3. Then punch / die cut whatever designs you wish to use to match the theme of your party or gathering. Since my daughter’s birthday is in the summer, she often picks a tropical or Luau theme for her parties. I punched leaves and circles to imitate a palm tree and several flowers from various Accent It All colors. Apply the designs around the label as you wish.

4. Once the labels are decorated, write guest names or have your guests write their own names with a permanent marker.

5. Remove the backing from the label strip and apply the labels to dry beverage bottles. Guests can remove their label and reapply it to another beverage bottle as needed.

Notes: This project can be as simple or as elaborate as you like. You can make them ahead of time, have the kids create these labels themselves or use it as a party craft. Whatever you decide, these labels are sure to add some color and fun to your next occasion and reduce waste by preventing any drink mix-ups.
Summer Tags for Summer Travels
GlueArts Designer: Lesley Langdon
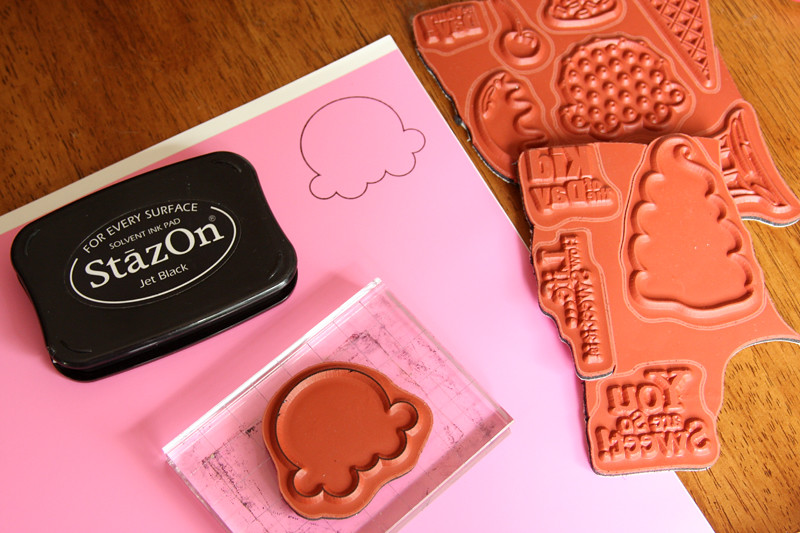
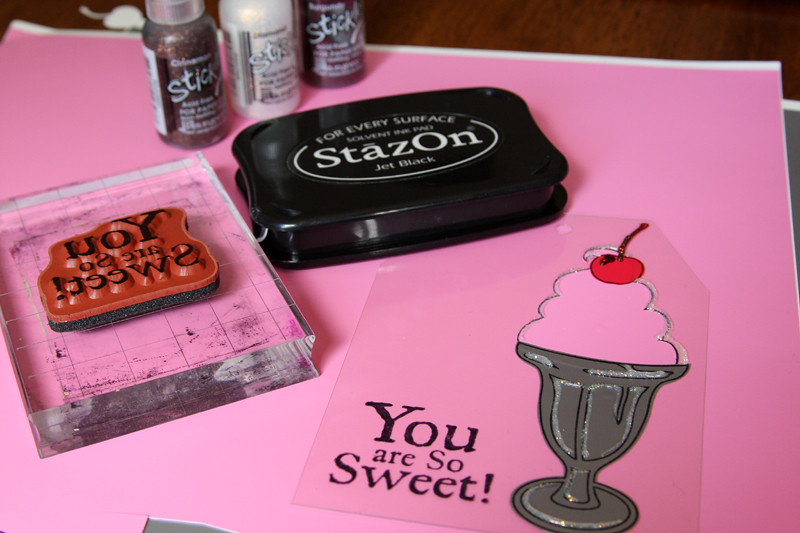
This is a great craft to do with the kids as they head off to summer camps. You can use any stamps you own on Glue Arts Accent-It-All, as long as you use an ink that will stay on (such as Staz-on inks). Simply stamp and cut out your image and apply the vinyl to a piece of thicker plastic (acetate), punch a hole in it, and adhere it to lunch bags, beach bags, back packs, etc. Your child will have no problem telling their items apart from other campers. My daughter loves this tag and tells me that she will be reminded of me whenever she looks at her tag.
Supplies:
Glue Arts Accent-it-All (Tickle Me Pink, Sterling Silver, Razzle Dazzle Red)
Stamps: Unity Stamp Co. (Sweet Life by Samantha Walker)
Ink: Staz-on (Jet Black) by Tsukineko
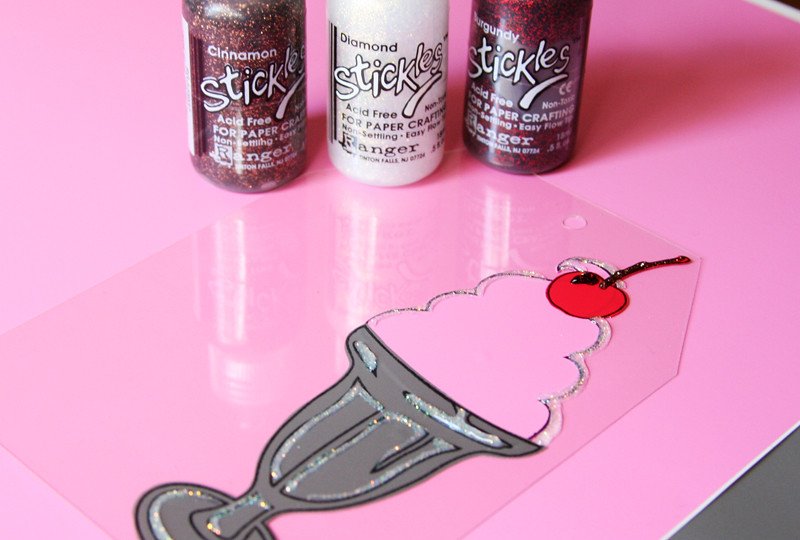
Glitter Glue: Stickles (Cinnamon, Burguny, Diamond)
Other: Acetate, Key Ring
Instructions:1. Stamp images onto Glue Arts Accent-it-All with Staz-on ink (Jet Black), cut out and adhere to a piece of acetate. Note: You can layer the Accent-it-All.

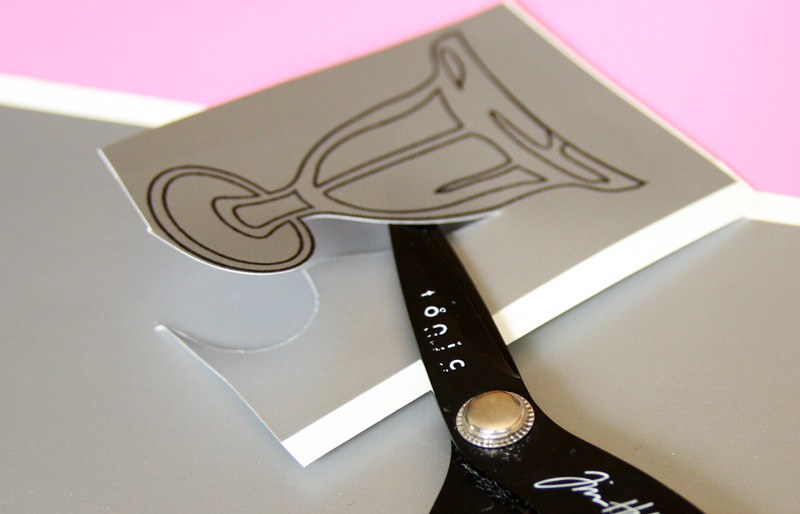
2. To make the acetate into a tag, cut the top corner off one side, then use the scrap piece as a guide to cut the other top corner so that they are even. Punch hole.
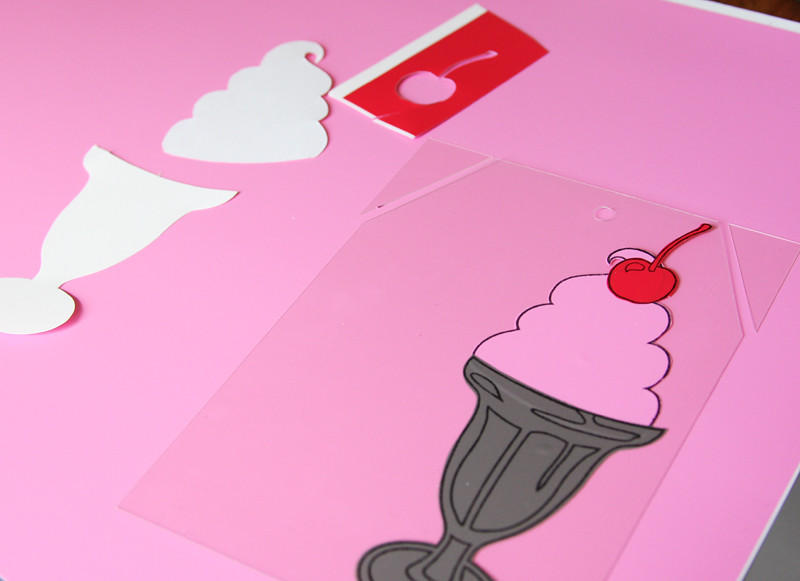

3. Apply Stickles to the images, let dry.
Accent It All 4th of July Party goods
GlueArts Designer: Jan Hennings
Supplies:
Cricut cartridges Storybook and George and Basic Shapes (Provo Craft)
plate, napkin, solar light, decorative bottle.
Step 1
Cut (2) 3"x 12" pieces of red vinyl.
Step 2
Cut (2) 1" x 12" pieces of white vinyl.

Step 3
Adhere the white strip in the center of the red strips.

Step 4
Cut a 4" section of the red/white strip and wrap napkins.

Step 5
Using red vinyl and George and Basic Shapes, cut a 1" star.
Step 6
Adhere the star to the center of the red and white strip.

PLATE:
Step 1
Using red vinyl and Storybook Cartridge, cut 1" 4th of July letters.

Step 2
Adhere to the center of the plate.
CENTERPIECE
Step 1
Cut a 6" piece off the red and white strip.
Step 2
Adhere to the neck of the bottle
Step 3
Adhere a 1" star to the center of the strip.

SOLAR LIGHT
Step 1
Cut a 6" piece off the red and white strip.
Step 2
Adhere to the stem of the solar light.

Step 3
Adhere a 1" star to the center of the strip.

Cut (2) 3"x 12" pieces of red vinyl.
Step 2
Cut (2) 1" x 12" pieces of white vinyl.

Step 3
Adhere the white strip in the center of the red strips.

Step 4
Cut a 4" section of the red/white strip and wrap napkins.

Step 5
Using red vinyl and George and Basic Shapes, cut a 1" star.
Step 6
Adhere the star to the center of the red and white strip.

PLATE:
Step 1
Using red vinyl and Storybook Cartridge, cut 1" 4th of July letters.

Step 2
Adhere to the center of the plate.
CENTERPIECE
Step 1
Cut a 6" piece off the red and white strip.
Step 2
Adhere to the neck of the bottle
Step 3
Adhere a 1" star to the center of the strip.

SOLAR LIGHT
Step 1
Cut a 6" piece off the red and white strip.
Step 2
Adhere to the stem of the solar light.

Step 3
Adhere a 1" star to the center of the strip.

How would YOU like a chance to win a sheet (12 by 12) of each color plus one additional Blackout?! Simply post a comment and we'll enter you to win! Next Monday we'll select one random winner to enjoy our Accent It All vinyl!
You have read this article Accent It All /
Jan /
Lesley /
Patti
with the title Accent It All This Summer!. You can bookmark this page URL http://skinnyminny22.blogspot.com/2011/07/accent-it-all-this-summer.html. Thanks!


