

It's Crate Paper Week!
And are we ever excited about that! The Glue Girls were all sent the beautiful Crate Paper Restoration line to work with and work with it...they have! Plus we are so fortunate to have one of the Crate Paper Girls, Michelle Lanning on our very own design team! All week long we'll be sharing beautiful ways to use the Crate Paper Restoration line and our outstanding lineup of adhesive products!!!

Trinket Box
Designer: Patti Milazzo
Designer Note: I find that after distressing any paper it tends to tear more easily even once it’s dried completely. So using the Adhesive Squares over one of the Glue Glider Pro Adhesive Cartridges is my preferred choice.
Supplies:
Glue Arts:
Glue Glider Pro with
1/4 Perma Tac Cartridge Refill - Pro
Mini Adhesive Squares
Adhesive Squares
3D Combo Pac – U Cut It
Crate Paper:
Restoration – Heirloom, Slipcover, Lace, Doilies and Refinish pattern papers; Restoration Chipboard Accents; Restoration Phrase Stickers
Other: 3” wooden craft box; 4” - 3/8” ribbon; 24” twine; glitter glue; crackle medium; brown ink
Instructions:
1. Using Glue Glider Pro Perma Tac Adhesive, cover wooden craft box with Crate Paper Restoration pattern paper and set aside.
2. Punch a small heart; ink it and adhere it to the tag sticker from the Restoration Phrase Stickers (cover the back with pattern paper); coat the heart with glitter glue and let dry.
3. When the glittered heart is dry, coat the entire sticker with a crackle accent and let dry.
4. Cut out doilies and flowers and ink edges.
5. Mist flowers and doilies lightly with water; crumple carefully and let dry.
6. When pieces are dry, coat edges with glitter glue and again let dry.
7. Layer doilies and flowers onto the top of the box using Adhesive Squares and U-Cut-It Foam Adhesive.

9. Apply a Mini Adhesive Square to both the front and back side rim of the box top. Wrap the twine around the top rim several times - the Mini Adhesive Square will be covered up by the twine, but help it stay in place.


Much Thanks Card
Designer: Danielle Flanders
Supplies:
Restoration Lace paper, Restoration Phrases and Restoration Borders - Crate Paper
Adhesive Squares and U Cut It 3D Foam Adhesive - Glue Arts
Seam binding - www.zipperstop.com
Olive Vine and Key Lime Pie Glimmer Mists by Tattered Angels
Pearls - Attic Treasures by Melissa Frances
Corner Rounder
Restoration Lace paper, Restoration Phrases and Restoration Borders - Crate Paper
Adhesive Squares and U Cut It 3D Foam Adhesive - Glue Arts
Seam binding - www.zipperstop.com
Olive Vine and Key Lime Pie Glimmer Mists by Tattered Angels
Pearls - Attic Treasures by Melissa Frances
Corner Rounder

Step 1: Cut a length of seam binding. Spray with Key Lime Pie and Olive Vine Glimmer Mists. Dry with a heat gun for fast drying.

Step 2: Create a card base from the yellow paper. Round the 4 corners. Cut a strip of 2 of the border stickers and attach them to the card front.

Step 3: Add chipboard frame over the top, then the chipboard flower. Tie seam binding into a bow. Add to card with a Glue Arts Adhesive Square. Adhere a small chipboard circle in center of bow and a pearl.

Step 4: Adhere chipboard corner. Adhere "Much Thanks" sticker with Glue Arts U Cut It 3D Adhesive Foam Blanks.


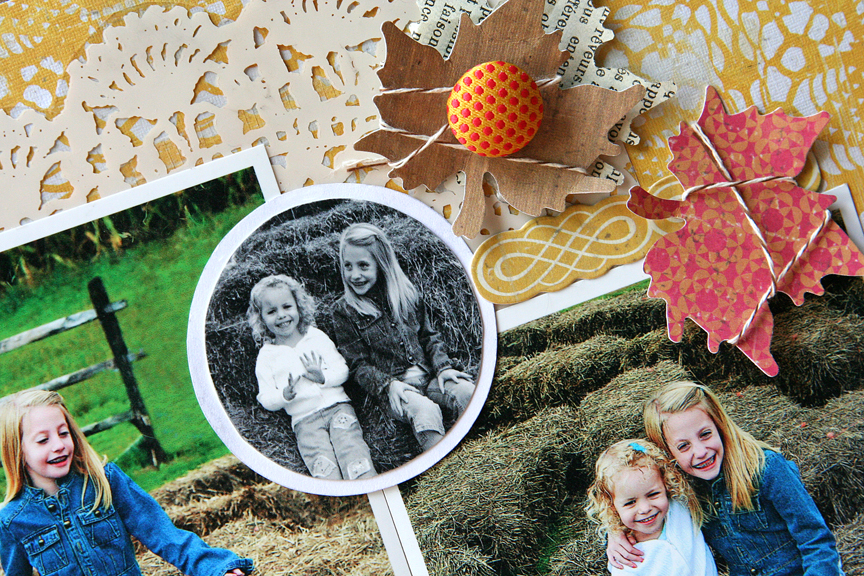
Harvest of Happiness Layout
Designer: Danielle Flanders

So tell us...are you a fan of Crate Paper? Love Glue Arts products??
Would you like to win some products from Glue Arts and Crate Paper?
Well all we ask is for you to take a moment and leave us a comment today! We'll enter you to win this beautiful assortment from the Crate Paper Restoration line and of course...a Glue Glider Pro, Extreme Adhesive Squares and our 3D Combo Pac!!
And speaking of winners....last week was so much fun for us and we could tell without a doubt that you loved our pairing up with May Arts. How could you not love all those beautiful products and those ribbons??!! So without further ado the winner of the May Arts holiday ribbons and our Glue Arts products is:
Froggietalks said...
Thank you, thank you, thank you!! I have been wanting to know how to go around a circle with ribbon for a long time, and the steps you showed make it click for me. I love all the projects, and thanks for the chance to win!

Congrats congrats to you!!! Please email us at Gluegirl@gluearts.com with your contact information!! And one more surprise...we're giving away to one additional winner this beautiful assortment of May Arts ribbons and our Ribbon Adhesive. That winner is:
I like that we get the directions to make every project you show on your site. These projects are wonderful. I love that bunched up ribbon.
See you tomorrow with more Crate Paper Restoration and GLUE ARTS!!
You have read this article 3D Combo Pac /
Adhesive Squares /
Danielle /
Glue Gilder Pro /
Mini Adhesive Squares /
Patti /
Perma Tac
with the title Crate Paper Restoration Week!!!. You can bookmark this page URL http://skinnyminny22.blogspot.com/2010/11/crate-paper-restoration-week.html. Thanks!


