

Good philosophy for life don't you think?!
Today's projects are a fun mix of perpetual calendars,a mini book from Designer Grace Tolman about trips to the Zoo and we loved the framed piece by Designer Jan Hennings that reminds us to "Just Be"!

Just Be Frame
GlueArts Designer: Jan Hennings
Pin ItSupplies:
GlueArts Glue Gun, Melt Sticks
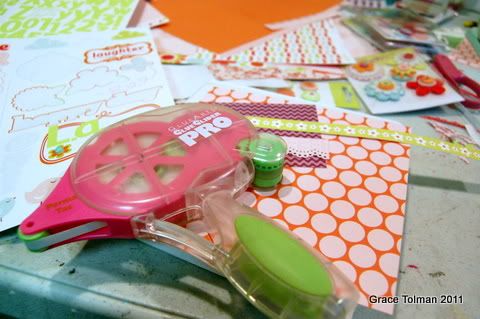
GlueArts Glue Glider Pro Perma Tac
Pebbles Happy Go Lucky Paper & Embellishment Collection
8"x8" frame from Hobby Lobby
Step 1-Remove the back from the frame.

Step 2-Use Splendid to cover the back board of the frame.

Step 3-Cut stems from Thrilled paper.

Step 4-Adhere stems with Perma Tac.

Step 5-Decorate as desired.

Step 6-Using Glue Arts Hot Glue Gun and Melt Sticks, glue the back in place.

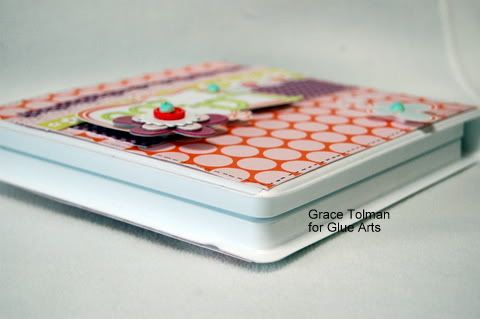
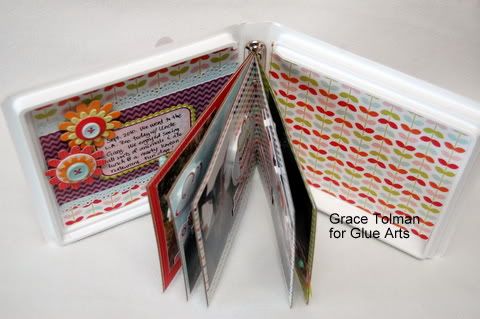
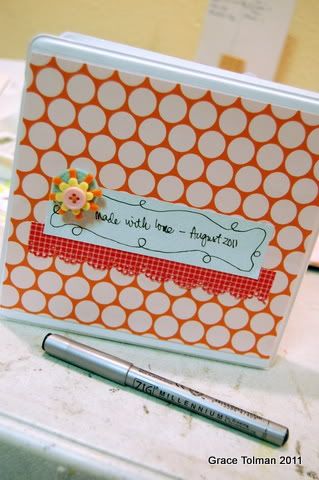
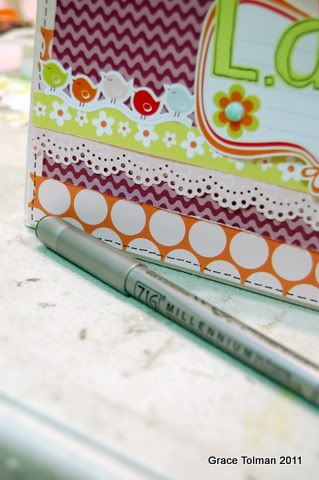
LA Zoo Mini Book
GlueArts Designer: Grace Tolman
I found this old CD holder at the thrift store last week for 49 cents and couldn’t resist making it as my foundation for this mini. The Happy Go Lucky collection from Pebbles with it’s fun bright and happy designs made this project super easy to put together.
Pin It
Supplies:
Glue Arts Perma Tac
Glue Arts U Cut it Foam
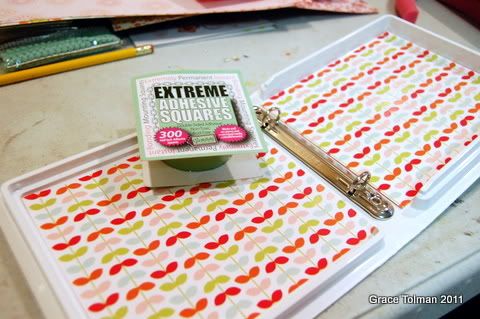
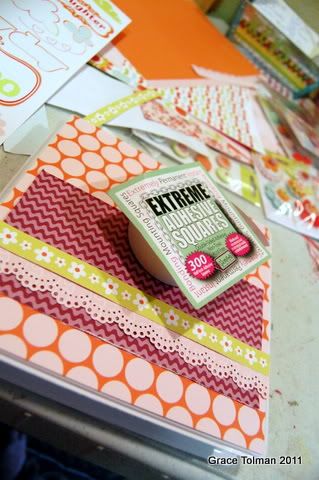
Glue Arts Extreme Square
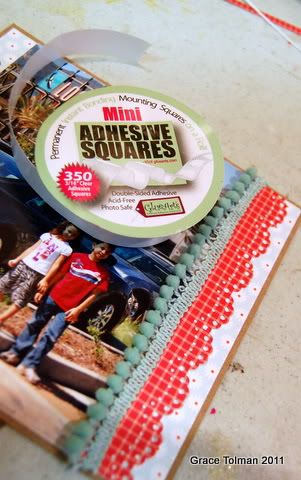
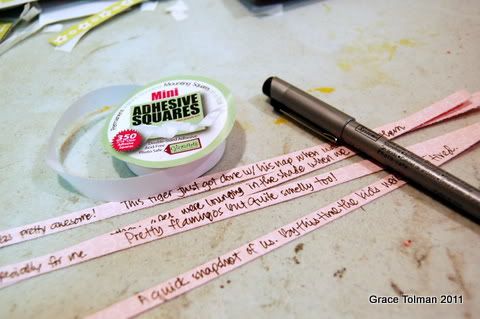
Glue Arts Mini Squares
Cardstock- The Paper Studio
Pattern papers, stickers and embellishments- Happy Go Lucky, Pebbles
Border punch- Martha Stewart Crafts
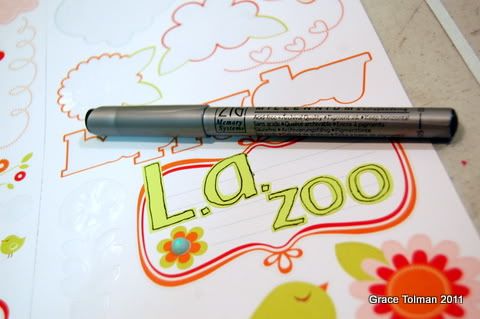
Black pen- Millenium, Zig
Recycled CD container
Instructions:
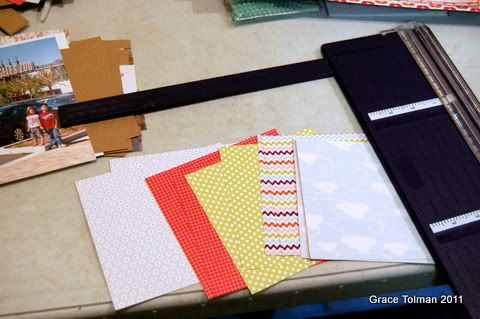
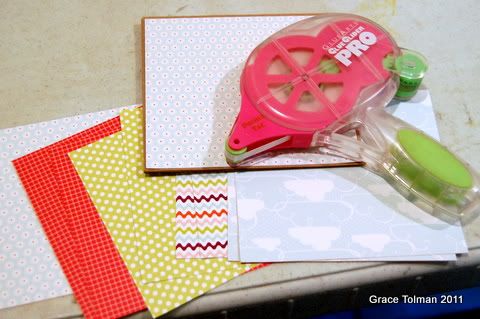
1. Gather your supplies
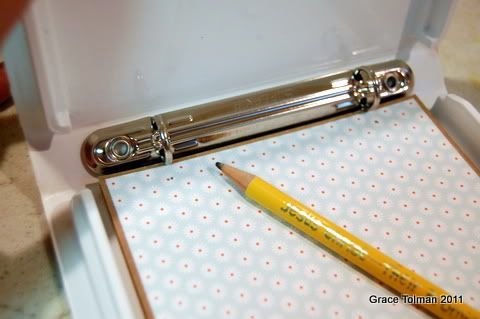
2. Measure the inside of your box and cut out cardstocks to fit the measurement. This will be the pages for your mini.

3. Cut out pattern papers that is ¼” smaller than the cardstock blocks and adhere them to the kraft cardstock with perma tac.
4. Make the holes for the papers to go in the binder. I used some eye balling technique here but you can always measure for more precise holes.
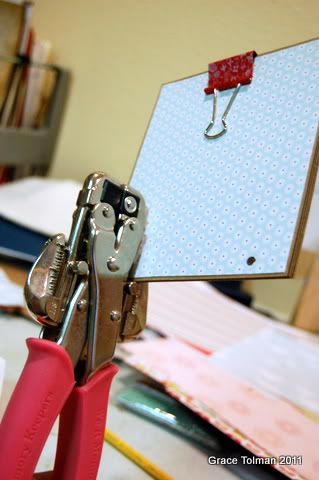
5. Next, I measured the inside covers of the CD container, cut out some pattern paper to cover that part and then adhered them with some extreme
squares. The container has very glossy texture and I wanted to make sure that the papers adhere well.
6. Then, I worked on filling my mini pages with pictures and embellishments. I used some mini squares adhesive to add some pom pom trim.
7. After that, I worked on the front of the mini, cutting papers to match my box measurements and adhering them with a combination of extreme squares and perma tac adhesives.
8. Then, using the Pebbles sticker sheets, I worked on the title block. To make the letters pop out better, I added some pen lines around the edges of the letters.
9. Next, I cut out some strips of light colored pattern paper, added my handwritten words to them and then adhered them to the mini pages with mini squares adhesives.
10. I used the same paper as I did in the front for my back cover. Added some handwritten signature and finished if off with a layered flower.
11. After studying my book, I decided to add some pen stitching to the edges of the front cover for a more finished look.
Happy September 1st to you! Hard to believe the summer is almost over (although you would not know it by the temperature today!) and that fall is right around the corner!


We'll select one random winner on Monday!
Be sure to stop by the Pebbles blog for more fun!
Tune back in tomorrow for this project from Designer Jenny Chesnick!
Thanks for being a GlueArts fan! Remember you can always find all your favorite GlueArts products at our online store!
You have read this article Glue Arts Glue Gun /
Glue Gilder Pro /
Jan /
Mini Adhesive Squares /
Pebbles /
Perma Tac
with the title Just Be With Pebbles & GlueArts. You can bookmark this page URL http://skinnyminny22.blogspot.com/2011/09/just-be-with-pebbles-gluearts.html. Thanks!


