It's amazing!
Often we take for granted the endless option we have at our fingertips to make personalized gifts bags and more with today's craft tools.
Designer Ania Lexander shows just how easy it is with Scor-Pal and GlueArts to make your own unique gift bag! Scor here, scor there, fold, fold, adhere and you've got yourself one sweet bag.
Designer Lisa Day is freshly returned from ScrapFest and make a layout about her perspective of first time eating out along, trying mussels, boarding a plane outside and yes...teaching on a stage! She used the Scor-Pal to create pleated embellishments for her page that are eye-catching and just the right touch!
Supplies Used:
Glue Arts PermaTac Adhesive and Applicator
Scor-Pal
Studio Calico Glee Club Kit
Instructions:
Start with your background by adhering cardstock and border stickers onto your background paper.

I wanted to create neat little pleated squares and folding them by hand would never give me the clean folds I wanted. Using the scor-pal helped me create really quick and neat folds to add to my layout!

I started with a 1 1/2" x 12" strip of paper and then scored at intervals of 1/4", then at 1/2" from that and then 1/4" inch from that and get repeating the pattern. Then I folded on the pleat score and cut my square to 1 1/2".

Then I arranged my pictures and my squares into a grip pattern starting from the bottom left and worked my way up so I could get them evenly placed.

After I had everything arranged I ran my layout through the sewing machine and then added my title, journaling and extra embellishments and then added some handstitching to tie it all together!


Glue Art Supplies:
Glue Glider Pro - Extreme Tac
Glue Glider Pro - Perma Tac
Extreme Adhesive Squares
Raisens
Other: Websters Page, Score-Pal, Prima lace, eyelets, Crop-a-dile
Note: I found the instructions to this one at a Norwegian blog: http://lenesplass.blogspot.com/2011/09/gavepose-tutorial-et-minikurs.html
Instructions:
This little bag is created outta a sheet of lettersize (8.5x11")
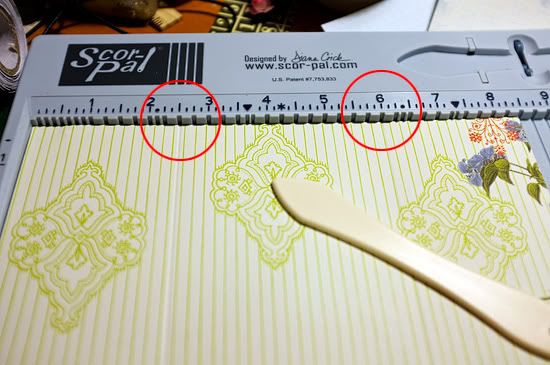
Place the short side (8.5") down on the Scor-Pal and score at the 2.5" and 6" side.
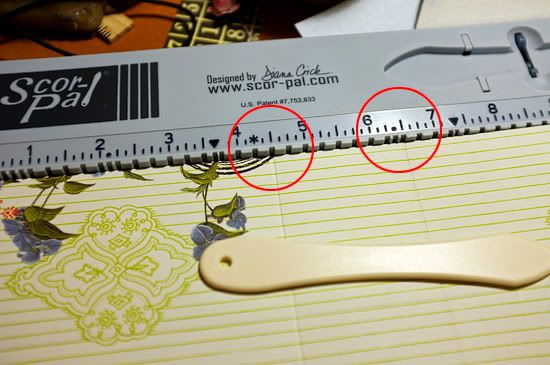
Turn the paper around, laying down with the long side up (11"), and scor at the 4.5" and 6.5" side.
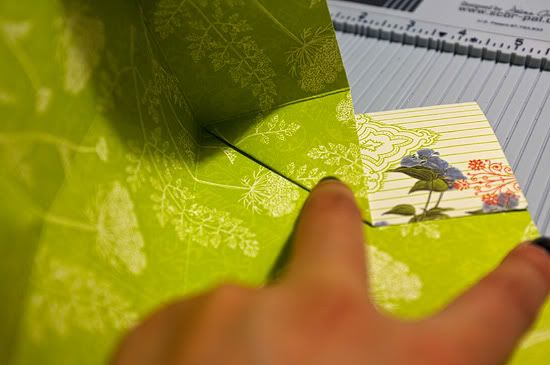
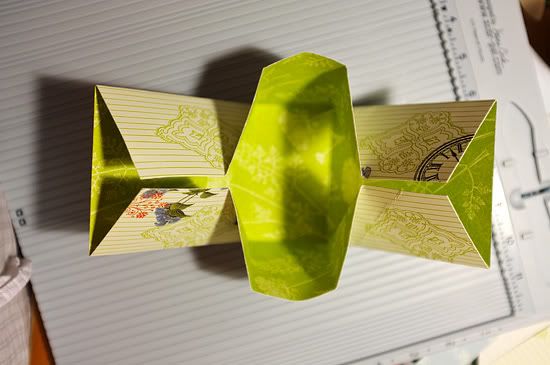
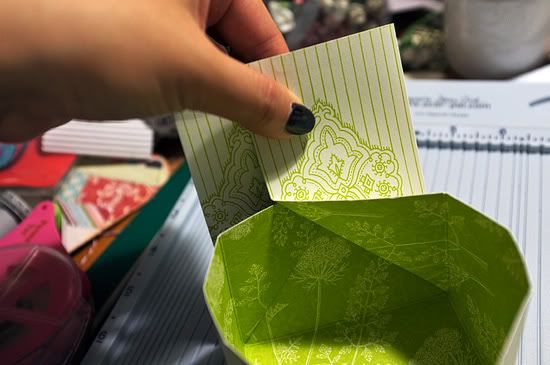
I'm not sure how to word this. But - fold all the scores. Then - taking the long side - fold along both the long and short side and make a new fold lined up with the other folds...
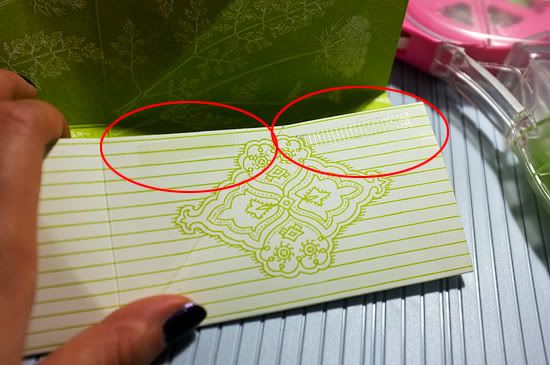
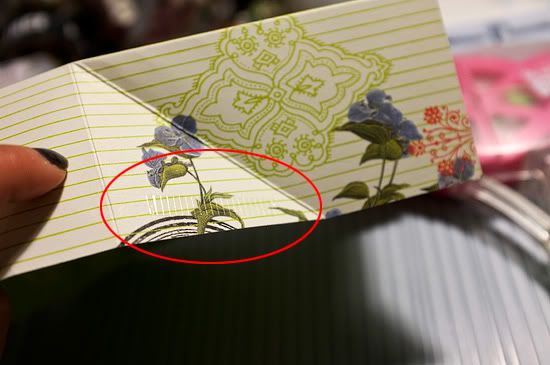
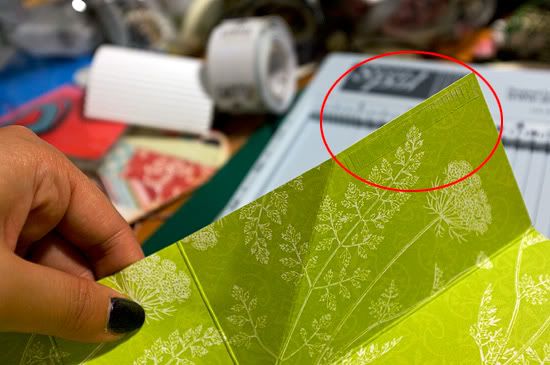
Then - when holding the bag like on picture five - look at where you'll need to place the adhesive at. At one fold (the inner one) you need the adhesive at both places at the same side, while on the other fold, the adhesive has to be on each their side of the scorings. Just fold - it's easier to see where's what when you're holding the bag in your own hands.
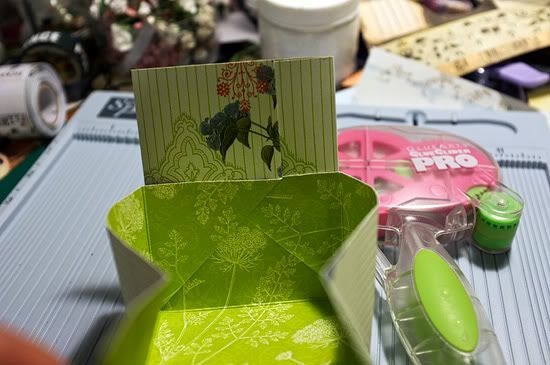
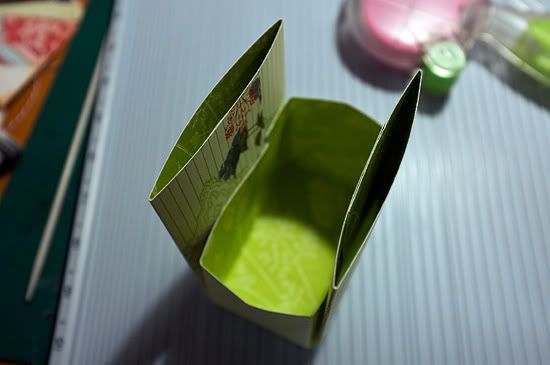
The bag, ready to be decorated!
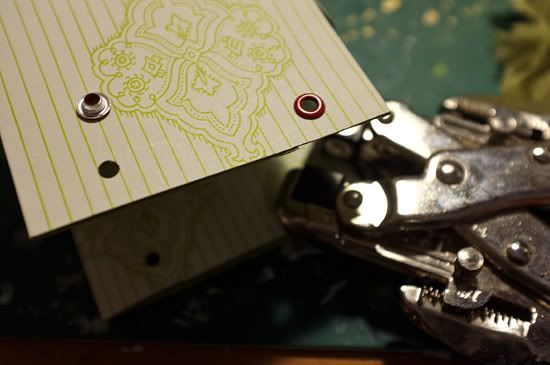
I punched out holes in the sides and attached eyelets to them, to reinforce the holes.
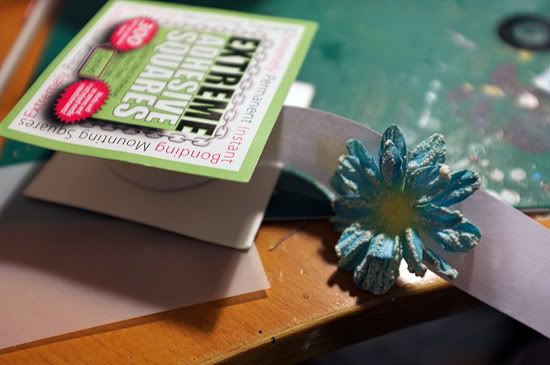
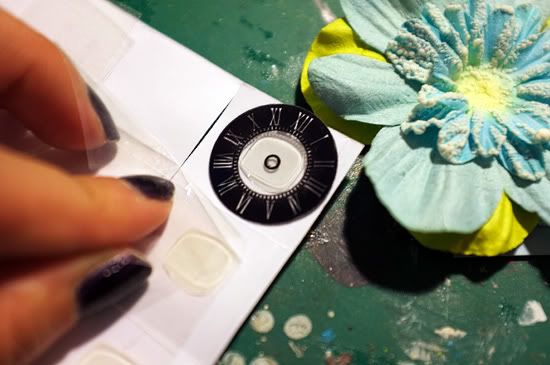
Then I added bits and pieces and placed them together on a square tag, before adhering the tag to the front of the bag.
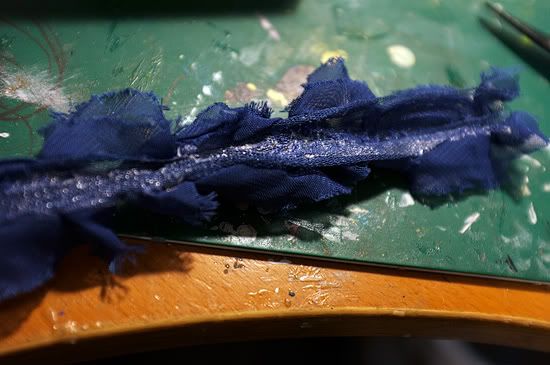
I decided to decorate the sides with the lovely flower-ribbon from Wesbters's Pages. To attach the ribbon to the bag I decided to use Extreme Tac - worked swell!
Isn't it amazing all the different ways you can use a Scor-Pal! We'd like for you to be able to try one out as well! Simply post a comment today...and we'll consider you entered. We'll select one random winner on Monday to win the new 12 by 12 Scor-Pal along with our 3D Combo Pac {a personal favorite!}, Adhesive Squares and our Ribbon Adhesive!!
Often we take for granted the endless option we have at our fingertips to make personalized gifts bags and more with today's craft tools.
Designer Ania Lexander shows just how easy it is with Scor-Pal and GlueArts to make your own unique gift bag! Scor here, scor there, fold, fold, adhere and you've got yourself one sweet bag.
Designer Lisa Day is freshly returned from ScrapFest and make a layout about her perspective of first time eating out along, trying mussels, boarding a plane outside and yes...teaching on a stage! She used the Scor-Pal to create pleated embellishments for her page that are eye-catching and just the right touch!
ScrapFest Layout
GlueArts Designer: Lisa Day
Supplies Used:
Glue Arts PermaTac Adhesive and Applicator
Scor-Pal
Studio Calico Glee Club Kit
Instructions:
Start with your background by adhering cardstock and border stickers onto your background paper.

I wanted to create neat little pleated squares and folding them by hand would never give me the clean folds I wanted. Using the scor-pal helped me create really quick and neat folds to add to my layout!

I started with a 1 1/2" x 12" strip of paper and then scored at intervals of 1/4", then at 1/2" from that and then 1/4" inch from that and get repeating the pattern. Then I folded on the pleat score and cut my square to 1 1/2".

Then I arranged my pictures and my squares into a grip pattern starting from the bottom left and worked my way up so I could get them evenly placed.

After I had everything arranged I ran my layout through the sewing machine and then added my title, journaling and extra embellishments and then added some handstitching to tie it all together!


Hostess-giftbag
GlueArts Designer: Ania Lexander
Glue Art Supplies:
Glue Glider Pro - Extreme Tac
Glue Glider Pro - Perma Tac
Extreme Adhesive Squares
Raisens
Other: Websters Page, Score-Pal, Prima lace, eyelets, Crop-a-dile
Note: I found the instructions to this one at a Norwegian blog: http://lenesplass.blogspot.com/2011/09/gavepose-tutorial-et-minikurs.html
Instructions:
This little bag is created outta a sheet of lettersize (8.5x11")

Place the short side (8.5") down on the Scor-Pal and score at the 2.5" and 6" side.

Turn the paper around, laying down with the long side up (11"), and scor at the 4.5" and 6.5" side.


I'm not sure how to word this. But - fold all the scores. Then - taking the long side - fold along both the long and short side and make a new fold lined up with the other folds...


Then - when holding the bag like on picture five - look at where you'll need to place the adhesive at. At one fold (the inner one) you need the adhesive at both places at the same side, while on the other fold, the adhesive has to be on each their side of the scorings. Just fold - it's easier to see where's what when you're holding the bag in your own hands.


The bag, ready to be decorated!

I punched out holes in the sides and attached eyelets to them, to reinforce the holes.


Then I added bits and pieces and placed them together on a square tag, before adhering the tag to the front of the bag.

I decided to decorate the sides with the lovely flower-ribbon from Wesbters's Pages. To attach the ribbon to the bag I decided to use Extreme Tac - worked swell!
Isn't it amazing all the different ways you can use a Scor-Pal! We'd like for you to be able to try one out as well! Simply post a comment today...and we'll consider you entered. We'll select one random winner on Monday to win the new 12 by 12 Scor-Pal along with our 3D Combo Pac {a personal favorite!}, Adhesive Squares and our Ribbon Adhesive!!
Now how would you like another way to win??! That's right today we invite you to visit the Scor-Pal Facebook page and "Like Them". Then post a hello on their Facebook wall for another chance to win products from Scor-Pal and GlueArts! Hurry though and don't delay!
And we hope you'll stop by the Scor-Pal blog to see more projects and creations using both GlueArts Adhesives and Scor-Pal tools!
You have read this article Ania /
Extreme Adhesive Squares /
Extreme Tac /
Glue Gilder Pro /
Lisa /
Perma Tac /
Raisen's /
Scor-Pal
with the title Scor-Pal and GlueArts Make the Perfect Gift Bag!. You can bookmark this page URL http://skinnyminny22.blogspot.com/2011/09/scor-pal-and-gluearts-make-perfect-gift.html. Thanks!


