There is a crisp feel to the air...
Pumpkins and fall decor is being brought outside..
Trees are starting to change and temperatures are starting to cool off!
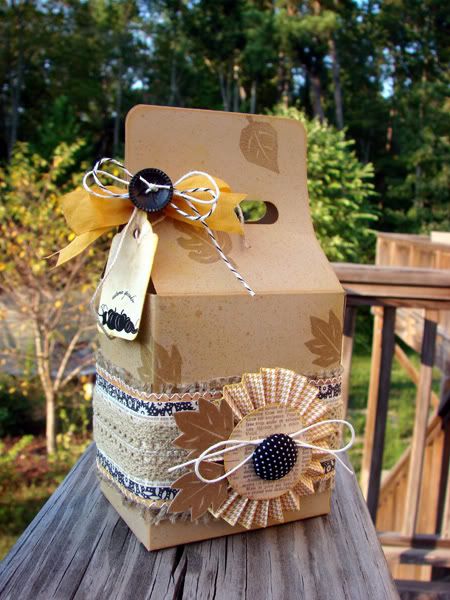
Which makes us happy!! So does the two projects shared today! Designer Audrey Pettit used the Scor-Pal to create a beautiful, handmade gift box! How amazing is that?! And Designer Lesley Langdon used the Scor-Buddy to give dimension by dry embossing a design onto her background to mimic the pattern on the ice cream cone! What a great idea!!
Supplies:
Glue Arts Ribbon Adhesive
Glue Arts Glue Gun and Glue Melt Sticks
Glue Arts Extreme Adhesive Squares
ScorPal 12" Scoring Tool
Kraft Outlet cardstock, hang tag string, baker's twine and tag
My Mind's Eye patterned paper
Basic Grey rub-ons
Stampin'Up stamps, embossing powder, and punches (circle, corner rounder, window slot)
Tsukineko ink
Crate Paper brad
vintage button and seam binding
burlap
1. To create your gable box, you need one sheet of 8.5 x 11 cardstock. Score the long (11") side of cardstock at 1/2", 3 1/2", 5 3/4", and 8 3/4".
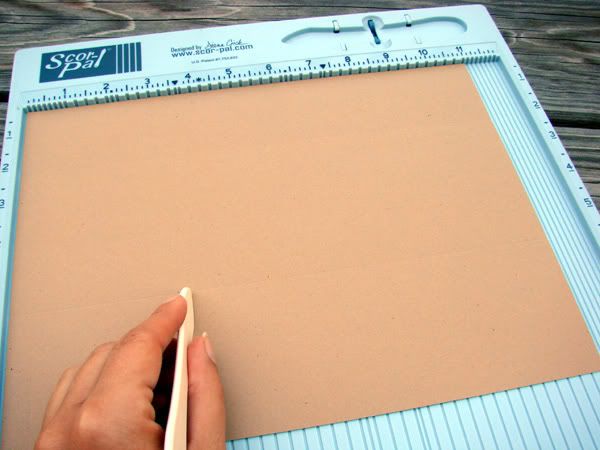
2. Score the 8.5" side at 3" and 6 1/2".
3. Fold the bottom of the card stock (the portion with the short scored sections) under and stamp across the exposed area of card stock, if you wish. I added stamped and embossed fall leaves to my box, but it looks equally cute left plain.
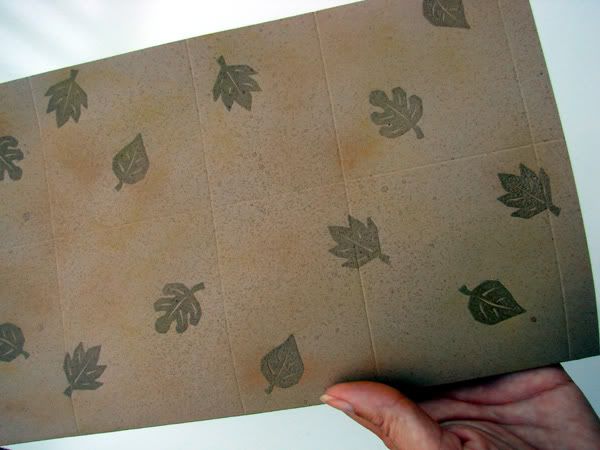
4. Cut each score line up to the middle, intersecting score line to create flaps as shown. On one edge of the card stock, you’ll have 1/2” flaps. Cut off the two 1/2" flaps on the ends, leaving the center flap.
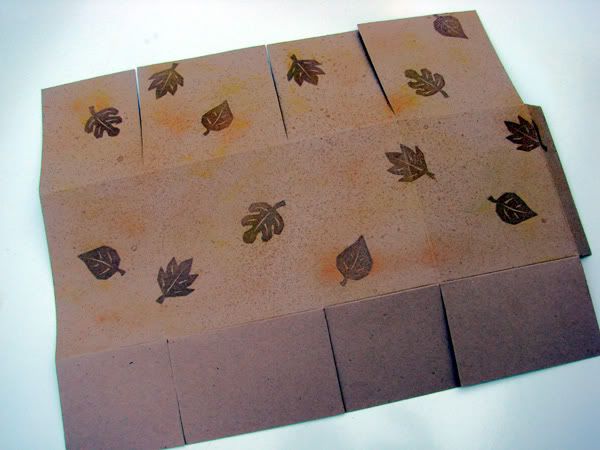
5. Now it's time to add adhesive. Believe it or not, Glue Arts Ribbon Adhesive is perfect for this job. Not only is it super strong, which you need to hold together your box, but the liner is extremely helpful in this step.
Place Ribbon Adhesive on the inside flaps as shown here to create interior sections of the box. Leave the liner on the adhesive.
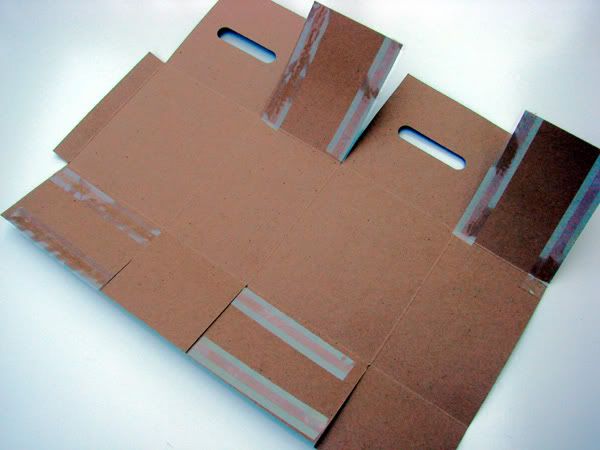
6. Place Ribbon Adhesive on the 1/2" flap. Be sure to place the adhesive strip on the front (stamped) side. Leave the liner on the adhesive.
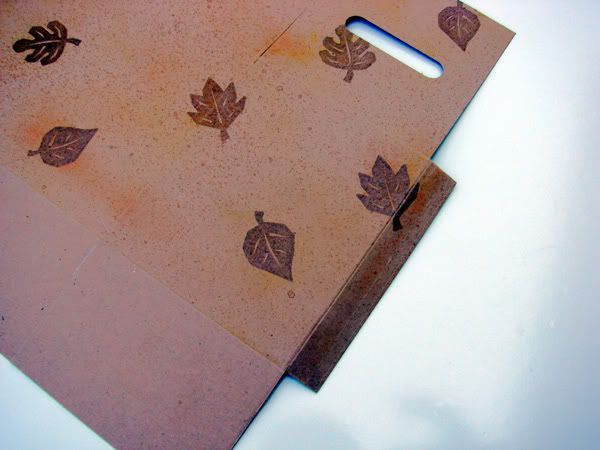
7. Create handles for your box using a punch on the larger two top rectangles, as shown. Use a corner rounder to round the handle corners.
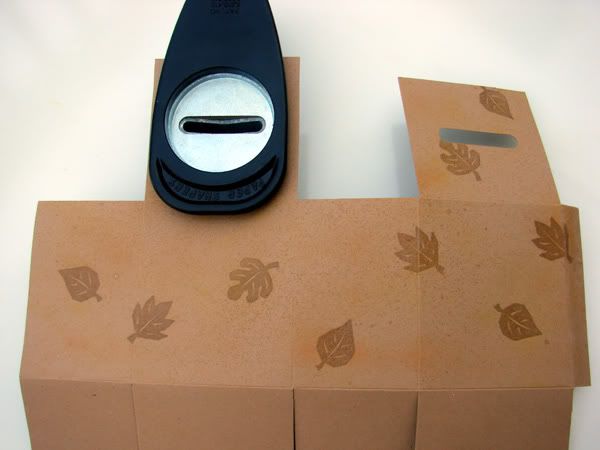
8. Peel the liner from the 1/2" flap on the side of the box , and fold the box into shape so that the ends meet the adhesive. If necessary, fold the flaps out of your way.
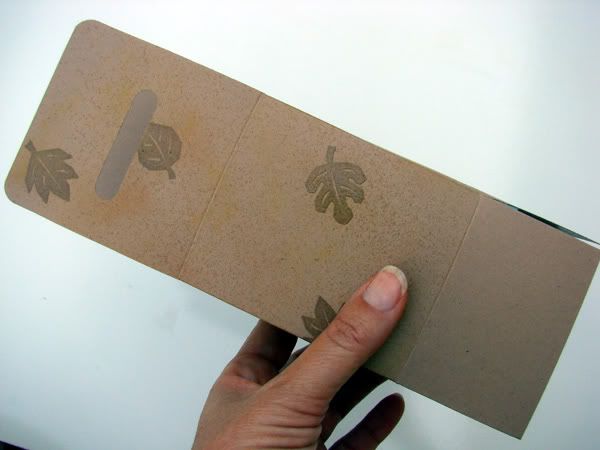
9. Peel the liner from the side flaps and adhere them to the interior sides of the box. This adds to the stability of the finished box.
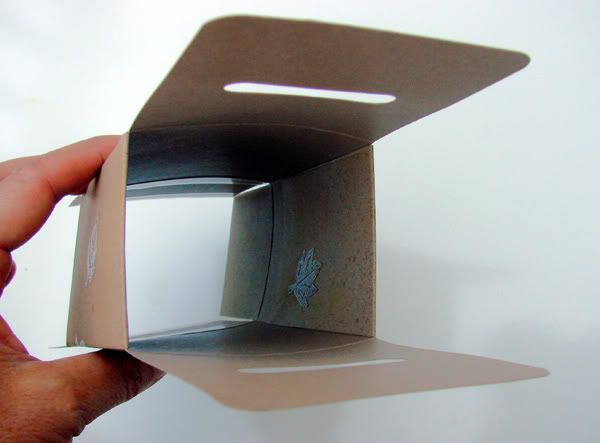
10. For the bottom of the box, fold in the two smaller flaps. Peel the liner from one of the larger flaps, and secure it to the folded smaller flaps. Peel the liner from the second larger flap, and seal the box.
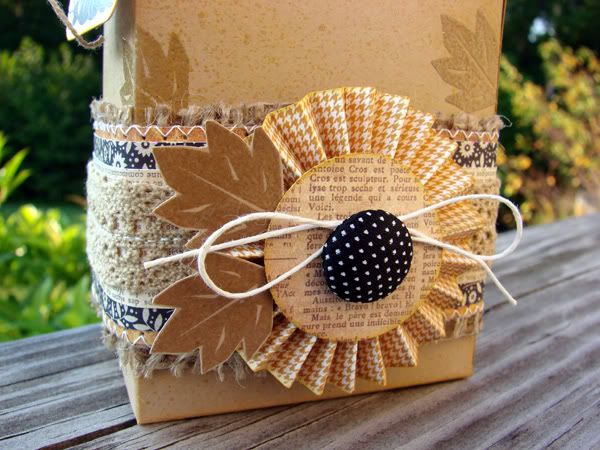
11. Now have fun decorating and embellishing your finished box. I added layered burlap, patterned paper, and trims around the center, and dressed it up with a fun rosette, decorative brad, and embossed leaves. Glue Arts Glue Melt Sticks and Extreme Adhesive Squares hold everything in place.
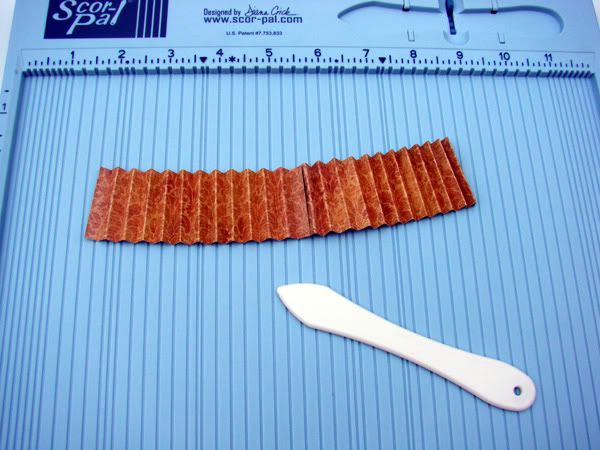
Rosettes are a breeze to make with the ScorPal tool. Simply cut a strip of paper, and score at 1/4" intervals down the length of the strip. Accordion-pleat the paper, adhere ends into a ring, push down to flatten, and glue to a scrap circle. Glue Arts Glue Gun and Glue Melt Sticks makes adhering your rosette quick and easy.
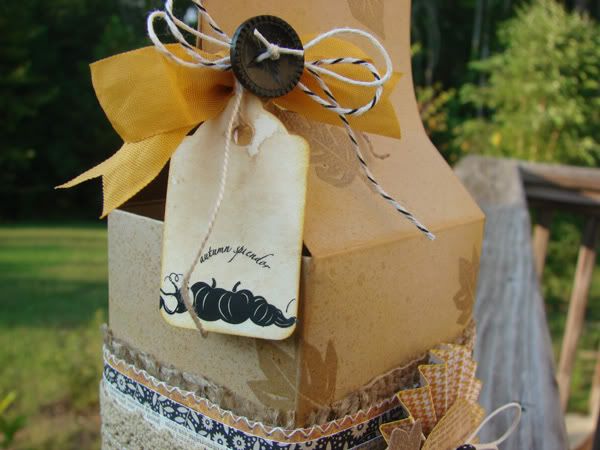
Tie the handle up with some pretty trims and perhaps a tiny tag, and you are ready to fill with your favorite treats.
4. To make your 5" x 5" card base, cut a piece of brown cardstock 5" x 10". Use your Scor-Buddy to score at 5" (good side up). Fold in half.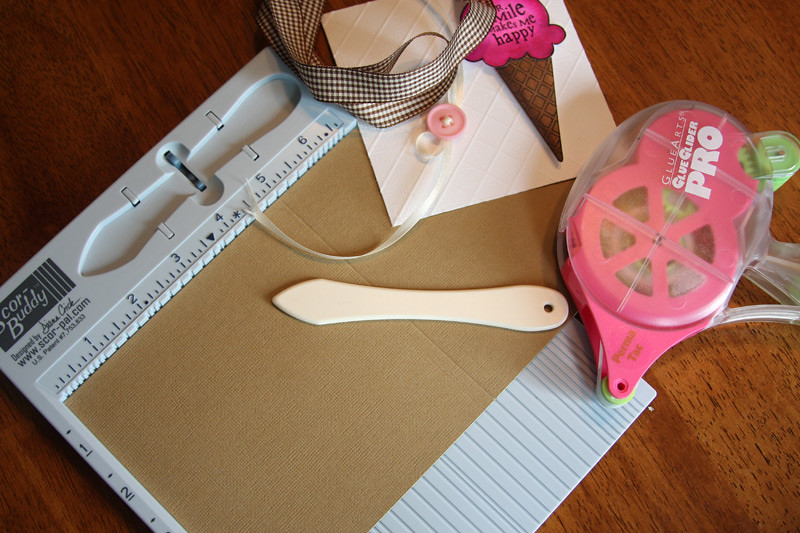
Pumpkins and fall decor is being brought outside..
Trees are starting to change and temperatures are starting to cool off!
Which makes us happy!! So does the two projects shared today! Designer Audrey Pettit used the Scor-Pal to create a beautiful, handmade gift box! How amazing is that?! And Designer Lesley Langdon used the Scor-Buddy to give dimension by dry embossing a design onto her background to mimic the pattern on the ice cream cone! What a great idea!!
Autumn Splendor Gable Box
GlueArts Designer: Audrey Pettit
Pin ItSupplies:
Glue Arts Ribbon Adhesive
Glue Arts Glue Gun and Glue Melt Sticks
Glue Arts Extreme Adhesive Squares
ScorPal 12" Scoring Tool
Kraft Outlet cardstock, hang tag string, baker's twine and tag
My Mind's Eye patterned paper
Basic Grey rub-ons
Stampin'Up stamps, embossing powder, and punches (circle, corner rounder, window slot)
Tsukineko ink
Crate Paper brad
vintage button and seam binding
burlap

1. To create your gable box, you need one sheet of 8.5 x 11 cardstock. Score the long (11") side of cardstock at 1/2", 3 1/2", 5 3/4", and 8 3/4".

2. Score the 8.5" side at 3" and 6 1/2".
3. Fold the bottom of the card stock (the portion with the short scored sections) under and stamp across the exposed area of card stock, if you wish. I added stamped and embossed fall leaves to my box, but it looks equally cute left plain.

4. Cut each score line up to the middle, intersecting score line to create flaps as shown. On one edge of the card stock, you’ll have 1/2” flaps. Cut off the two 1/2" flaps on the ends, leaving the center flap.

5. Now it's time to add adhesive. Believe it or not, Glue Arts Ribbon Adhesive is perfect for this job. Not only is it super strong, which you need to hold together your box, but the liner is extremely helpful in this step.
Place Ribbon Adhesive on the inside flaps as shown here to create interior sections of the box. Leave the liner on the adhesive.

6. Place Ribbon Adhesive on the 1/2" flap. Be sure to place the adhesive strip on the front (stamped) side. Leave the liner on the adhesive.

7. Create handles for your box using a punch on the larger two top rectangles, as shown. Use a corner rounder to round the handle corners.

8. Peel the liner from the 1/2" flap on the side of the box , and fold the box into shape so that the ends meet the adhesive. If necessary, fold the flaps out of your way.

9. Peel the liner from the side flaps and adhere them to the interior sides of the box. This adds to the stability of the finished box.

10. For the bottom of the box, fold in the two smaller flaps. Peel the liner from one of the larger flaps, and secure it to the folded smaller flaps. Peel the liner from the second larger flap, and seal the box.
11. Now have fun decorating and embellishing your finished box. I added layered burlap, patterned paper, and trims around the center, and dressed it up with a fun rosette, decorative brad, and embossed leaves. Glue Arts Glue Melt Sticks and Extreme Adhesive Squares hold everything in place.
Rosettes are a breeze to make with the ScorPal tool. Simply cut a strip of paper, and score at 1/4" intervals down the length of the strip. Accordion-pleat the paper, adhere ends into a ring, push down to flatten, and glue to a scrap circle. Glue Arts Glue Gun and Glue Melt Sticks makes adhering your rosette quick and easy.


Tie the handle up with some pretty trims and perhaps a tiny tag, and you are ready to fill with your favorite treats.

Your Smile Card
GlueArts Designer: Lesley Langdon
Pin It
Intro: The Scor-Buddy is great for making PERFECT folds and also for dry embossing! You can make straight lines, diamonds, squares, all over the place lines, etc. And it's quick, easy and effective.
Supplies:
Glue Arts U-Cut-It 3D Foam
Glue Arts Extreme Adhesive Squares
Glue Arts Glue Glider Pro (Perma Tac Adhesive)
Scor-Pal's Scor-Buddy
Bazzill Cardstock
Unity Stamp Co Stamps
Copic Markers
Memories Ink (Black) by Stewart Superior
Ribbon, Button
Instructions:

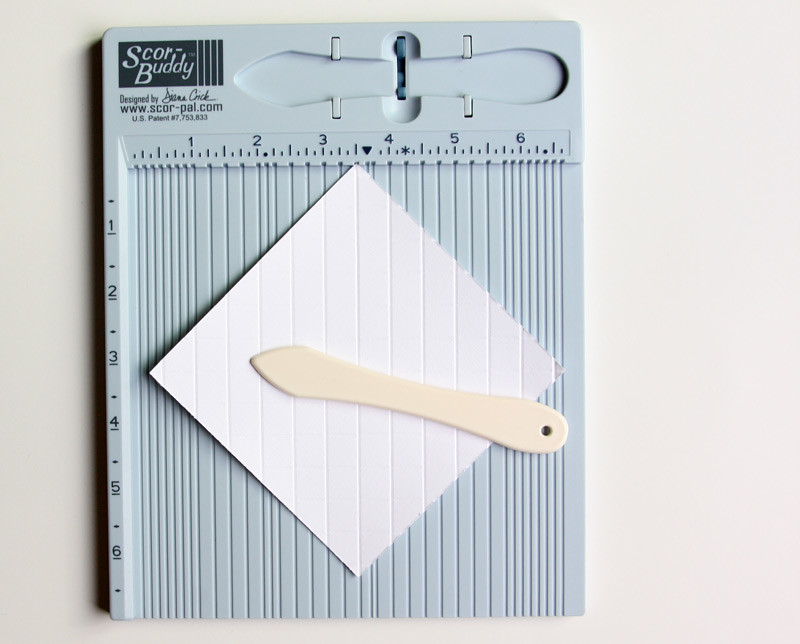
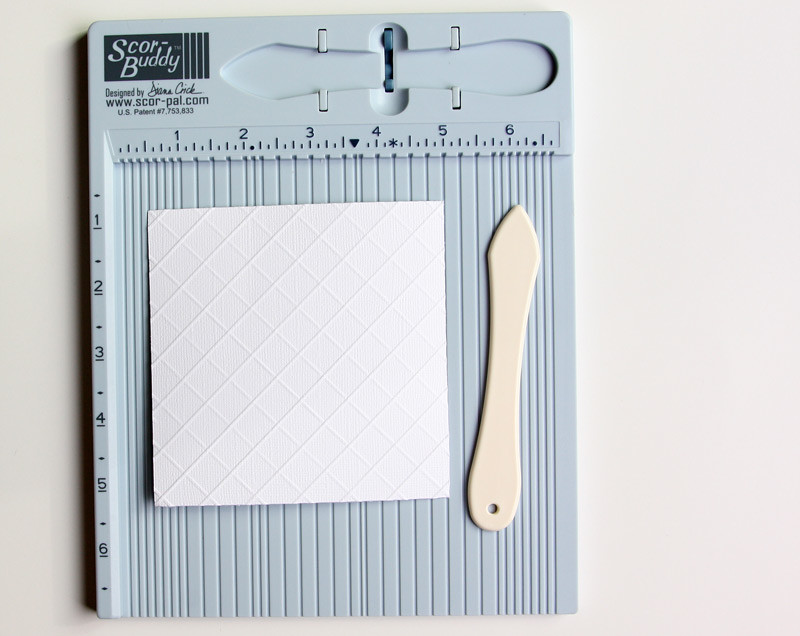
1. Cut a square piece of white cardstock 4.5" x 4.5". Place on the Scor-Buddy, good side down and diagonally (as in photo). Score at 1/2" intervals. Flip the cardstock the other way diagonally and score again at 1/2" intervals to make a diamond pattern. Set aside.

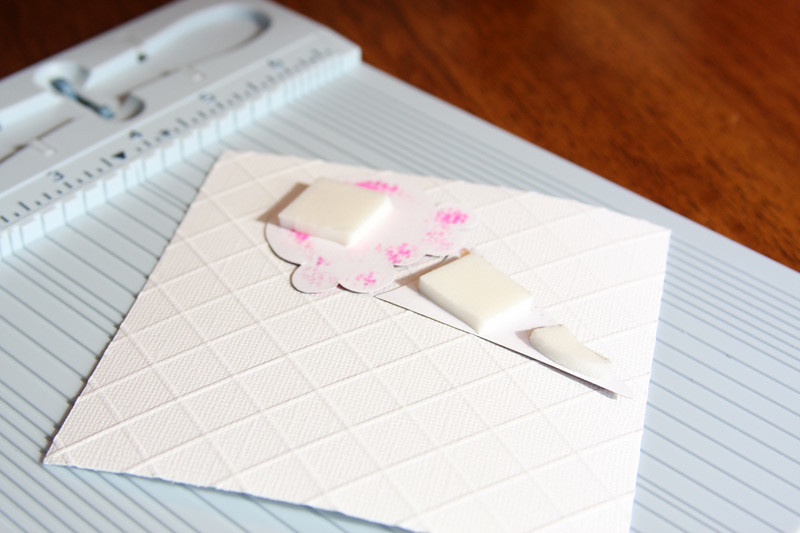
2. Stamp ice cream cone pieces onto white smooth cardstock, color with markers and stamp sentiment onto ice cream. Adhere to white embossed square with Glue Arts U-Cut-It 3D Foam.
3. Tie ribbon around white square and underneath the ice cream cone, and adhere button and secure ribbon in place with Glue Arts Extreme Adhesive Squares.
3. Tie ribbon around white square and underneath the ice cream cone, and adhere button and secure ribbon in place with Glue Arts Extreme Adhesive Squares.

4. To make your 5" x 5" card base, cut a piece of brown cardstock 5" x 10". Use your Scor-Buddy to score at 5" (good side up). Fold in half.
5. Use your Glue Arts Glue Glider Pro (Perma Tac Adhesive) to adhere the white square to brown cardstock.

We have a new Large Scor-Pal that we would like to give away to one of our GlueArts fans! And to help you craft all these beautiful projects we're sharing we're going to include our 3D Combo Pac, Ribbon Adhesive and our Adhesive Squares.


Just post a comment here! We'll pick one random winner next Monday to win these amazing gifts!
Now how would you like another way to win??! That's right today we invite you to visit the Scor-Pal Facebook page and "Like Them". Then post a hello on their Facebook wall for another chance to win products from Scor-Pal and GlueArts! Hurry though and don't delay!
And we hope you'll stop by the Scor-Pal blog to see more projects and creations using both GlueArts Adhesives and Scor-Pal tools!
You have read this article Audrey /
Extreme Adhesive Squares /
Glue Arts Glue Gun /
Glue Gilder Pro /
Lesley /
Perma Tac /
Ribbon Adhesive /
Scor-Pal /
U Cut It Foam
with the title Scor-Pal and GlueArts Just Make Us Happy!. You can bookmark this page URL http://skinnyminny22.blogspot.com/2011/09/scor-pal-and-gluearts-just-make-us-happy.html. Thanks!


