Halloween Wreath
GlueArts Designer: Lisa Day
Supplies:
Glue Arts Glue Gun and Glue Sticks
Glue Arts U-Cut It Foam
DCWV Midnight Spell
Wreath
Snakes
Black Spray Paint
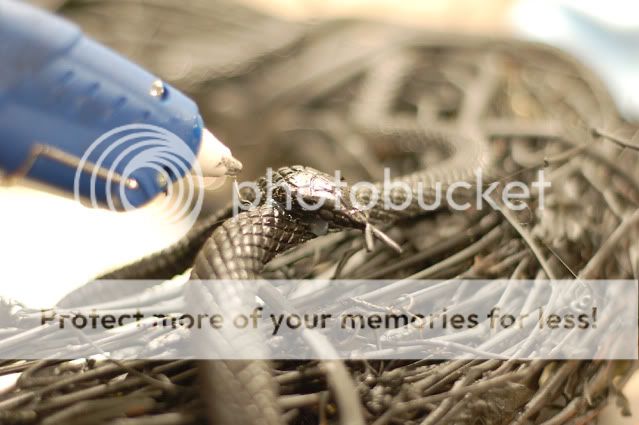
Step 1: Begin by spray painting the wreath and the snakes black. Then hot glue on the snakes to the wreath. I wrapped them around lightly and glued onto the part of the wreath that was the thickest.

Step 2: Make your rosettes. I cut strips of various sizes and scored them using the ScorePal. For the thicker pieces I scored at .5" and then glued two pieces together. For anything under 2" in width I scored at .25" and only used one strip.

Step 3: Glue your ends together. I used hot glue since the DCWV paper is a little bit heavier.

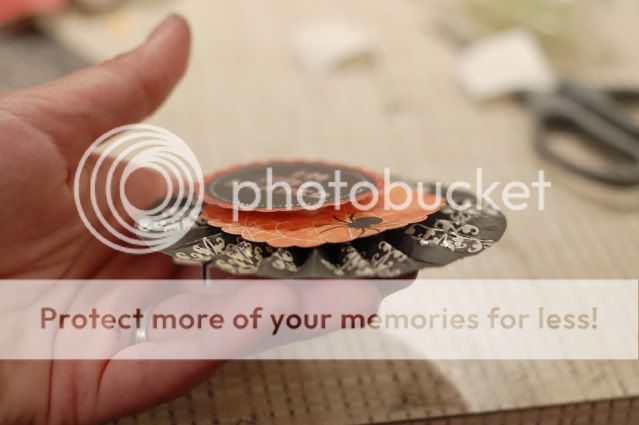
Step 4: Flatten your rosette and hot glue on a circle to the back to hold it flat.

Step 5: Decorate the front of your rosette. I used some U-Cut It Foam to add dimension to some of the details.

Step 6: Hot Glue all of your rosettes together. I cut strips of scrap paper and hot glued them to the back of the circles to connect them together.

Step 7: Hot glue them to the front of your wreath!

Step 8: Hang somewhere and enjoy!
Glue Arts Glue Gun and Glue Sticks
Glue Arts U-Cut It Foam
DCWV Midnight Spell
Wreath
Snakes
Black Spray Paint
Step 1: Begin by spray painting the wreath and the snakes black. Then hot glue on the snakes to the wreath. I wrapped them around lightly and glued onto the part of the wreath that was the thickest.

Step 2: Make your rosettes. I cut strips of various sizes and scored them using the ScorePal. For the thicker pieces I scored at .5" and then glued two pieces together. For anything under 2" in width I scored at .25" and only used one strip.

Step 3: Glue your ends together. I used hot glue since the DCWV paper is a little bit heavier.

Step 4: Flatten your rosette and hot glue on a circle to the back to hold it flat.

Step 5: Decorate the front of your rosette. I used some U-Cut It Foam to add dimension to some of the details.

Step 6: Hot Glue all of your rosettes together. I cut strips of scrap paper and hot glued them to the back of the circles to connect them together.

Step 7: Hot glue them to the front of your wreath!

Step 8: Hang somewhere and enjoy!
We loved Lisa's snake wreath! Consider sticking a few snakes around the outside of your door or use our GlueArts Accent It All Blackout Vinyl and cut some more to scare off your trick or treaters!
We'd like to help you have a scary Halloween by offering you the NEW Die Cuts With a View Midnight Spell Paper Stack!

Midnight Spell Paper Stack with Glitter/Foil
Spooky, silly, serious, and fun! All these and more are sentiments just waiting to be discovered, lurking behind the cover adorning the front of this stack. The elaborate chandeliers sparkling amidst a dark room, ravens lying in wait, and silly jack-o-lanterns will be a must-have for all of your paper crafting projects. This stack is dressed in a color palette of amber orange, android green, midnight black, and Byzantium purple.
Stack of printed paper includes 48 sheets, 24 with foil or glitter accents. Plus we're including our Glue Glider PRO Handle and our NEW PRO+ Cartridge in Perma Tac along with our Extreme Adhesive Squares. Which we know you're going to need with all those spiders!lol Simply post a comment and we'll enter you to win! We'll announce one random winner Monday, October 17th here on the blog! Be sure to stop by tomorrow for more tricks and treats!
You have read this article DCWV /
Hot Glue Gun /
Lisa /
Scor-Pal /
U Cut It Foam
with the title Cast a Spell on a Spooky Snake Wreath with GlueArts!. You can bookmark this page URL http://skinnyminny22.blogspot.com/2011/10/cast-spell-on-spooky-snake-wreath-with.html. Thanks!


