

This week is all aglow with a brand new sponsor and new Halloween inspired tricks and treats!
We're teaming up with Authentique all week long and sharing projects using their new collection Glowing!
To learn more about this new company, please visit their website and sign up for their emails too!
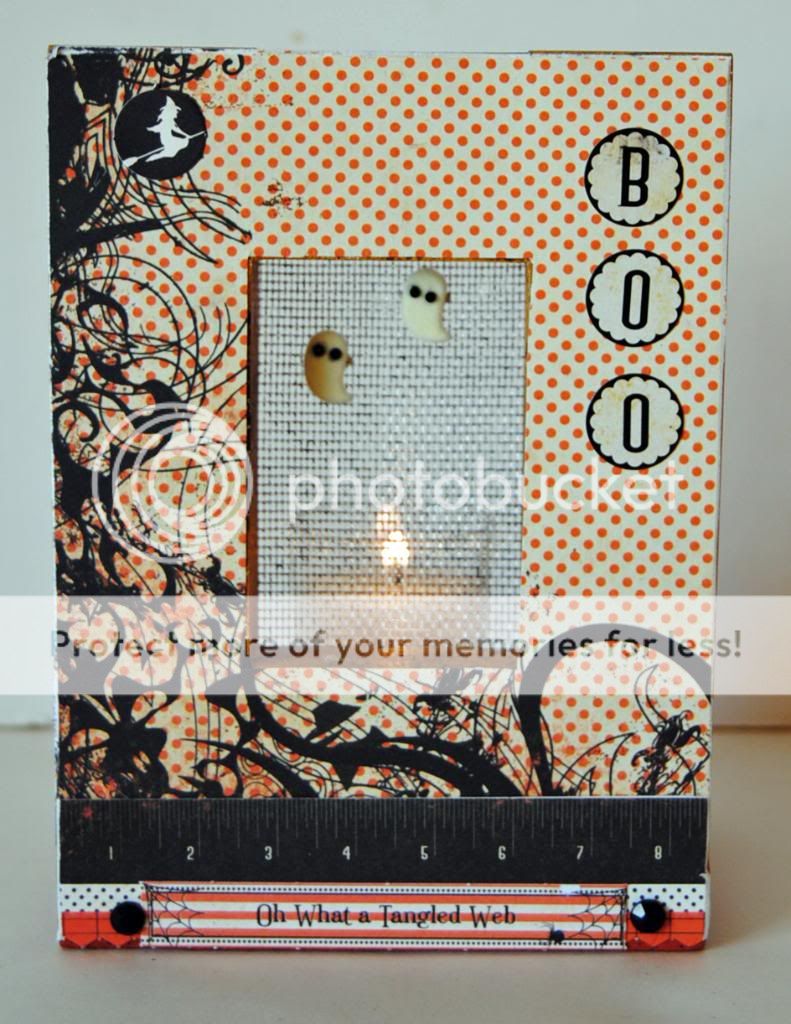
BOO Frame
GlueArts Designer: Jan Hennings
Supplies:
Glue Glider Pro and Perma Tac (Glue Arts)
Glue Glider Pro and Perma Tac (Glue Arts)
Glowing Paper Line and Diecuts (Authentique)
Black Magic Glimmer Mist (Tattered Angels)
ghost brads (making memories)
votive
Trick or Treat Banner
GlueArts Deisgner: Audrey Pettit
Supplies:
Glue Arts Glue Glider Pro+ with High Tac Adhesive
Glue Arts Ribbon Adhesive
Glue Arts Extreme Adhesive Squares
Glue Arts U Cut It Foam Adhesive
Authentique Glowing:
Patterned Papers, Die Cuts, and Cardstock Stickers
Trims: Webster's Pages, The Kraft Outlet, and Vintage Satin
Scallop Punch: Stampin'Up
Die: Rosette Die by Tim Holtz
Ink: Clearsnap
Doily: Wilton
Gems: Bazzill
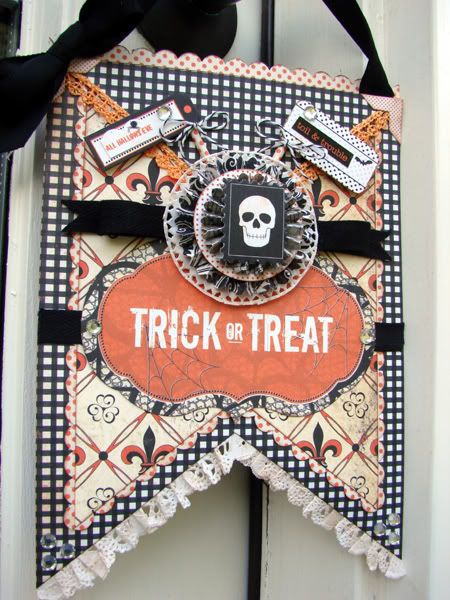
1. Cut a 6" x 8" piece of patterned paper for the banner base. Cut a V notch into the bottom. Save that V cut-out for the top of the banner.
2. Punch several thin strips of polka dotted patterned paper with a scallop border punch.
3. Cut a 5" x 7" piece of a contrasting patterned paper. Cut a V notch into the bottom and edge the piece with the scalloped borders you created in step two. Adhere this piece to the banner base using High Tac adhesive.
4. Adhere the V piece cut out from step one to the top of the banner and edge with lace trim.
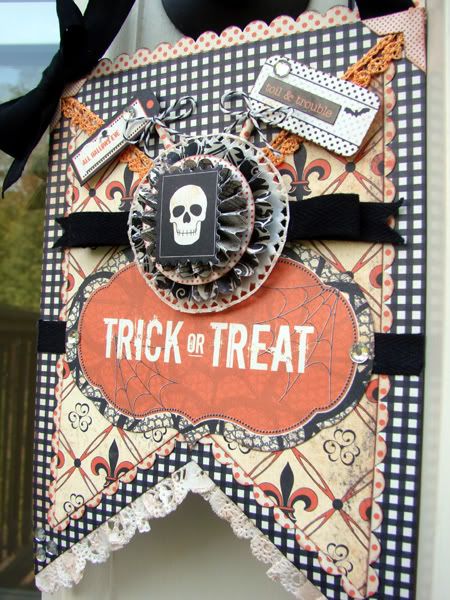
5. Using Glue Arts Ribbon Adhesive, adhere a strip of black twill across the center of the banner. Adhere die cut sentiment to the center of the banner.
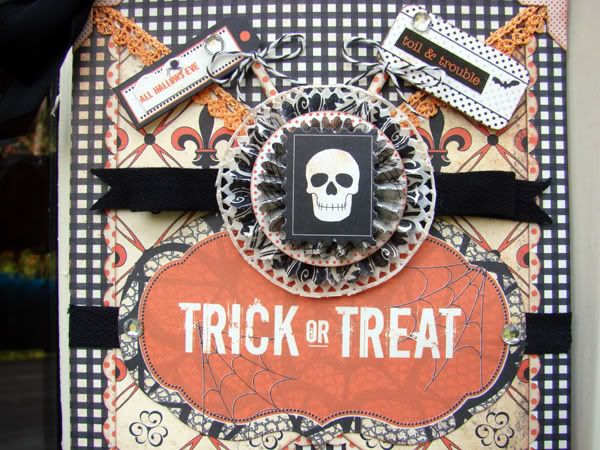
6. Embellish banner with trim, paper rosettes, cardstock die cuts, a doily, and gems.
7. Create banner flags from cardstock die cuts, cardstock stickers, baker's twine, and rolled strips of patterned paper. Adhere flags to the top of the banner using Glue Arts U Cut It Foam adhesive.
8. Ink a paper doily with brown ink, cut off the outside lacy edge, and accordion pleat the trim. Adhere to the bottom V notch of the banner. Adhere more scalloped edging to the top of the banner, and adhere a ribbon hanger.
Supplies:
Glue Arts Glue Glider Pro+ with High Tac Adhesive
Glue Arts Ribbon Adhesive
Glue Arts Extreme Adhesive Squares
Glue Arts U Cut It Foam Adhesive
Authentique Glowing:
Patterned Papers, Die Cuts, and Cardstock Stickers
Trims: Webster's Pages, The Kraft Outlet, and Vintage Satin
Scallop Punch: Stampin'Up
Die: Rosette Die by Tim Holtz
Ink: Clearsnap
Doily: Wilton
Gems: Bazzill
1. Cut a 6" x 8" piece of patterned paper for the banner base. Cut a V notch into the bottom. Save that V cut-out for the top of the banner.
2. Punch several thin strips of polka dotted patterned paper with a scallop border punch.
3. Cut a 5" x 7" piece of a contrasting patterned paper. Cut a V notch into the bottom and edge the piece with the scalloped borders you created in step two. Adhere this piece to the banner base using High Tac adhesive.
4. Adhere the V piece cut out from step one to the top of the banner and edge with lace trim.
5. Using Glue Arts Ribbon Adhesive, adhere a strip of black twill across the center of the banner. Adhere die cut sentiment to the center of the banner.
6. Embellish banner with trim, paper rosettes, cardstock die cuts, a doily, and gems.
7. Create banner flags from cardstock die cuts, cardstock stickers, baker's twine, and rolled strips of patterned paper. Adhere flags to the top of the banner using Glue Arts U Cut It Foam adhesive.
8. Ink a paper doily with brown ink, cut off the outside lacy edge, and accordion pleat the trim. Adhere to the bottom V notch of the banner. Adhere more scalloped edging to the top of the banner, and adhere a ribbon hanger.

 So what gives you a fright on Halloween night? It is bumps in the night??
 We have a feeling you'll be happy to have a bit of a fright when we let you know we're giving away a set of the Authentique Glowing collection...that includes one of each paper and stickers to match!
And to help all those pretty little things stick to your frightful project, we're going to include our NEW PRO+ multi-directional cartridge, our PRO handle and our 3D Combo Pac!

Just leave a comment on today's post and next Monday's we'll scare up a random new winner! It's that easy! And speaking of winners...it's Monday and that means time to announce our fab winner of last week's Die Cuts With a View Midnight Spell Paper Stack and Glue Glider PRO and our new PRO+ cartridge! That winner is:
angie ashuk said...
Love the bag!!! Would love to win this prize. Thanks for the chance.
Congrats to you Angie!!! Looks like your wish came true! Please email me at Gluegirl@gluearts.com with your information!
We invite you this week to stop by the Authentique blog to see what they're talented team of designers is up to! (and we're thinking more chances to win too!!) They're all using our brand new PRO+ plus cartridge for this week's projects!!
You have read this article Audrey /
Authentique /
Jan
with the title The Week is Glowing With Authentique & GlueArts!!. You can bookmark this page URL http://skinnyminny22.blogspot.com/2011/10/the-week-is-glowing-with-authentique.html. Thanks!


