

Did we really say that out loud?
It's a thought that has been echoed in our household as soon as the weather changed! Snow equals snow days, boots, hats and coats (which my kids love!) snow angels, snow fights and yes....Snowmen!
Designer Tamara Tripodi has hit one out of the snow fort with her amazing creation!!! The attention to detail is just...well...wonderful!


Once There Was a Snowmen
GlueArts Designer: Tamara Tripodi
GlueArts supply list:
Misc. supplies:
Echo Park Paper Co. 'Winter Park' paper and stickers
Epiphany Crafts Shape Studio Tools round button and small round shape
Dark brown paper twine
Fuzzy white yarn
Solid cardstock for snowman facial features
4x4" styrofoam square
Styrofoam balls
Wooden dowel rod
Dark teal crinkle ribbon
Misc. solid buttons
White gel pen to add 'catchlights' in the snowmans eyes
Tree diecut from loriwhitlock.com

Instructions:
Trim paper to fit styrofoam square and adhere with hot glue to all sides and top.
Trim paper to fit styrofoam square and adhere with hot glue to all sides and top.

Adhere two styrofoam balls together. It helps to flatten the sides and adhere those 'flattened' areas together.

Start at the base of the snowman, and adhere yarn with hot glue by wrapping around the styrofoam balls all the way up to the top.

When you are done, create some buttons with Epiphany Crafts Shape tool and adhere to the snowman.. add facial features. I used my die cutter for different sized circles and hand cut the nose. Adhere with hot glue.
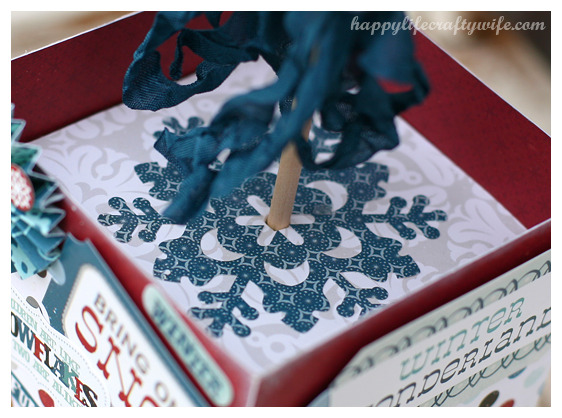
Push the dowel rod into the snowman, and secure with a dab of hot glue. Tie crinkle ribbon to the base. Stick this into the syrofoam block.
To create the top hat, I used some packaging foam and rolled it up and secured it closed with hot glue. The cut a circle for the top, and trim a strip to fit around the sides. Embellish as desired. To create the bottom of the hat, trim two pieces of paper and score every half inch and accordian fold. Adhere two strips together with Glue Glider Perma Tac. Hot glue this to the bottom of the hat, and then onto the snowmans head.

Embellish the square as desired. I used the super cute stickers from Echo Park Paper Co.'s 'Winter Park' kit. The tree was created with 3 tree die cuts folded in half and adhered to the corner with Glue Arts hot glue.
Use U cut-it foam to add dimension to the stickers.

Have fun with it! This is more 'wintery' but you can make this very Christmasy and fun! I plan to make another soon in a fun girlie Christmas version!
Are you shaking your heads at how adorable this project is? Think even making a Santa too! Or a set...girl and boy for a mantle piece!!
We'd love to hear from you and what you're creating and crafting this holiday season! And what you thought of today's craft from Tamara!!

We'll collect the comments over the next two weeks and pick one random winner to receive our PRO handle, new PRO+ Perma Tac cartridge, our Adhesive Squares and yes...our U Cut It Foam! The more you comment...the more chances you have to win!!
You have read this article Glue Gilder Pro /
Hot Glue Gun /
Perma Tac /
Tamara /
U Cut It Foam
with the title Bring On the Snow!!!. You can bookmark this page URL http://skinnyminny22.blogspot.com/2011/11/bring-on-snow.html. Thanks!


