
It's true! GlueArts adhesives provide the perfect adhesion you need for all your home crafting projects and more!
And Unibind Photobook Creator is the perfect compliment!
If you missed Monday's post and video..we'd like to share this with you again! It's the perfect way to illustrate to you just how amazing the Photobook Creator is! And the endless uses and ideas you'll have for it!
The Photobook Creator gives you the ability to make beautiful hardback books in just 90 seconds, right from the comfort of your own home or office. There is no need to load your pages up to a server or wait weeks for delivery.
The Photobook Creator is perfect for scrapbookers, photographers, small business owners, or anyone who wants the ability to bind and preserve digital images in an attractive, durable way. Photobooks come in a range of sizes Photobooks are available in a variety of sizes (12"x12", 11"x8½", 8"x8", and 6"x4")
- and also a variety of colors and finishes to complement any application.
Today two of our designers are sharing more unique ways to use the Unibind Photobook Creator. Designer Audrey Pettit is getting a jump on the holiday season and made a beautiful daily December album! Grace Tolman made a special keepsake album for a personalized wedding gift. Both are outstanding ideas!!


December Daily Album
Designed by: Audrey Pettit
Designer's Note:
I've always wanted to make a December Daily album, but never seem to start one early enough. Maybe by starting one now, I'll actually be ready come December.
Supplies:
Glue Arts Glue Glider Pro with Perma Tac Adhesive
Glue Arts Ribbon Adhesive
Glue Arts Extreme Adhesive Squares
Glue Arts Micro Extreme Adhesive Squares
Unibind Photo Book Creator
Unibind Hardcover Landscape PhotoBook with Pre-Cut 5x3.5" Window
Cardstock: Stampin'Up
Patterned Paper: Teresa Collins, Sassafras Lass, and MAMBI
Chipboard: Little Yellow Bicycle
Rub-Ons: Creative Imaginations
Die Cuts: K&Co.
Stamps: Hero Arts
Trims: Webster's Pages
Buttons: Rusty Pickle
Baker's Twine: Divine Twine
Ink: Clearsnap

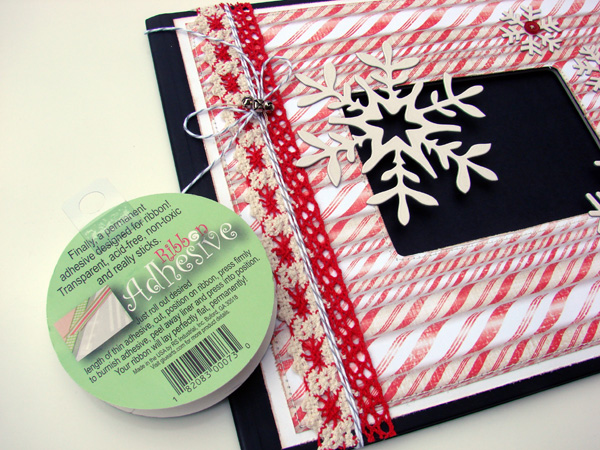
2. Add trims to the left side of the album cover with Glue Arts Ribbon Adhesive.

4. Create pages for the inside of the book. I used 16 sheets of 8.5x11" white cardstock for my book. A little tip to make it easy to turn your pages is to score each sheet of cardstock 1/2" in on the left side. Insert book spine into the Unibind PhotoBook Creator and adhere the pages following manufacturer's instructions. Allow to cool.


Wedding Book
Designed by: Grace Tolman
Supplies:
Glue Arts Accent it all (white)
Glue Arts Perma Tac
Glue Arts Mini Adhesive Squares
Glue Arts U Cut it Foam
Book and binding tool- Unibind
Pattern papers- SEI
Die cut machine- Cricut, Provo Craft
Cartridge- Storybook
Border punch- Martha Stewart Crafts
Corner Rounder- Marvy Uchida
Stamp- Studio Calico
Glitter- American Crafts
Black pen- Millennium, Zig
Instructions:
1. Gather your supplies.


9. I cut out a scallop edge from the brown heart paper and adhered that to the front page of the book. Make sure you line this up to center onto the page and the window on the front of the book.
10. I used the die cut machine to cut out a "&" sign.

11. Next, I covered the & sign with perma tac. Make sure you get all the nooks and crannies on this one. For the adhesives that went over the image, I folded them to the back.


15. I then cut out some white swirls/flourishes on the White Accent it all sheet.
16. Then I laid them onto the front of the book.


More amazing albums and projects today...don't you agree?! Would you like to win your own Photobook Creator? Have visions of projects you could make! Unibind and GlueArts would like to give you a chance to create your own PhotoBooks. Unibind has generously given us a Unibind Photobook Creator to give away to one of our GlueArts fans!

We're also going to include a GlueArts Glue Glider Pro and our Adhesive Squares.

Simply leave us a comment and we'll select one random winner next Monday!! It's just that simple!
And how would you like another chance to win? We'd like to ask you to please show Unibind what amazing fans we have. Please visit the Unibind Facebook wall and leave them a big GlueArts hello! Then visit our GlueArts wall and let us know you've gone and said hi! And be sure while you're visiting Unibind...please "like" them too! We sure do!!
We'll see you back here tomorrow...more amazing Unibind and GlueArts projects!! And of course chances to win!
You have read this article Audrey /
Extreme Adhesive Squares /
Glue Gilder Pro /
Grace /
Perma Tac /
Ribbon Adhesive /
Unibind
with the title GlueArts and Unibind..... You can bookmark this page URL http://skinnyminny22.blogspot.com/2011/05/gluearts-and-unibind.html. Thanks!


