

One line is soft, light and sweet...the other elegant,deep and rich in color. Two completely opposite looks and styles yet when you see our designers projects they flow together beautifully.

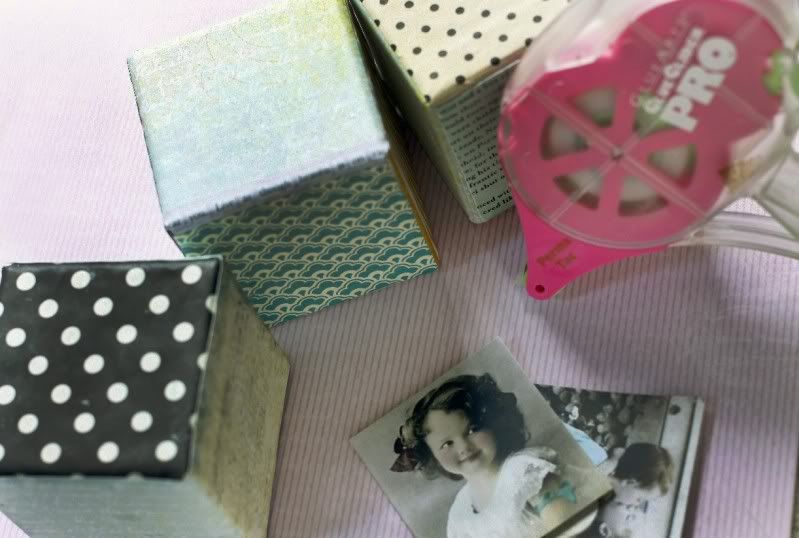
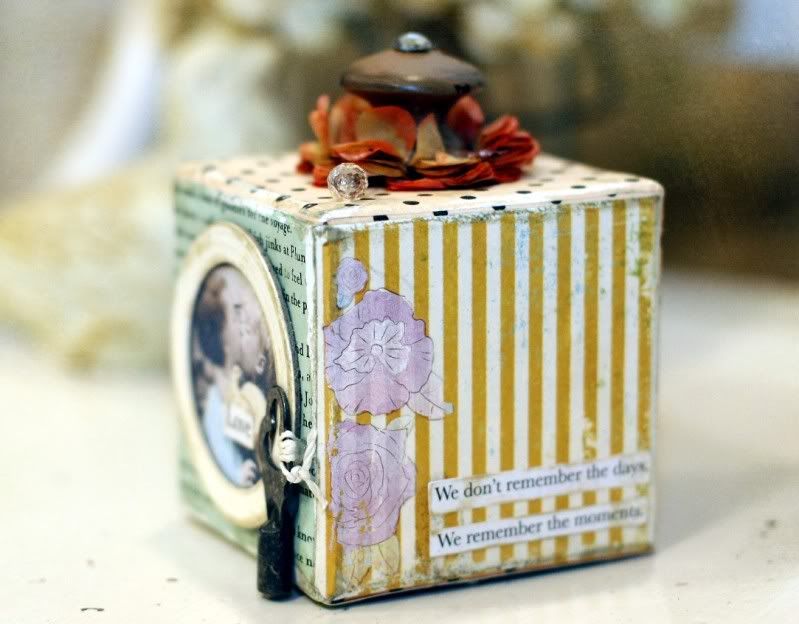
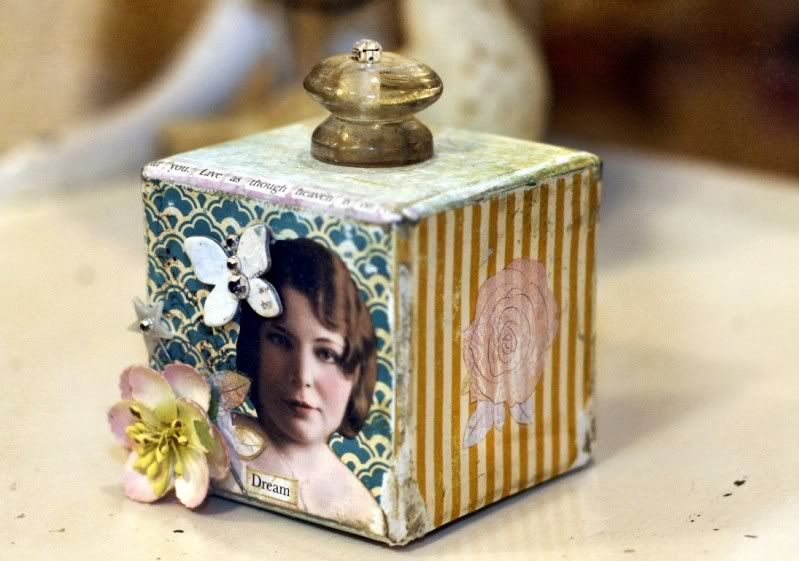
Today we have a special project from Designer Linda Albrecht. She made vintage collage blocks and one of these beautiful blocks has a picture of her Grandma. Linda used our Adhesive Squares to help complete this special keepsake.
Designer Patti Milazzo has a card to make your heart swoon! She perfectly breaks down each step so you too can make it and send it off to someone special!

Vintage Collage Blocks
GlueArts Designer: Linda Albrecht
Supplies:
Glue Arts Glue Glider Pro with Perma Tac Adhesive
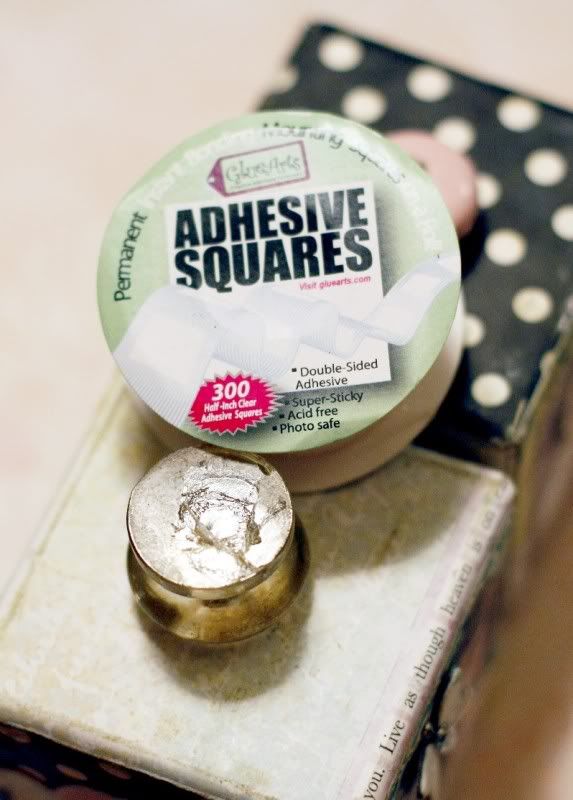
Glue Arts Extreme Adhesive Squares
Glue Arts Hot Glue Gun
Kaiser Craft "Pink Gelato" collection Stickers, Rub Ons, and patterned papers
Other patterned papers- Pink Paislee, Jenni Bowlin, October Afternoon
Paper Flower by Prima
AccuCut Die Cutting machine with Flower & butterfly dies
3" wood blocks
Metal Key
Dressmakers tissue for flower
Miscellaneous knobs, decorative pins, rhinestones, vintage photos, Diecut butterflies and frame
Sandpaper & brown inkpad for distressing
Tattered Angels Glimmer Mist- "Tigerlily"
Instructions:
1. Cover wood blocks with patterned papers as desired using Perma Tac Adhesive. I like to wrap my papers around the corners except for on the last couple of sides that I cover. Lightly sand edges when complete, then distress with brown ink.
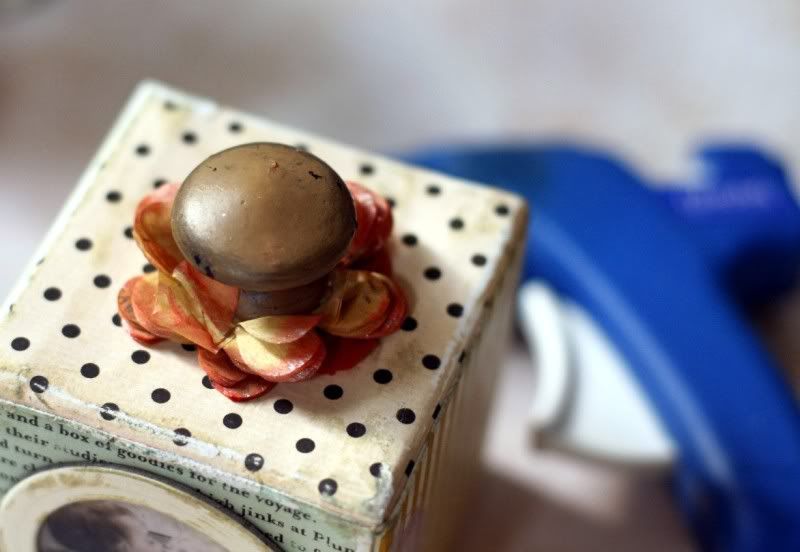
2. For the top of one block, cut several flowers from dressmakers tissue using a diecut machine. Layer flowers, spray with a color mist, allow to dry, sew flowers together then adhere to the top of block with hot glue. Adhere wood knob onto the center of the flower.

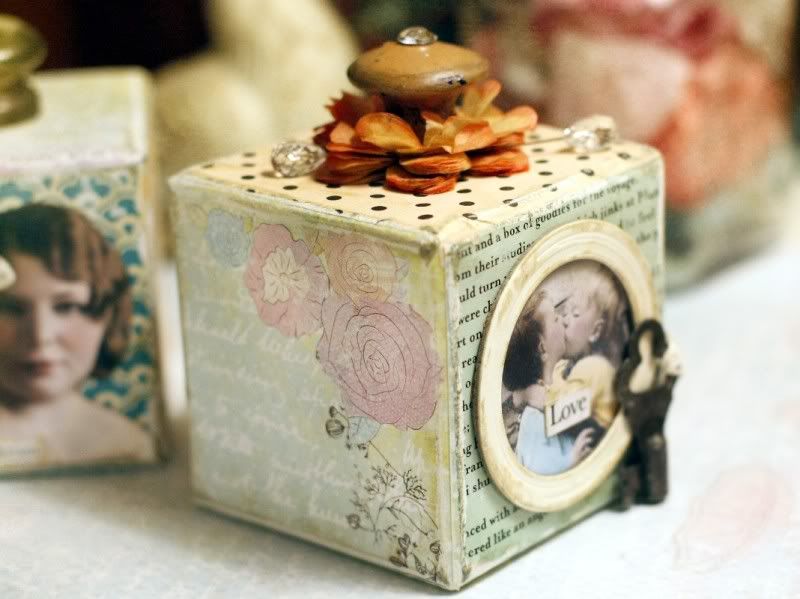
3. Insert a photo behind a cardstock frame then adhere to the front of the block using Perma Tac Adhesive. Use hot glue to add a key or other embellishments.
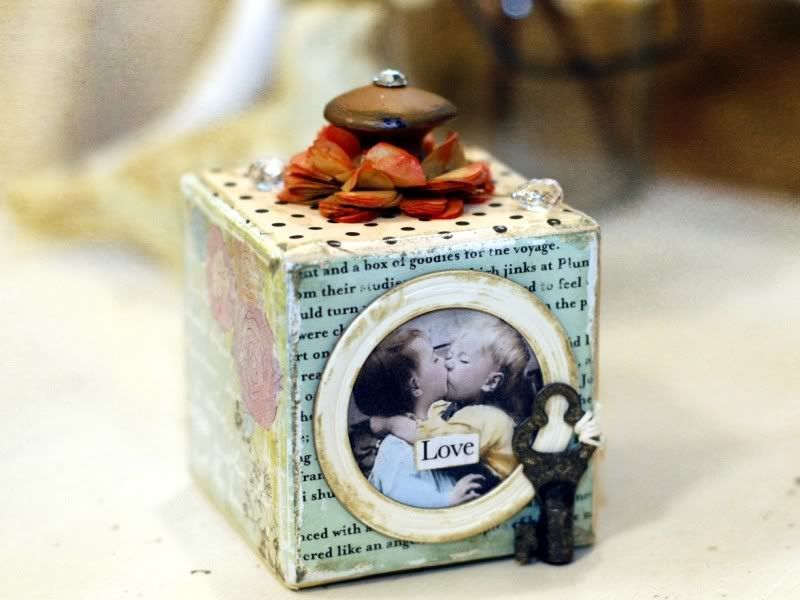
4. Apply rub ons and word stickers as desired to the photo and to the sides of the block.
5. To another block adhere photo then add chipboard butterfly and metal embellishments using Extreme Adhesive Squares.
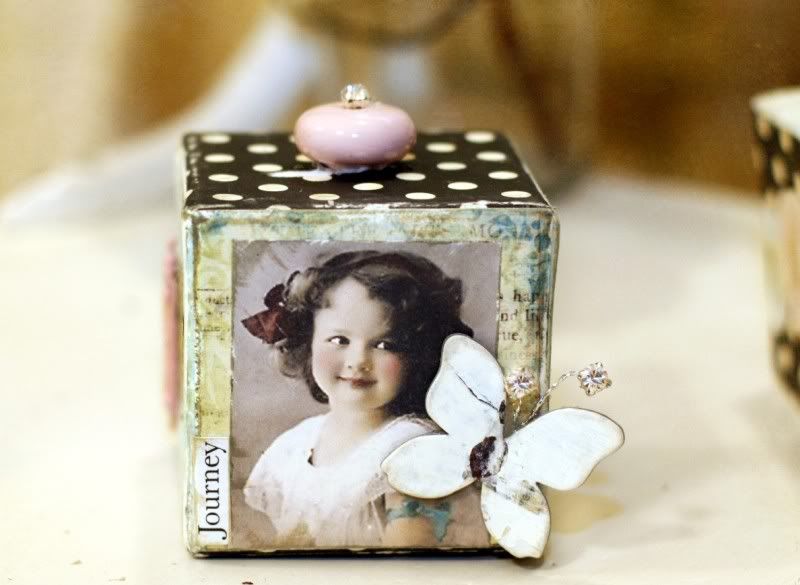
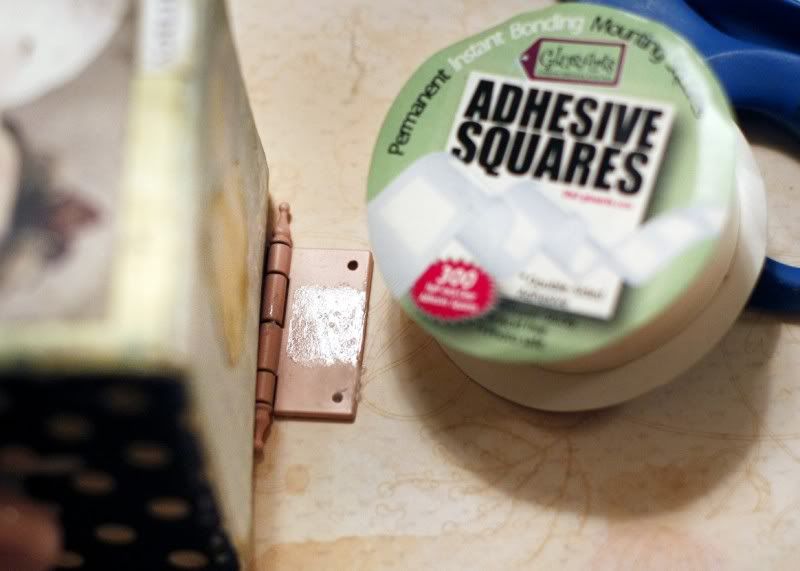
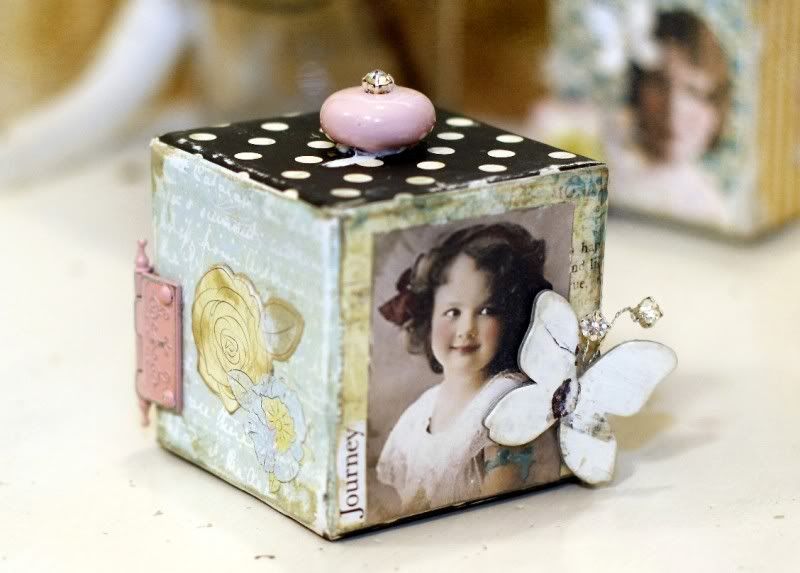
Designer Tip: These Extreme Adhesive Squares are crazy sticky. I cut off the individual square from the strip then lay it onto the piece that I will be adding to the project, rub it on & remove protctive backing. Removing them from anything is practically impossible so place your square carefully and then feel really, really confident that what you used it on will stay there :-)
6. To remaining block, adhere photo then use Extreme Adhesive Squares to apply the glass knob to the top of the block and to apply flowers and small chipboard butterfly.

7. Apply rub ons and word strips to the block as desired.
7. Apply rub ons and word strips to the block as desired.
If anyone would like the vintage images please visit my blog and request them. Two of them are ones that I recieved online for free, but I colorized them in Photoshop. The other is a photo of my grandmother that I'd be happy to share also.

Love Is Friendship Set to Music Card
GlueArts Designer: Patti Milazzo
Supplies:
Glue Arts:
Glue Glider Pro with
1/4 High Tac Cartridge Refill - Pro
Mini Adhesive Squares
Adhesive Squares
U-Cut-It Adhesive Foam
Raise ‘Ns
Kaiser Craft:
Velvet Ensemble Pattern Papers – Performance, Matinee, Opera, Entertain and Interval
Velvet Ensemble Journal Tags
Other: Fiskars - Flower and Heart Lever Punch, Clear Stamp (All Around Quote), Circle and Leaf Punch
Instructions:
1. Cut a 5” x 7” piece of pattern paper for the card background. Cut strips of pattern paper and tear out 3 Journal Tags from the booklet. Punch flower shapes from pattern paper as well.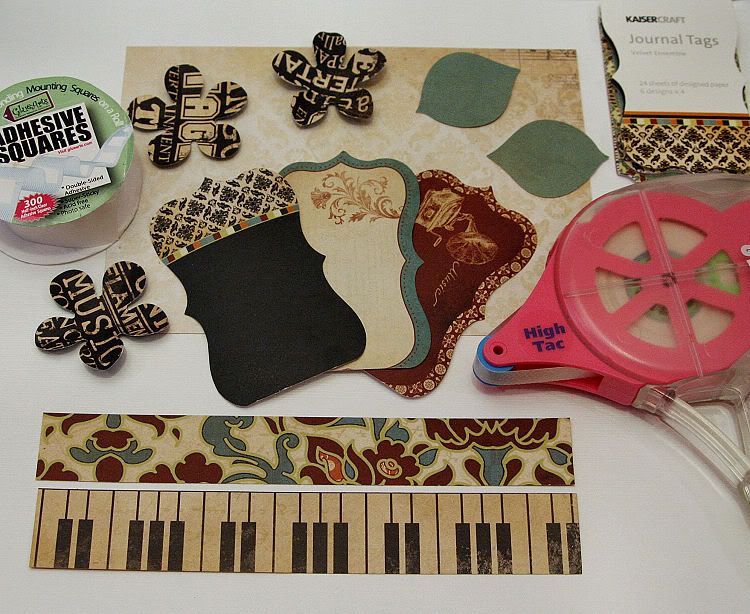
2. Arrange the Journal Tags in a fan and adhere to the center of the card with the Glue Glider Pro with High Tac Adhesive. Don’t worry that the Victrola is sideways. Also use the High Tac to adhere the paper strips at the bottom of the card, overlapping the bottom of the Journal Tags slightly.
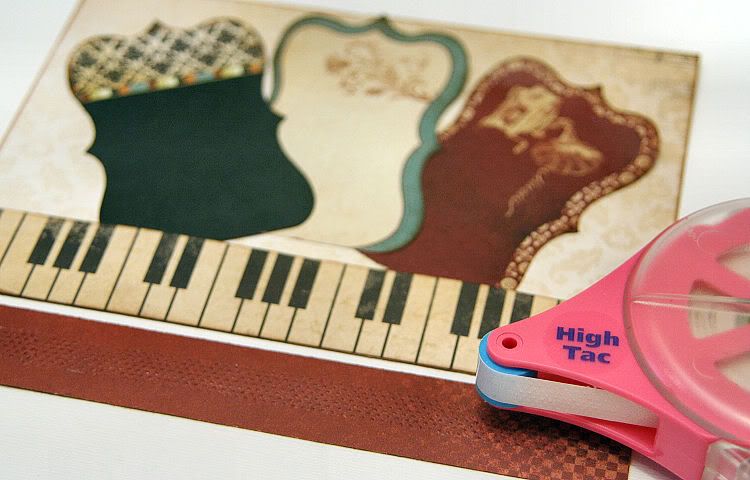
3. Cut another ¼” wide x 12” long strip of pattern paper (orange) and fold pleats across the length. Unfold, apply High Tac to the back and refold the pleats. Then apply the pleated strip just above the piano keys.
4. Bend and fold the punched flowers, then layer them using Raise ‘Ns for added dimension.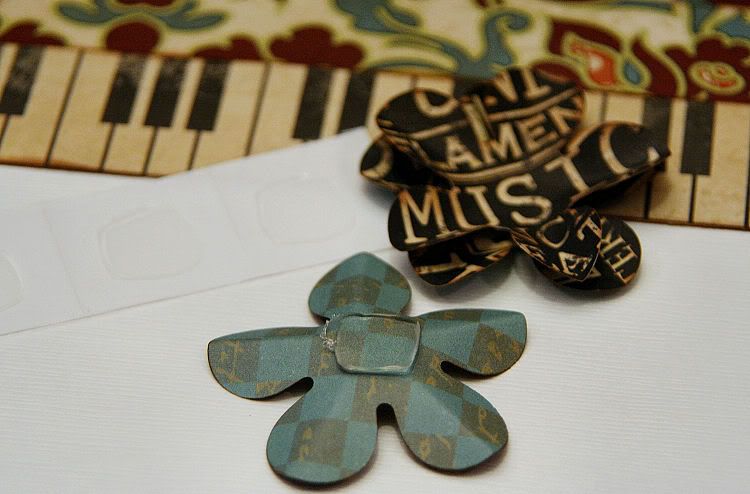
5. Adhere the flower with an Adhesive Square to the right journal tag (covering the Victrola). Use the Adhesive Squares to also adhere the two leaves. To the center of the flower, use a Mini Adhesive Square to attach a button tied with hemp.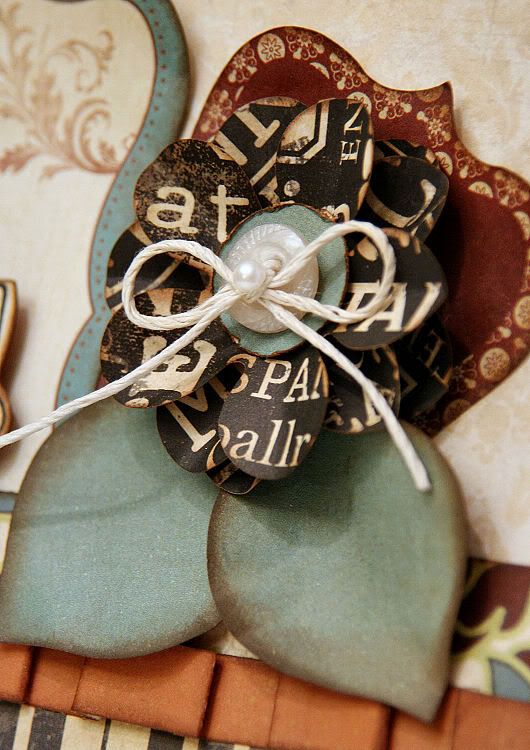
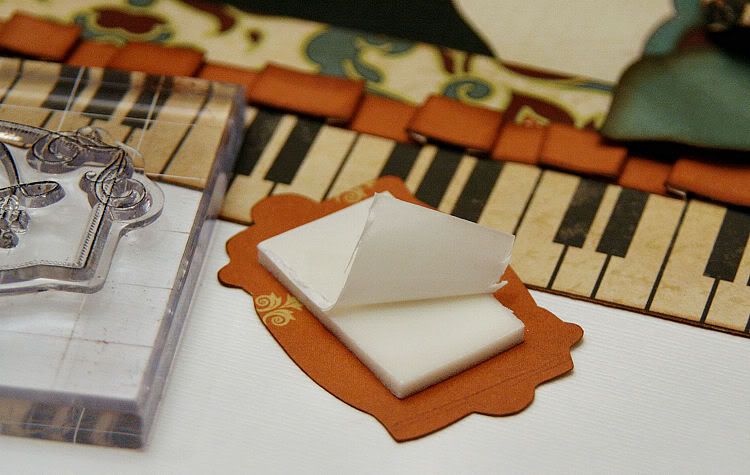
6. Stamp the quote on cream pattern paper and cut out. Apply U-Cut-It Adhesive Foam to the back and adhere between the left and center Journal Tags as shown. Add a punched heart and pearl accents to complete.

5. Adhere the flower with an Adhesive Square to the right journal tag (covering the Victrola). Use the Adhesive Squares to also adhere the two leaves. To the center of the flower, use a Mini Adhesive Square to attach a button tied with hemp.
6. Stamp the quote on cream pattern paper and cut out. Apply U-Cut-It Adhesive Foam to the back and adhere between the left and center Journal Tags as shown. Add a punched heart and pearl accents to complete.


Simply leave us a comment...let us know what is your favorite project, what inspires you or simply which collection just calls our your name!
We'll select two random winners and announce those next Monday on the blog! It takes only a moment to comment and who knows...it could be you who is the winner!!
And last don't forget to visit the Kaisercraft blog all week long for more ideas and inspiration using GlueArts adhesives and Kaisercrafts products!
You have read this article Extreme Adhesive Squares /
Glue Gilder Pro /
High Tac /
Hot Glue Gun /
Kaisercraft /
Linda /
Patti /
Perma Tac /
Raisen's /
U Cut It Foam
with the title Vintage Love with Kaisercraft & GlueArts. You can bookmark this page URL http://skinnyminny22.blogspot.com/2011/06/vintage-love-with-kaisercraft-gluearts.html. Thanks!


