

Fiskars!
Since I was a little girl we always had a pair of Fiskars scissors in our kitchen drawer. When I got older and started crafting I went and purchased my first pair of Fiskars scissors. I then bought another style, then a pair of much loved pinking shears and now I have well...more then two pairs of Scissors!lol I also own two well loved and used Fiskars trimmers, countless punches, border punches and more!
GlueArts is excited to share with you this week Fiskars products. And when we're talking Fiskars... we of course welcome to our blog a special Guest...Stephenie Hamen! {she's the Content and Education Manager for Fiskars}
Be sure to join us all week long to see all the GlueGirls projects highlighting Fiskars and our GlueArts Adhesives, learn more about Stephenie and of course enter to win!!

Dance in the Rain Card
GlueArts Designer: Audrey Pettit
Glue Glider Pro with Perma Squares Adhesive
Glue Arts Ribbon Adhesive
Glue Arts Micro Extreme Adhesive Squares
Fiskars Supplies:
SureCut Deluxe Craft Paper Trimmer- 12"
Cloud Squeeze Punch
Notebook Border Punch
Postage Stamp Border Punch
Accents Repositionable Rubber Stamps
Crate Paper and The Girls' Paperie Patterned Paper
American Crafts Trim
Stampin'Up and Clearsnap Ink
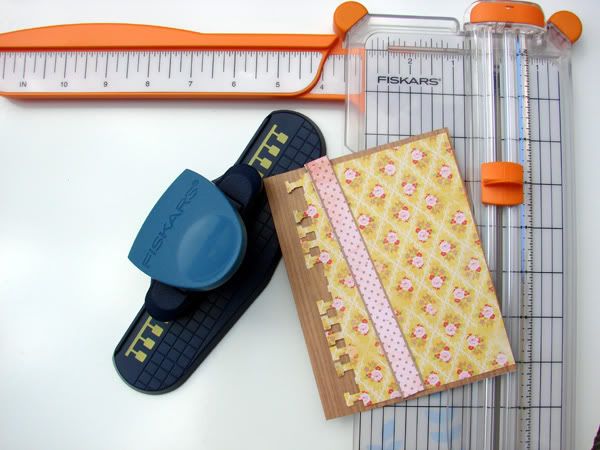
1. Cut a 4.25" x 5.5" card base from patterned paper. Cut a smaller 4" x 5.25" layer from a second paper and punch the left edge using the Fiskars Notebook Border Punch. Tear away small pieces of the notebook edge for a distressed look. Cut a 1/2" strip of paper. Adhere the layers using the Glue Glider Pro with Perma Squares Adhesive. Machine stitch the thin border strip for added detail.
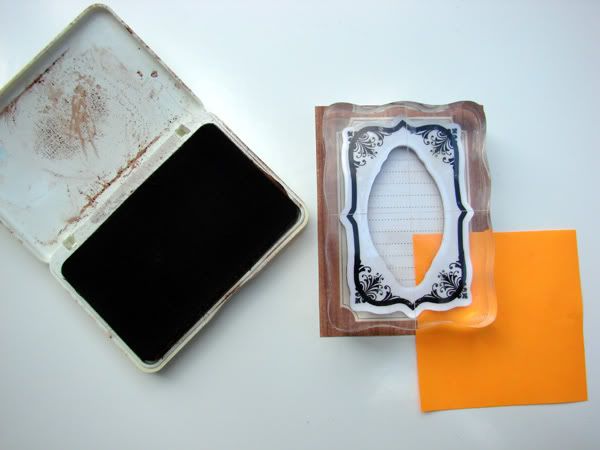
2. Cut a journaling card from patterned paper. Mask printed floral section with a Post-It note and stamp frame in brown ink.
3. Apply lace trim to the bottom of the journaling card with Glue Arts Ribbon Adhesive, then add a strip of patterned paper punched with the Postage Stamp Border Punch. Add some machine sewing and adhere the journaling card to the center of the card base using Perma Squares Adhesive.
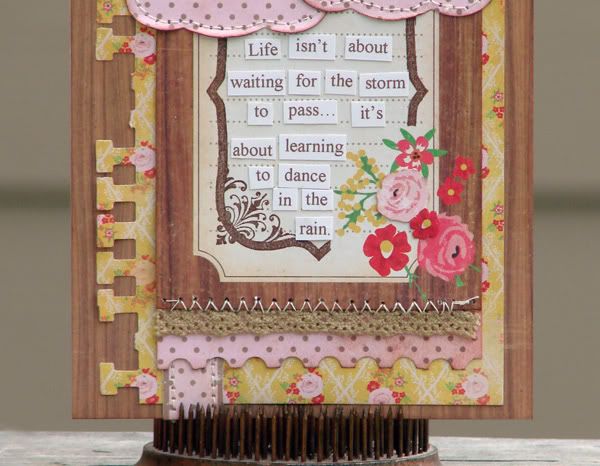
4. Print quote and cut into small word strips. Apply to the journaling card using Micro Extreme Adhesive Squares.
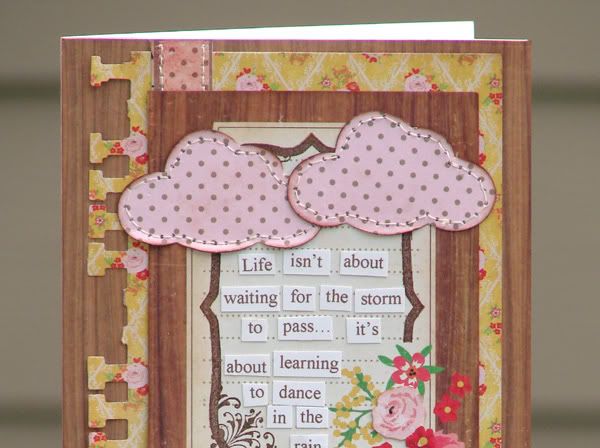
5. Punch clouds from patterned paper, edge with brown ink and apply to the top of the journaling card, overlapping slightly. Add machine stitched edging to the clouds.

Wrist Cuff
Guest Designer: Stephenie Hamen
I love vintage buttons and trims, as well as vintage fabrics – or at least patterns that look somewhat vintage. I also love making something to wear as a jewelry piece that is completely unique and entirely me. Wrist cuffs let me do that. I can match them to any outfit, use the latest goodies that I find, and just add a little *pop* to an ordinary day.

Here are the supplies you will need to create your own little jewelry artwork:
· Coordinating patterned fabric
· Buttons, baubles, trim, ribbon, and/or lace of your choice
· Base fabric – canvas or heave muslin work the best
· Iron and iron safe surface
· Heat gun (optional)

Once you have all of your supplies in place and ready to go, there are just a few simple steps to creating!
1. Measure your wrist with the tape measure.

2. Now, cut down your canvas to size using your mat and rotary cutter. I added about an inch in length – 7” was a perfectly snug fit, so 8” gave me a little room for movement. I cut it to be 4” wide.

3. Using the pinking shears, take about a ½” off the width on each side. This made my final base piece of canvas 3”x8”.

4. Begin using your pinkers to cut the decorative fabric you want to add to your cuff. Cut it and build it by stacking. Cut the ribbon you will use to tie as well. (I put it under the last layer of fabric)

5. Now, go back to your base layer and roll on some of your FarbicBond adhesive.

6. Put on your first layer and iron to set. Keep doing this until all of your layers are built.

7. Finally, add your embellishments. I added 2 buttons and a piece of vintage flair. I carefully rolled on the adhesive and then set it with a heat embossing gun since I wasn’t sure if I should iron the vintage buttons and flair.
8. Let everything cool down and then tie it up! You are ready to rock your latest fabric jewelry creation.
Options: You can use Velcro or buttons if you want to close your cuff instead of tying it shut. It is all a matter of preference. Just be sure to add a little extra length for the overlap if you go that route.
Now, head out for a night on the town or just run to the grocery store, but get that cuff on and make a statement.


Now it's not a normal week around here unless we talk about our amazing product sponsor and share with you how YOU can win some of their awesome products! Fiskars was incredibly generous and is allowing us to giveaway to one of you...

... a Trimmer, Cloud Squeeze Punch, Stamp Border Punch, Postage Stamp punch, Acrylic Stamps and more! Simply leave us a comment and we'll enter you to win! Next Monday we'll select one winner to enjoy these goodies!!
Last week was our Kaisercraft week and we hope you enjoyed it as much as we did! Let's announce the first winner of the beautiful Pink Gelato collection..
the photo blocks and
"pink gelato" i love it!!!!
amazing projects!!
"pink gelato" i love it!!!!
amazing projects!!
And our winner of the Velvet Ensemble collection....
Great music pocket card--we are a musical family and even have an Edison phonograph like on the card.
slrdowney at hotmail dot com
slrdowney at hotmail dot com
Congrats to you both! Please email me at Gluegirl@gluearts.com with your info!
Be sure to check back in with us tomorrow for more Fiskars projects from our GlueGirls Design Team! And don't forget to visit Fiskars Crafts for more creative ideas!!
You have read this article Audrey /
Extreme Adhesives Mini Squares /
Fiskars /
Glue Gilder Pro /
Guest Designer /
Perma Squares /
Ribbon Adhesive
with the title Welcome to Fiskars Craft Week!!. You can bookmark this page URL http://skinnyminny22.blogspot.com/2011/06/welcome-to-fiskars-craft-week.html. Thanks!


