Prima & Tattered Angels Blog Hop

Hi and welcome to the PRIMA and TATTERED ANGELS Blog Hop.

Thanks so much for hopping over from the PRIMA Blog!

PRIMA  have teamed up with TATTERED ANGELS to bring you some FABULOUS new projects from both the PRIMA Design Team and Educators.

First up we have this super sweet GIVE AWAY


Included are:
  • Prima Innoscense alterable flowers-3 packs
  • Prima Winter Roses
  • Prima Royal Verbena Silver Flowers
  • Prima Miss Sophie Lace Flowers
  • Prima Sugar Plum Roses-Banana
  • 3 styles of alterable Prima lace
  • TA Glimmer Mist-Sunflower, Blackberry Cordial, Bronze and Timberline
  • TA Glam-Nightfall & Dirty Martini
  • TA Chalkboard-Cherry Cola & Monolith

For a chance to win the LOVELY prize above just visit some of the other blogs listed below and then hop back to the PRIMA BLOG and let us know your favorite altered Prima product spotted on one of the blogs!
(Comments will close September 14th at midnight PST. One lucky winner will be chosen on September 15th.)

Now, how about a peek at what I have created for you all today


Lots of gorgeous PRIMA products including some of the new Resistant Canvas, Mask, Resin - Bird Homes & Small Birds and blooms - including: #553487 Medley Star Gazer,  #552893 Ceylon White Wedding, Gillian Flowers #552985 Aqua & #552978 Lilac, Melody #552923 White.

I have used TATTERED ANGELS Glimmer Mists to alter the PRIMA Resistant Canvas and flowers and to enhance a masked element.


To create the background, I have used the PRIMA #551629 Resistant Canvas - Alla Prima

I first attached the Resistant canvas vines to cardstock and then misted with 'Timeless Lilac' Glimmer Mist.
'Patina' Glimmer Mist was then randomly misted over the top and with a paint brush and again with 'Timeless Lilac', more depth was added to the various leaves and flowers.  

The white resistant markings that show give a lovely subtle effect.


The gate element which sits behind my photo was first created with texture paste and the PRIMA #550042 Mask


Once the texture paste was dried, I then misted lightly with 'Turquoise Blue' Glimmer Mist. A touch of 'Timeless Lilac' Glimmer Mist was added around the edges with a paint brush.  The gate was then cut out and attached.   


To coordinate, Glimmer Mist 'Timeless Lilac' was also used to alter the PRIMA White SA-002/1 Mini Roses. 

A touch of shine and shimmer was added to the PRIMA Resin Bird with TATTERED ANGELS Glimmer Glaze 'Icicle'.  

I also added more depth to the little pixie's hat and top with 'Patina' Glimmer Mist - again painted with a paint brush.  Glimmer Glaze was then also applied when dried.


The Resistant Canvas Scalloped Borders were coloured with Glimmer Mist 'Timeless Lilac' and then attached around the outer edges of the layout.


Layout 'Wonder' by Trudi Harrison.  
Materials: #551629 Resistant Canvas Alla Prima, #550042 Mask, , Resin #890834 Bird Homes, Resin #890773 Small Birds, #552893 Ceylon Flowers White Wedding, #552985 Gillian Flowers Aqua, #552978 Lilac,  Melody #552923 White, #553487 Medley Star Gazer, #551100  Reflections Printery, #843182 Pixie Glen Pyske Cuts, #843014 Sweet Fairy Fresh Breeze, #538736 Cameo Roses, #542726 Love Letter Roses Jude,  White SA-002/1 Mini Roses.

Tattered Angels Glimmer Mists - Patina, Timeless Lilac.
Tattered Angels Glimmer Glaze - Icicle

Be sure to click on the following links for LOADS more fun projects and ideas altering gorgeous PRIMA Projects


So hop around, get inspired, and then pop back HERE and leave a comment for a chance to win that FABULOUS prize!!

Thanks so much for HOPPING By!!

Hugs

Trudi
You have read this article Layout / Prima / Tattered Angels with the title August 2011. You can bookmark this page URL http://skinnyminny22.blogspot.com/2011/08/prima-tattered-angels-blog-hop.html. Thanks!

Life Is Fabulously Sweet With GlueArts & Pebbles!!

Life IS Sweet!

Especially when you fill it with sweet treats like we have for you today!

Designer Andrea Budjack has the sweetest treat that we guarantee not to give you a cavity. Andrea used a paper mache cupcake box that now looks good enough to eat! GlueArts Ribbon Adhesive helps make sure everything stays put where it belongs!

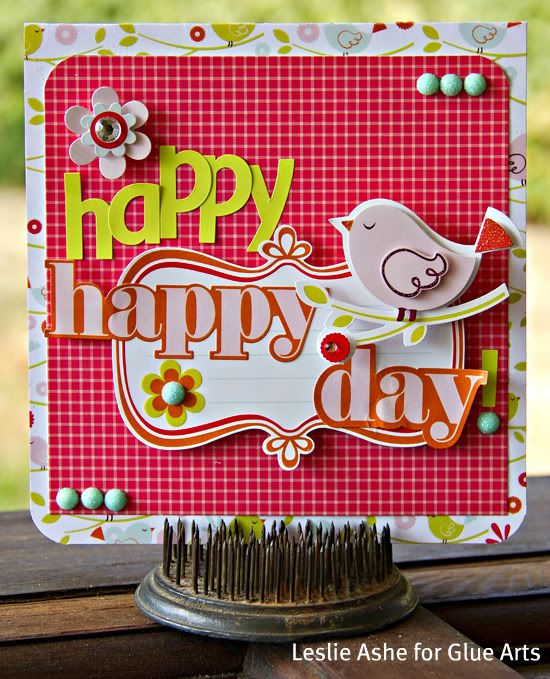
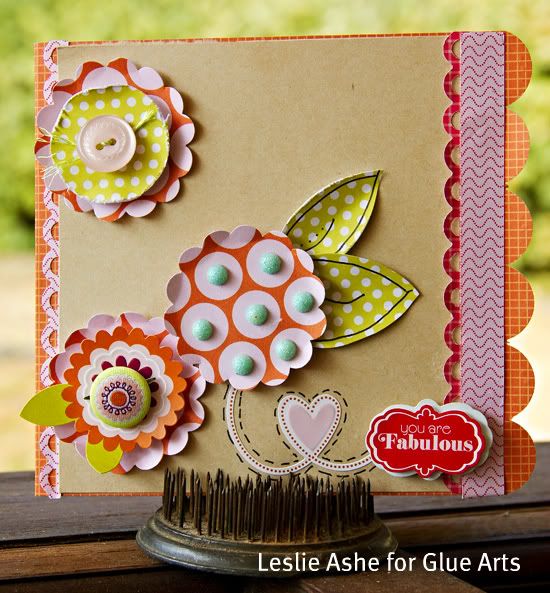
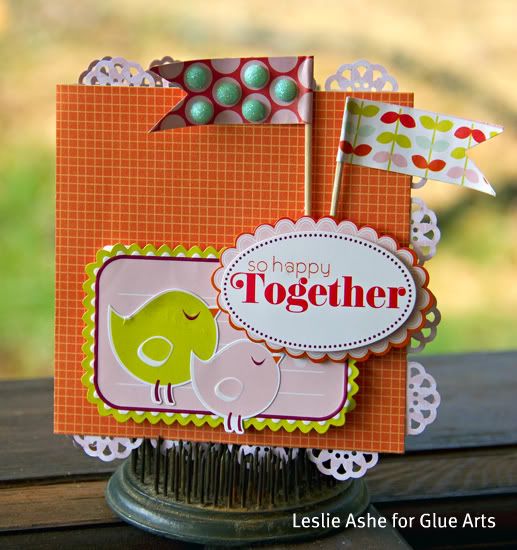
Designer Leslie Ashe has not one, not two but three absolutely over the top cards that would make any one's day a happy one when they receive these! Leslie chose GlueArts Glue Glider Pro with High Tac to help make these beauties!


Fabulously Sweet Treat Box
GlueArts Designer: Andrea Budjack


Supplies: 
Glue Arts Pro Glide Perma Tac
Glue Arts Ribbon Adhesive
Glue Arts Glue Gun
Pebbles - stickers, brads, paper, trims
Flower Soft
Papertrey Ink - die
Ceramcoat - paint
Craft Glue

1. Paint top of cupcake box.

user posted image
2. Cut, sew, and ink edges of paper and adhere to bottom of box using Glue Arts Pro Glide Perma Tac.
user posted image
3. Using Glue Arts Ribbon Adhesive, adhere trim around the top of the bottom box. Repeat for a second layer.
user posted image
4. Apply craft glue to top of box (painted portion) and add Flower Soft.
user posted image
5. Die cut label and mount to back side of sticker. Ink edges, punch hole and add baker's twine.
6. Using Glue Arts Glue Gun, ahere embellishments to top of cupcake box.

user posted image


Pebbles Card Trio
GlueArts Designer: Leslie Ashe

Glue Arts Supplies:
Glue Glider Pro w/High Tac cartridge

Adhesive Squares
3D U Cut It Foam

Pebbles Happy Go Lucky

Other: punches & border punches (EK Success, Fiskars), cardstock (American Crafts)

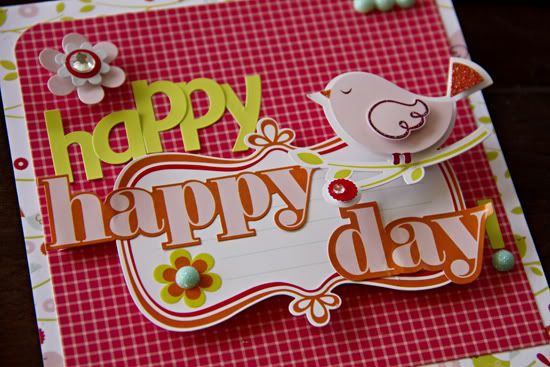
1) Happy Happy Day: card measures: 5 1/2" x 5 1/2"

user posted image

Directions:
-cut patterned paper 5 1/2" x 11". Fold, score & round bottom edges.
-cut patterned paper 5" x 5" and adhere to center of card
-apply journal sticker block in center of both papers, using 3D foam adhesive
-apply the "happy" sticker to top left
-apply the "day" sticker to bottom right
-add the bird embellishment to top right
-using letter stickers, add "happy" to top of first "happy"
-add turquoise jewels to center of flower and in 3's to top right of card and bottom left of card
-add flower above the letter sticker "happy"

user posted image


2) Fabulous: - card measures: 5 1/2" x 6"
user posted image


Directions:
-cut patterned paper 5 1/2" x 12". Fold, score & using border punch, punch edge.
-trim cardstock 5 1/2" x 5 1/2" and adhere to center of card
-using scallop circle punch (1"), punch out 3 scallop circles & bend up edges slightly
-using 1/2" circle punch, punch one circle
-adhere circle to top of scallop circle, using 3D adhesive foam
-adhere button to top
-adhere circle "flower" to top left of card
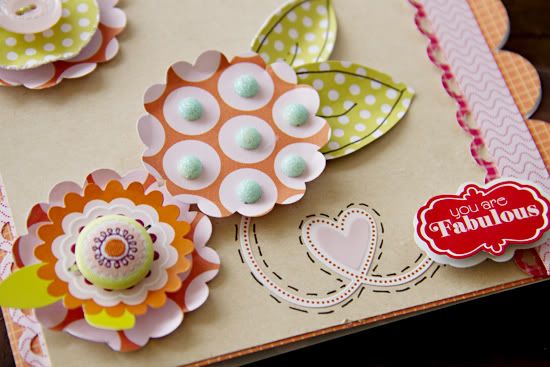
-adhere 2nd circle "flower" to middle, towards bottom
-add turquoise gems to centers of circle
-hand cut leaves from patterned paper & adhere under 2nd flower
-adhere 3rd flower to bottom left & place flower sticker on top.
-adhere flower brad to center of flower
-place swirl sticker with heart under 2nd flower
-using border punch, punch border and place to right side of card, near scallops. Also place to elaft side of card, under cardstock slightly.
-place border strip (located on patterned paper barcode side) on border punched strip, close to scallop edge of card
-place "you are fabulous" sentiment on bottom right side of card

user posted image


3) So Happy Together: - card measures 4 1/2" x 4 1/2" 
user posted image

Directions:
-trim patterned paper 4" x 8" fold & score.
-using border punch, punch a strip of a design, cut out and place all around edge of card
-place journaling sticker to bottom center of card
-add birds to center of sticker
-add "so happy together" to top right
-add flags under "so happy together"
-on polka dot flag, place turquoise gems


WOW!

Talk about talented Designers! Andrea and Leslie are so inspiring and we hope you feel the same!


Pebbles has generously provided us with a beautiful kit of supplies that we would like to give to YOU!


Simply leave us a comment today and we'll enter you to win this beautiful kit along with our Glue Glider Pro, our Mini Adhesive Squares and our Ribbon Adhesive! 

We also invite you to stop by the Pebbles Blog! Our July Guest Designer, Lynn Ghahary coordinates their Design Team and blog!

Be sure to stop  by and let them know GlueArts sent you by!

We'll pick one random winner next Monday to win this prize! Be sure to tune in tomorrow and Friday for more ideas with Pebbles and GlueArts!


You have read this article Andrea / Glue Gilder Pro / Hot Glue Gun / Leslie / Pebbles / Perma Tac / Ribbon Adhesive with the title August 2011. You can bookmark this page URL http://skinnyminny22.blogspot.com/2011/08/life-is-fabulously-sweet-with-gluearts.html. Thanks!