

How can you not love this fun combination of our outstanding adhesives and Paper Smooches fun and whimsical stamps!
We asked Kim Hughes to give us a little background on herself and her company...

Thanks Kim....it's hard to not be creative and want to craft when you work with the adorable stamps you've designed! And proof is in the pudding today when you see what Designers Linda Albrecht and Andrea Budjack have up their sleeve!
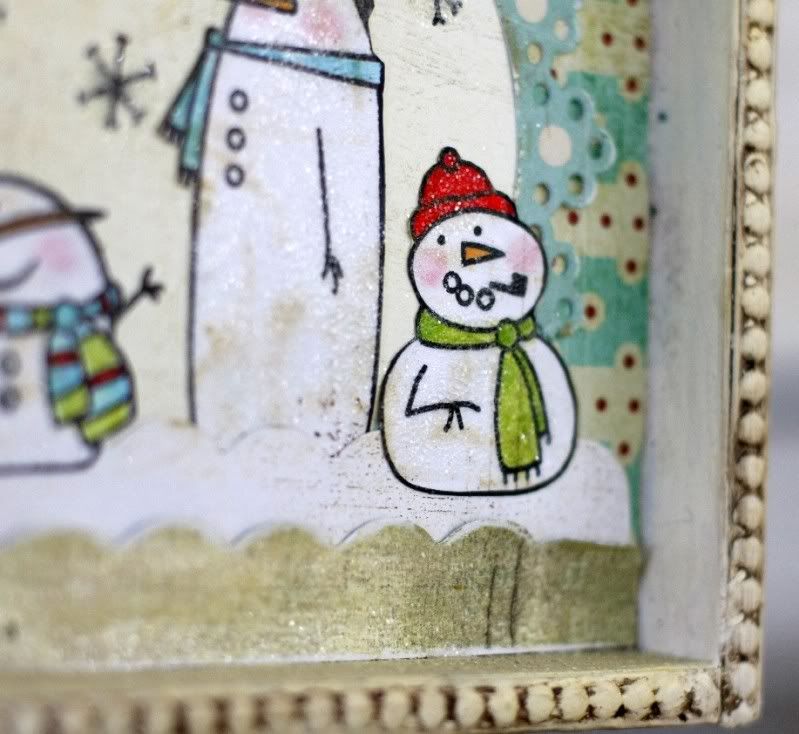
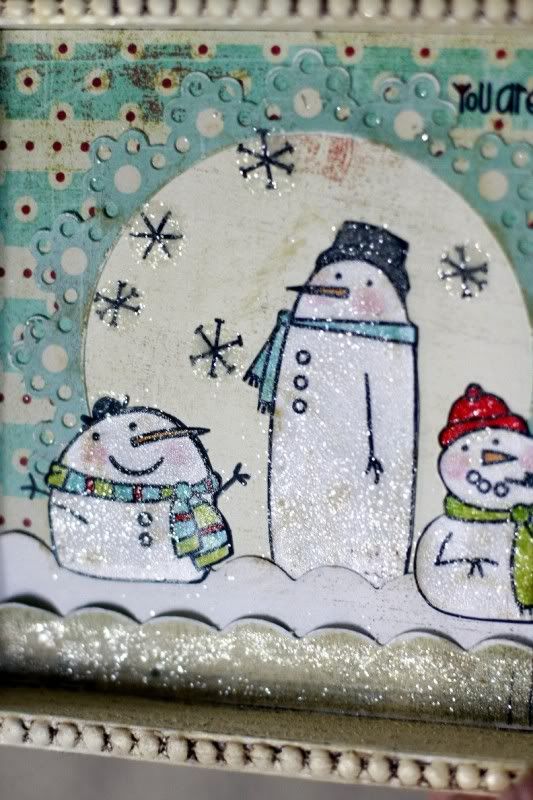
Andrea used the "Falling For You" stamp set and shows how bats...are not just for Halloween. They can also make special tags!! Love how she made her own mini hanger! Linda used the "Swanky Snowdudes" stamps for a glittery, winter shadowbox that reminds us cool weather is just around the corner!


Batty In Love Tag
GlueArts Designer: Andrea Budjack
Supplies:
Glue Arts Pro Glide Perma Tac
Glue Arts U-Cut It Foam
Paper Smooches - stamps
Websters Pages - paper
Pink Paislee - paper
Bazzill Basics - cardstock
Quickutz - dies
Papertrey Ink - ink, dies, stamp
Glossy Accents
Adhesive Pearls - KaiserCraft
Copic - marker
EK Success - marker
Craft Supply - fabric, twine, button, wire
Instructions:
1. Cut and die cut pieces of paper and cardstock to create tag. Ink edges of pieces and adhere together using Glue Arts Pro Glide Perma Tac. Stitch along edges.

2. Stamp Paper Smooches images and sentiment. Also stamp rectangle die cut.

3. Create hanger, add twine and adhere to tag.

4. Add bat, heart and sentiment to tag using Glue Arts U-Cut It Foam.

5. Add color to images using markers, using a white gel pen to accent the eyes and teeth of the bat.

6. Add gloss to heart.
7. Add pearls, fabric ribbon and button to tag.
Glue Arts Pro Glide Perma Tac
Glue Arts U-Cut It Foam
Paper Smooches - stamps
Websters Pages - paper
Pink Paislee - paper
Bazzill Basics - cardstock
Quickutz - dies
Papertrey Ink - ink, dies, stamp
Glossy Accents
Adhesive Pearls - KaiserCraft
Copic - marker
EK Success - marker
Craft Supply - fabric, twine, button, wire
Instructions:
1. Cut and die cut pieces of paper and cardstock to create tag. Ink edges of pieces and adhere together using Glue Arts Pro Glide Perma Tac. Stitch along edges.
2. Stamp Paper Smooches images and sentiment. Also stamp rectangle die cut.
3. Create hanger, add twine and adhere to tag.
4. Add bat, heart and sentiment to tag using Glue Arts U-Cut It Foam.
5. Add color to images using markers, using a white gel pen to accent the eyes and teeth of the bat.
6. Add gloss to heart.
7. Add pearls, fabric ribbon and button to tag.

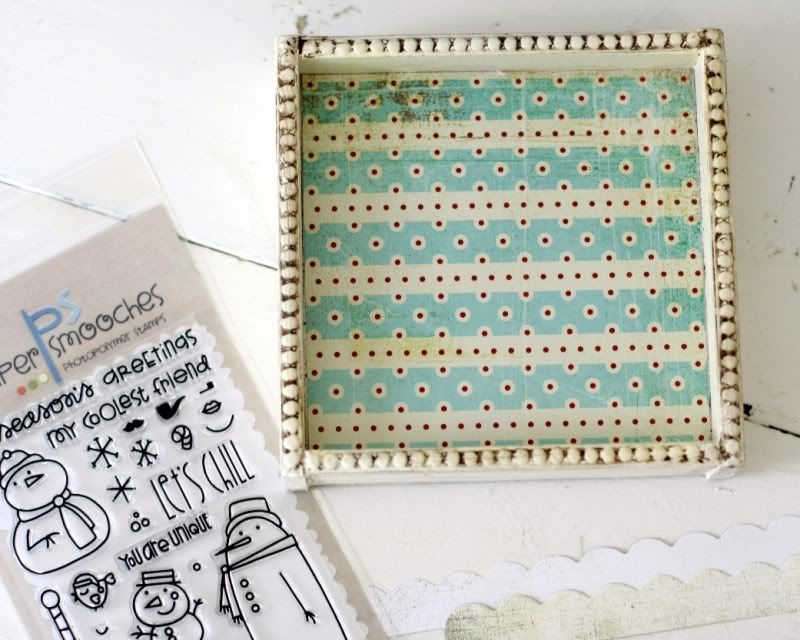
Snowman Shadowbox Frame
GlueArts Designer: Linda Albrecht
Supplies:
Glue Arts Glue Glider Pro with Perma Tac Adhesive
Paper Smooches "Swanky Snowdudes" Stamps
BasicGrey "Indie Bloom" Tarantela paper & Element sticker
Ranger Distress Crackle Paint "Clear Rock Candy"
Clear Glitter
Tim Holtz Distress Ink "Antique Linen"
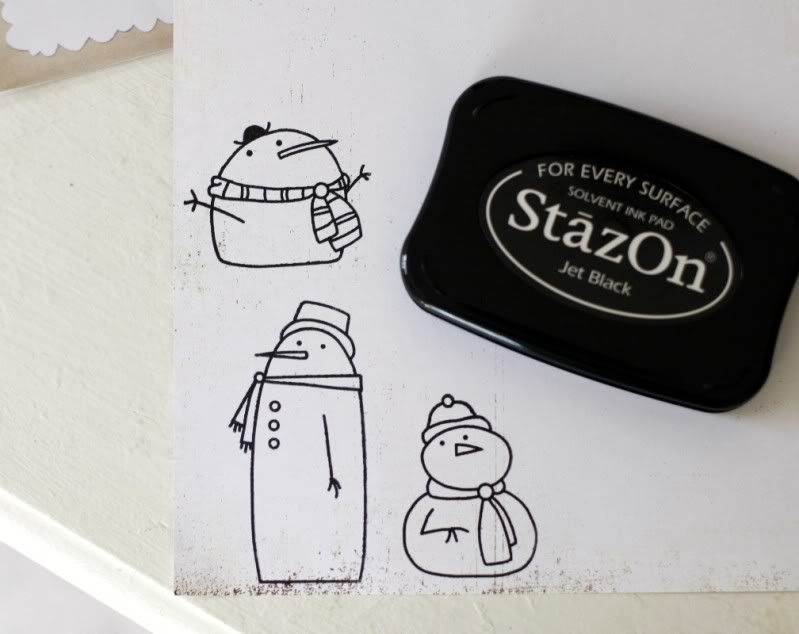
StazOn "Jet Black" Solvent Ink Pad
Faber-Castell WaterColor Pencils
AccuCut Diecutting Machine & Scalloped Border die
Shadowbox style frame
Instructions:
1. Adhere patterned paper to the back of the frame and cut out scalloped borders from paper for "snow".
Supplies:
Glue Arts Glue Glider Pro with Perma Tac Adhesive
Paper Smooches "Swanky Snowdudes" Stamps
BasicGrey "Indie Bloom" Tarantela paper & Element sticker
Ranger Distress Crackle Paint "Clear Rock Candy"
Clear Glitter
Tim Holtz Distress Ink "Antique Linen"
StazOn "Jet Black" Solvent Ink Pad
Faber-Castell WaterColor Pencils
AccuCut Diecutting Machine & Scalloped Border die
Shadowbox style frame
Instructions:
1. Adhere patterned paper to the back of the frame and cut out scalloped borders from paper for "snow".
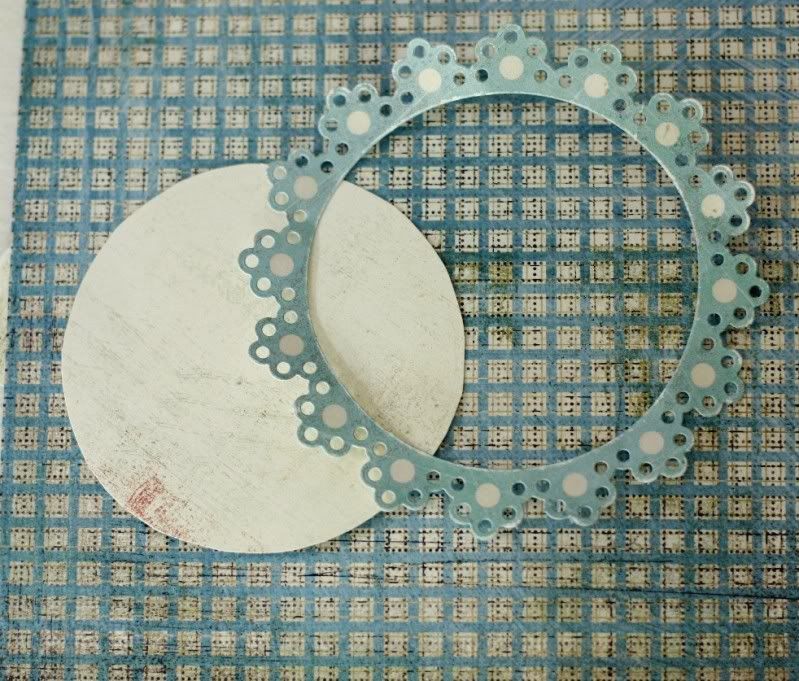
2. Cut a circle from paper for the inside of scalloped circle Element Sticker.
3. Adhere the circle to the inside of the frame then apply the Element sticker over it. Distress scalloped paper borders with sandpaper then adhere them to the bottom edge of the insdie of the frame to resemble snow.
3. Adhere the circle to the inside of the frame then apply the Element sticker over it. Distress scalloped paper borders with sandpaper then adhere them to the bottom edge of the insdie of the frame to resemble snow.
4. Use black waterproff solvent ink to stamp the snowmen onto paper.
5. Use watercolor pencils to add color to the snowmen then apply a thick coat of ranger Distress Crackle paint to each snowman. Allow to dry.
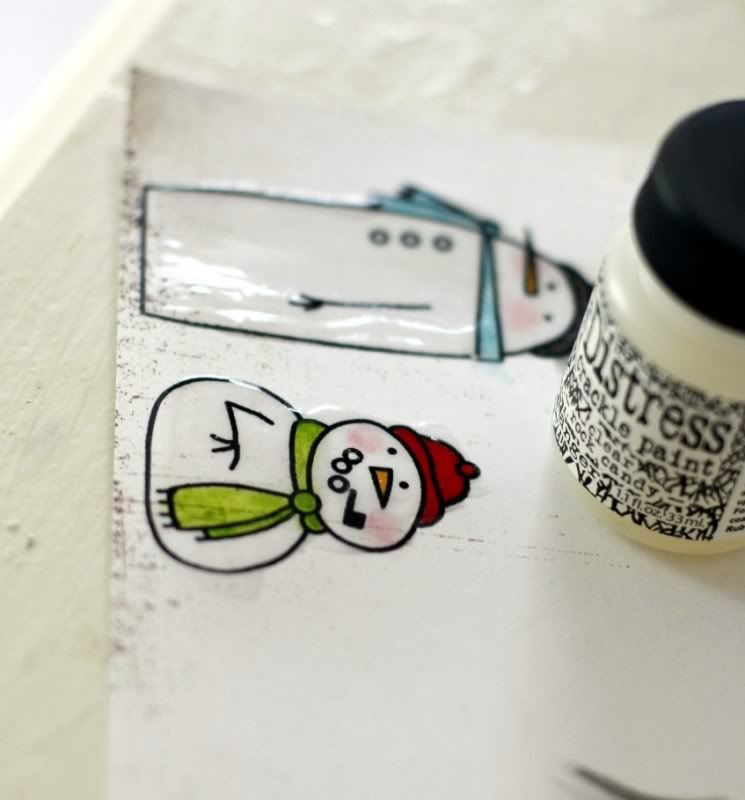
6. After crackle paint has dried use Distress ink pad to distress the snowmen then adhere them to the inside of the scene in the frame. Apply a light sprinkling of clear glitter as desired.
7. Stamp snowflake images onto the scene in the frame as desired.
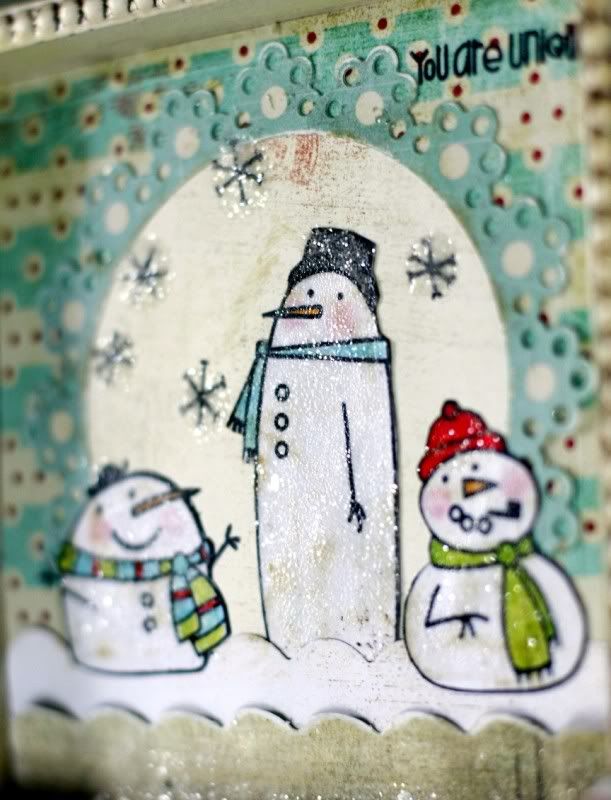
8. Apply clear glitter to the snowfalkes and more crackle paint and glitter along the bottom scalloped border. Stamp the "You are unique" at the top right corner of the frame.
6. After crackle paint has dried use Distress ink pad to distress the snowmen then adhere them to the inside of the scene in the frame. Apply a light sprinkling of clear glitter as desired.
7. Stamp snowflake images onto the scene in the frame as desired.
8. Apply clear glitter to the snowfalkes and more crackle paint and glitter along the bottom scalloped border. Stamp the "You are unique" at the top right corner of the frame.

Today we invite you to stop by the Paper Smooches Facebook page and let them know GlueArts has sent you. Be sure to "Like: them since we do and you post a comment on their wall for a chance to win! We'll give you through Friday to stop by and say a big GlueArts Hello!

And don't forget to post a comment here for another chance to win the stamp set of YOUR choice, our Glue Glider Pro and our Extreme Adhesive Squares!!


You have read this article Andrea /
Glue Gilder Pro /
Linda /
Paper Smooches /
Perma Tac /
U Cut It Foam
with the title You're Unique With Paper Smooches & GlueArts. You can bookmark this page URL http://skinnyminny22.blogspot.com/2011/08/you-unique-with-paper-smooches-gluearts.html. Thanks!


