

Let's try it again...Sunshine and Lollipops....Echo Park and GlueArts...
Okay okay...it's not working right?
But wait....we're all about the sunshine today! No cloudy skies here!
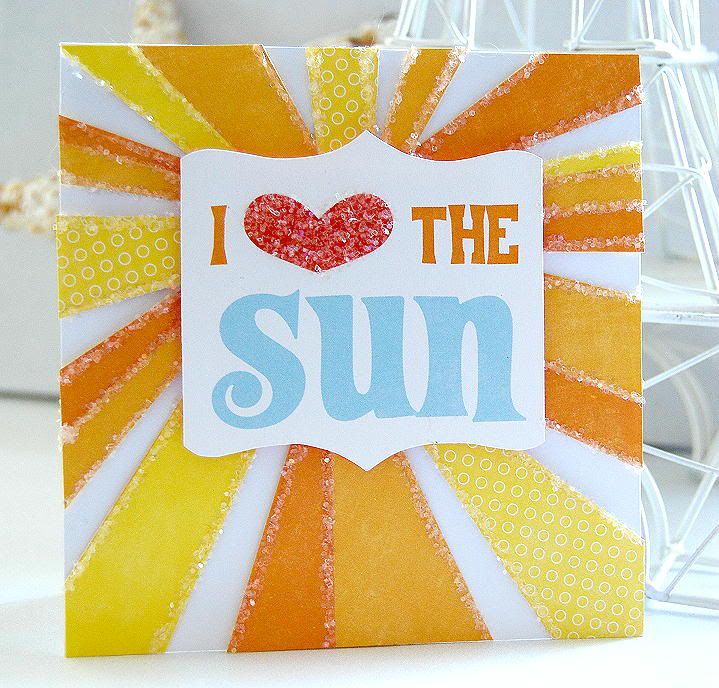
Designer Kristen Swain is proudly proclaiming her love of the sun and you know I'm right there with her! Her glittery, bright card will have you dashing for your sunglasses. Now imagine this design made into a wall canvas or small plaque to put out for the summer. Consider making the card with a matching canvas for a gift for someone special. This project has amazing possibilities!
Designer Jan Hennings celebrates summer with a handmade sandcastle album you're going to love!!! Our special Guest Designer, Mandy Starner has a fun layout to celebrate time spent on the playground. (which we know you all do!)
Catch Some Rays Card
GlueArts Designer: Kristen Swain
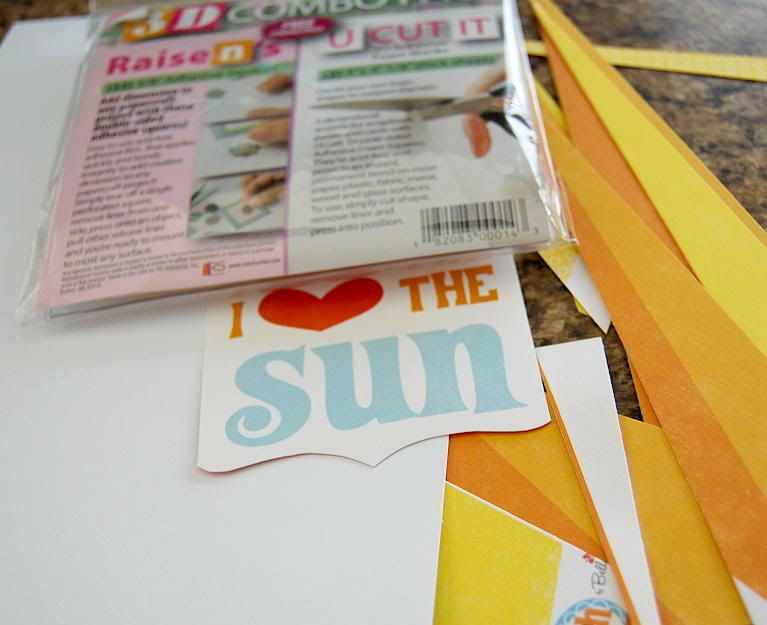
Materials:
Glue Arts - Raisen's and UCutIt foam- 3D pack Echo Park Splash Collection
Glitter
Liquid Glue
Instructions:
1. Fold card to 4 x5 inches.
2. Use trimmer to cut rays from Sunshine paper.
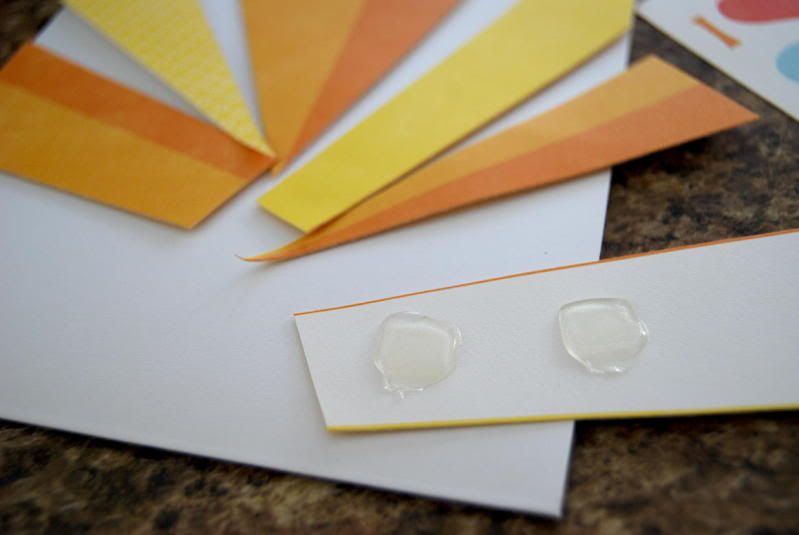
3. Use Raisen's to adhere and slightly pop up rays on card. Adhere rays of paper around card, pointing into center point.
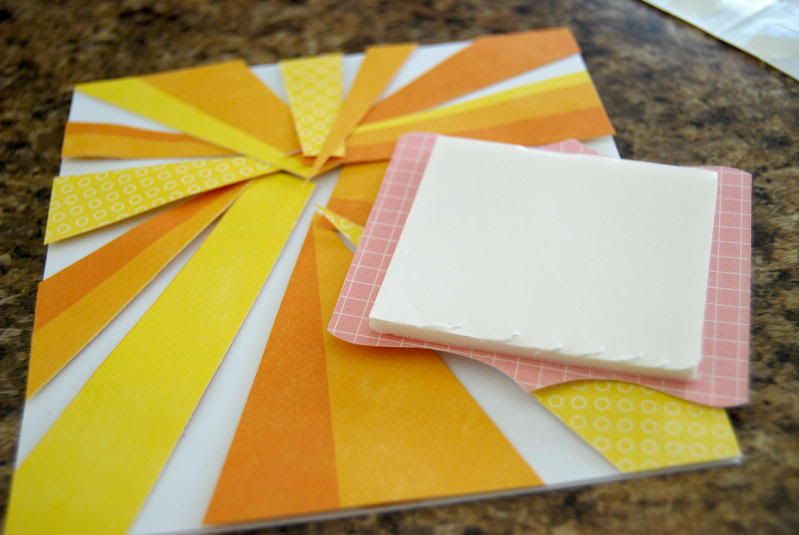
4. Use UCutIt foam on card phrase that has been fussy cut out, then adhere to card.
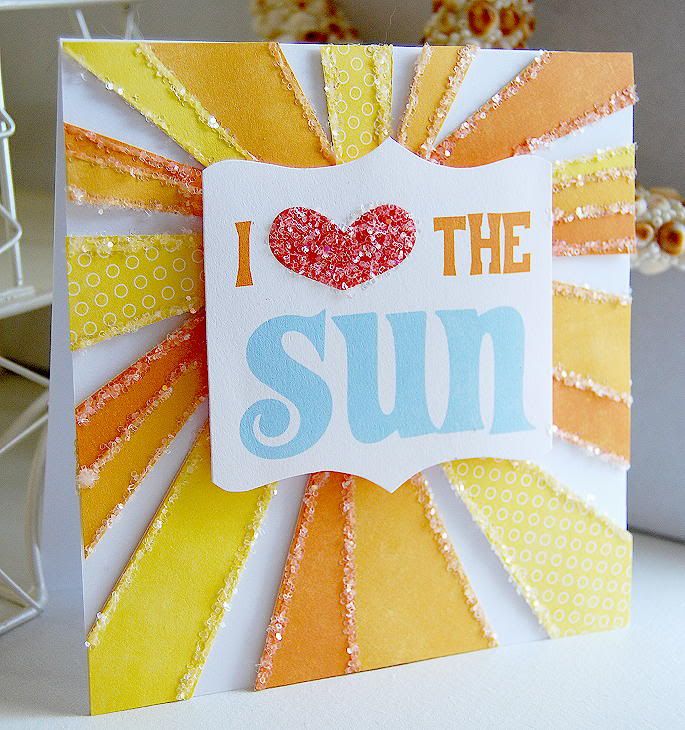
5. Use liquid glue and glitter along lines of rays to highlight. Also coat heart on card phrase.

Splash Castle Album
GlueArts Designer: Jan Hennings
Supplies:
Echo Park Paper Splash Collection Kit
AccuCut Diecut System, Shadow Box and Castle Dies
WeRMemory Keepers Crop-a-dile
Autumn Leaves Orange Ink
Robin's Nest Dew Drops
Binder Rings
Robin's Nest Dew Drops
Binder Rings
Instructions:
Step 1-Using Accucut and the Shadow Box Die and the Castle die, cut on cardboard and "Splash" papers. You'll need a diecut for the front and the back of each page.
Step 1-Using Accucut and the Shadow Box Die and the Castle die, cut on cardboard and "Splash" papers. You'll need a diecut for the front and the back of each page.


Step 2-Cut out the center part of the Shadow Box die. Trim as needed to match the dimensions of the Castle diecuts.

Step 3-Using Perma Tac, adhere the "Splash" papers to the diecut cardboard.


Step 4-Decorate the front cover and inner pages as desired.


Step 6-Cut page 2 and 3 in half at the center.


Step 7-Using orange ink, ink all the edges.
Step 8-Using Crop-a-dile, punch two holes on the left side and two holes on the right side. Use the punched holes as a guide for your other pages.
Step 8-Using Crop-a-dile, punch two holes on the left side and two holes on the right side. Use the punched holes as a guide for your other pages.

Step 9-Assemble album and bind with four office rings.

We'd like to share with you a bit more about our Guest Designer....Mandy Starner!

My name is Mandy Starner, most call me MandyKay or just Mk.
I live in Maryland with my wonderful and supportive husband, our 3 beautiful daughters, and our 2 crazy dogs. I love to spend as much time as possible making, baking, painting, learning, smiling, and laughing. I eat way too much chocolate and I never get enough sleep.
I collect owls and typewriters. I love thunderstorms and Tootsie Pops. I am a little bit vintage and a little bit modern, a little bit country and a little bit rock-n-roll. I have been fortunate enough to have my work published in CARDS, Scrapbook Trends, Paper Crafts, Create magazine, and Page Maps2 by: Becky Fleck. I have been doing make and takes at my local scrapbook store for a couple of years now, and I just recently started teaching as well. I can be found at my scrapbook desk just about every free minute of the day(not that there are many between housework, sports, dinner, and errands).
It’s a good thing that I am a night owl, because the wee hours of the morning are my most creative hours of the day. Scrapboking and cardmaking have been quite and obsession of mine for about 8 years now.
I love to share my creations and ideas with others and I am so excited to have the chance to be a guest designer for Glue Arts!

At The Playground Layout
GlueArts Guest Designer: Mandy Starner
Supplies:
Echo Park Paper Splash Collection Kit
Instructions:
1. Position and adhere photo and blocks of patterned paper in a pattern in the middle of your background paper. Add some punched borders across the bottom, all using your Glue Glider Pro with Perma Tac.

2.Cut out and adhere banner using U Cut It foam.

3. Adhere sun and fussy cut clouds above photo using Raise n's.


To help you capture all those summer memories and more we'd like to give you a chance to win the Echo Park Splash collection kit.


It's filled with fun prints, stickers and more! And to help you adhere together all those projects, we're including our GlueArts Extreme Adhesive Squares, our 3D Combo Pac which includes our U Cut It Foam and our 3D Raisen's. And last we'll include our Glue Glider Pro and the refill of YOUR choice!

Sound good? Then just leave us a comment today. Tell us what kind of a weather person are you? Sunshine? Cloudy? Love rainy days? Fall and falling leaves? We'll enter you to win the Echo Park Splash collection and GlueArts goodies . We'll select one random winner next Monday and announce it here on the blog.
We have more fun ideas for you and here's what is coming up tomorrow!
You have read this article 3D Combo Pac /
Echo Park Paper /
Guest Designer /
Kristen
with the title Sunshine & Lollipops...Echo Park & GlueArts..... You can bookmark this page URL http://skinnyminny22.blogspot.com/2011/08/sunshine-lollipopsecho-park-gluearts.html. Thanks!


