

We're so excited to bring you a brand new week and a brand new sponsor to the GlueArts blog!
Please help us welcome Pebbles to the blog!

Many of you may know Pebbles....or as many of us called them...
Pebbles in my Pocket. Pebbles is a fun company that was started back in 1992 by one smart and creative lady, Brenda Birrell! Brenda started with a hand-drawn catalog right out of her home.
Pebbles has been known for their fun products, patterns and more! And now their products are a part of the American Crafts Family! A perfect fit!
Today we're excited to kick off a full week of Pebbles inspiration and ideas using their Happy Go Lucky collection! You definitely can't help but feel happy when you work with their fun papers and embellishments!

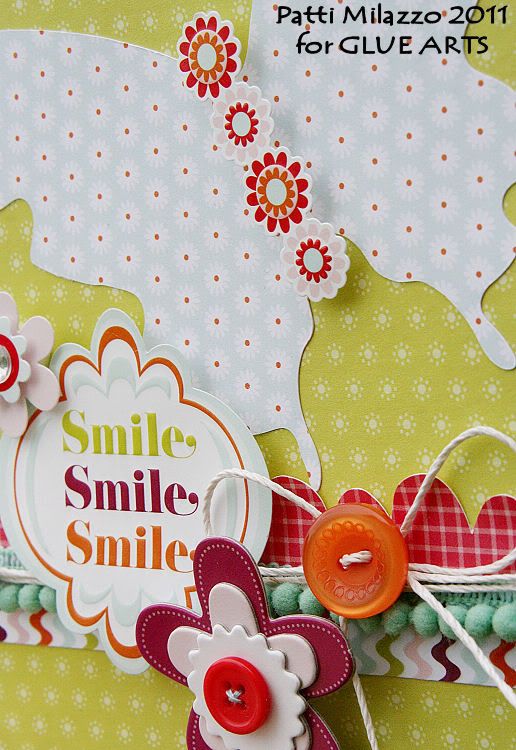
Smile Card
GlueArts Designer: Patti Milazzo
Pin ItSupplies:
Glue Arts:
Glue Glider Pro with 1/4 High Tac Cartridge Refill - Pro
Mini Adhesive Squares
U-Cut-It Adhesive Foam
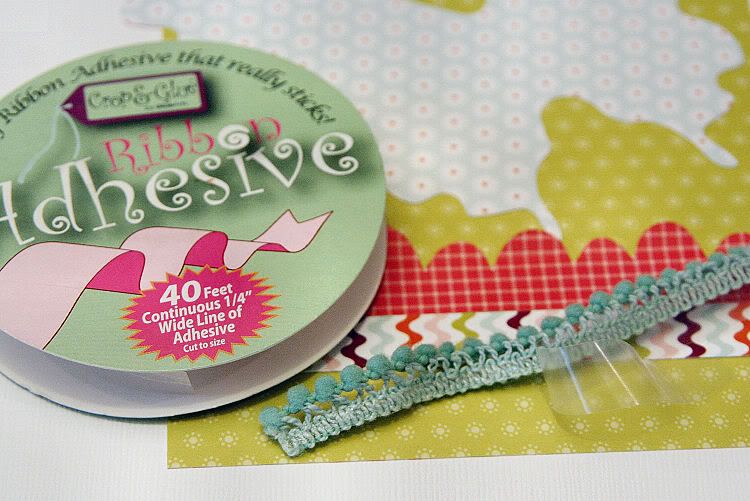
Ribbon Adhesive
Pebbles Inc.:
Happy Go Lucky Pattern Paper – Delight, Carefree, Cheery and Thrilled
Happy Go Lucky Buttons
Happy Go Lucky Ribbon
Happy Go Lucky Chipboard Flowers
Happy Go Lucky Embossed Stickers
Other: Hemp; Fiskars Americas Butterfly Shape Template
Instructions:
1. Create a 5” x 7” card. Then cut out butterfly shape (die cut or template about 4” x 5.5” in size) and adhere to card front using the Glue Glider Pro with High Tac Adhesive. Also cut and adhere paper strips below the butterfly.
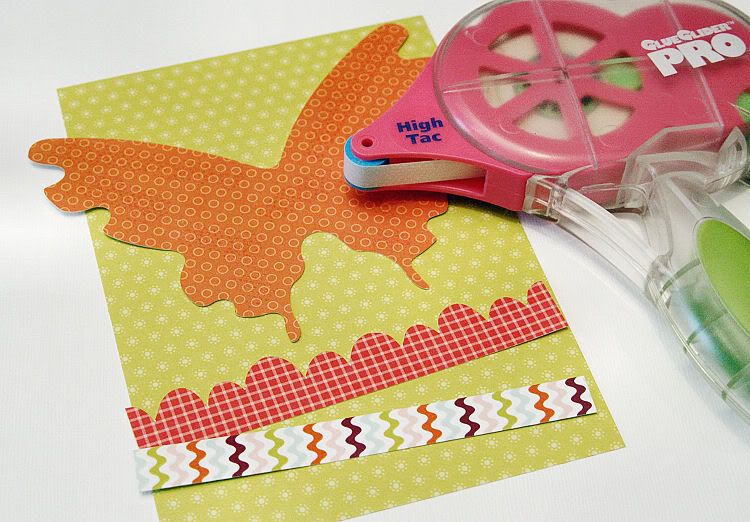
2. Cut ribbon/trim to fit across the card and apply Ribbon Adhesive to the back to adhere between the paper strips.
3. Cut hemp to wrap around the card front twice and tie a loose bow near the center of the card.
4. Cut and apply U-Cut-It Adhesive Foam to the back of a dimensional sticker with a sentiment/greeting. Position near the left side on top of the paper strips.
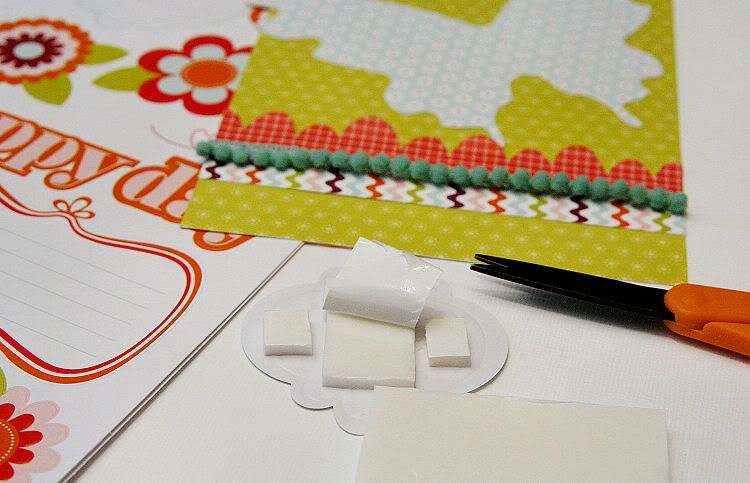
5. Although the flower stickers already had some dimensional foam on the back, I wanted to add even more height so that the flowers rested just above the “smile” sticker. I added additional U-Cut-It Adhesive Foam to the back of each and applied them above and below the greeting sticker.
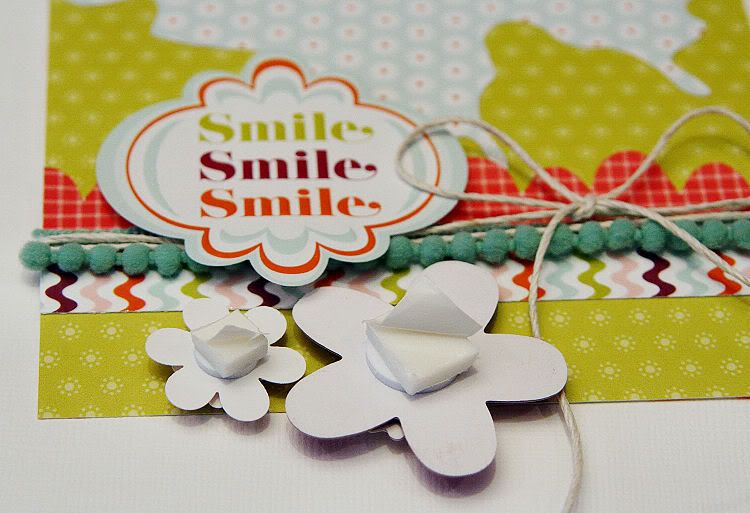
6. Tie the bow in the hemp and thread one of the tails through a button. Apply a Mini Adhesive Square to the back of the button and affix it on top of the bow.
7. To finish the card, add a thin strip of U-Cut-It Adhesive Foam to the back of a floral border sticker (trimmed to fit) and position in the center of the butterfly.
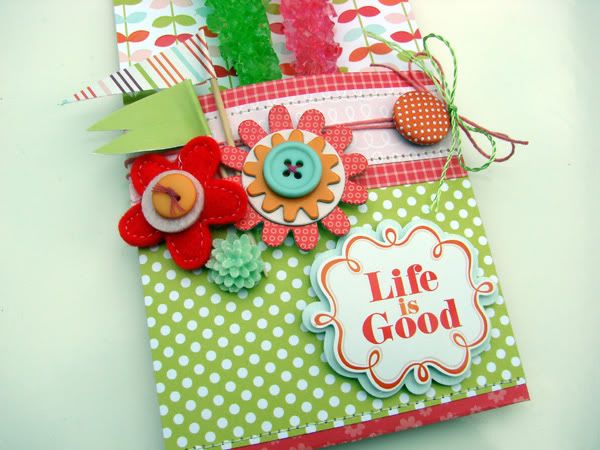
Life is Good Treat Holders
GlueArts Designer: Audrey Pettit
Pin ItSupplies:
Glue Arts Glue Glider Pro with High Tac Adhesive
Glue Arts U Cut It Foam Adhesive
Glue Arts Micro Extreme Adhesive Squares
Pebbles Inc. Happy Go Lucky Collection:
Patterned Papers, Embossed Stickers, Chipboard Flowers, Dimensional Stickers, Layered Embellishments, Fabric Brads, Glitter Flower Brads, Toothpick Flags, and Ribbon
Marvy Corner Rounder
Vintage Twine
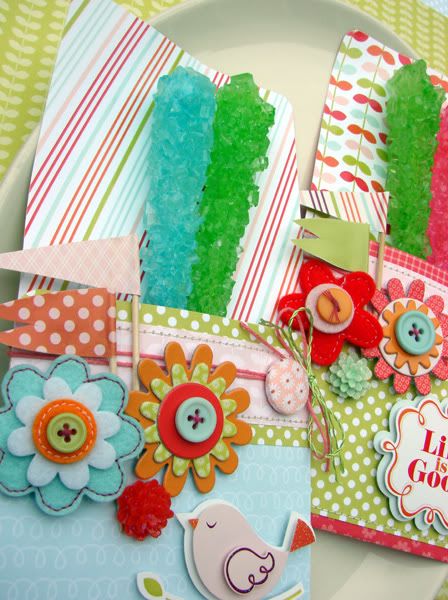
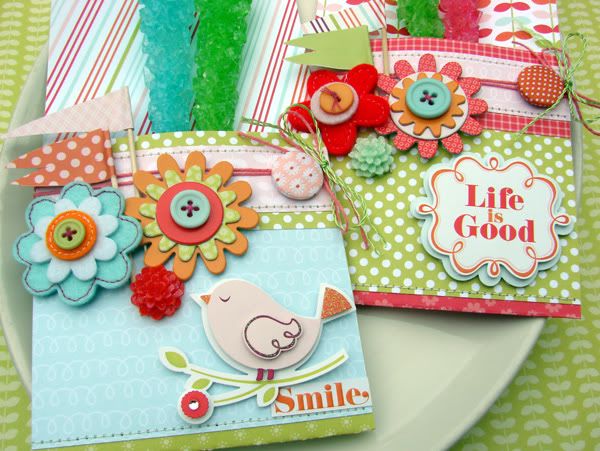
These treat holders are so quick and easy to create, and work well with any number of sweets such as old-fashioned candy sticks, candy bars, bubble gum sticks, or candy canes. Using U Cut It foam adhesive to hold the sides closed allows for a lot of depth to hold the candy. Stack two layers of foam for really thick treats.
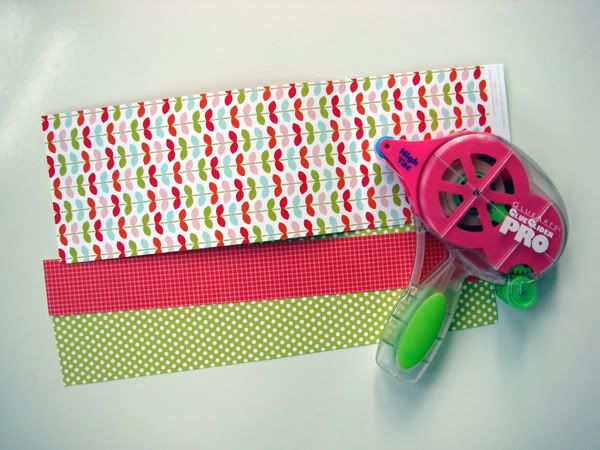
1. For the base of the treat holder you will need a strip of double-sided patterned paper cut to 4" x 12". Cut several smaller strips for accents.
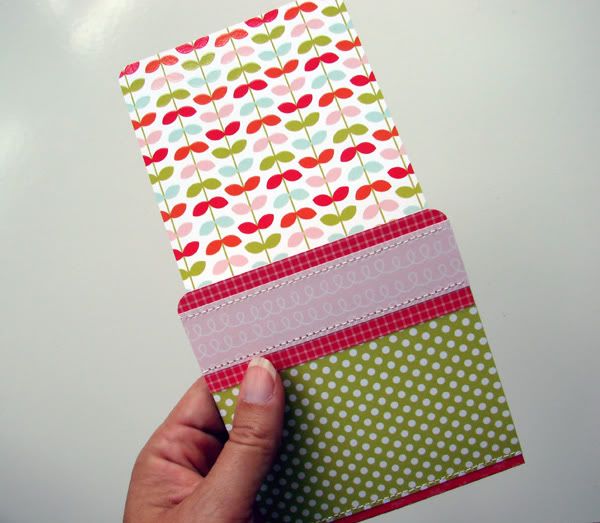
2. Create a score mark at 4" up from one end of the 4" x 12" strip, and fold up the bottom. Adhere smaller strips across this bottom flap using Glue Arts High Tac adhesive. Round the top corners of the holder and the flap using a corner rounder punch. Machine stitch if desired.
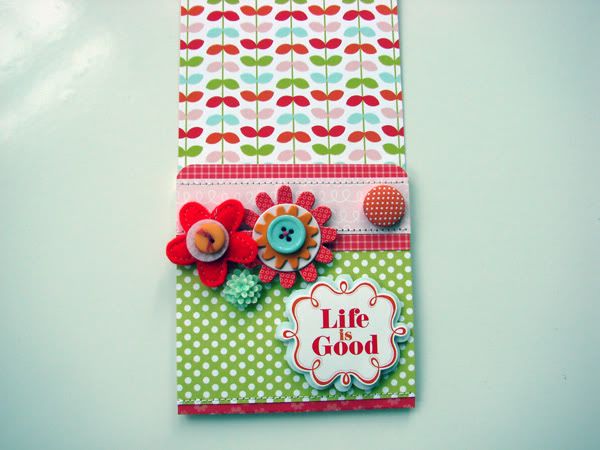
3. Embellish the pocket with whatever goodies you would like. I used Layered Embellishments, Chipboard Flowers, Dimensional Stickers, Fabric Brads, and Glitter Flower Brads.
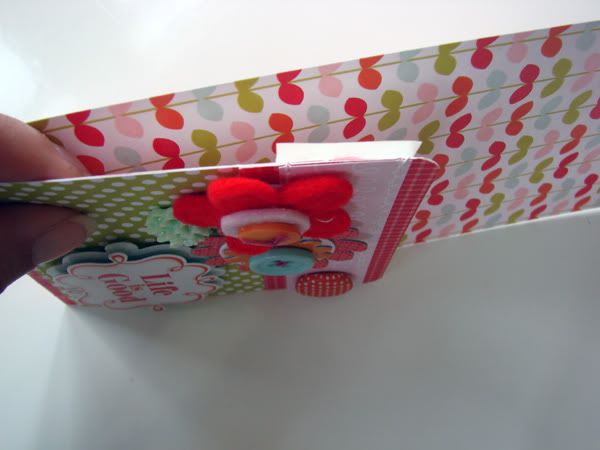
4. Cut thin strips of U Cut It foam adhesive that are about 1/4" x 1" and apply to the top of the pocket flap. This will hold your pocket closed. If you don't want the depth, stitch the flap closed, or use staples or Glue Arts Extreme Adhesive Squares.
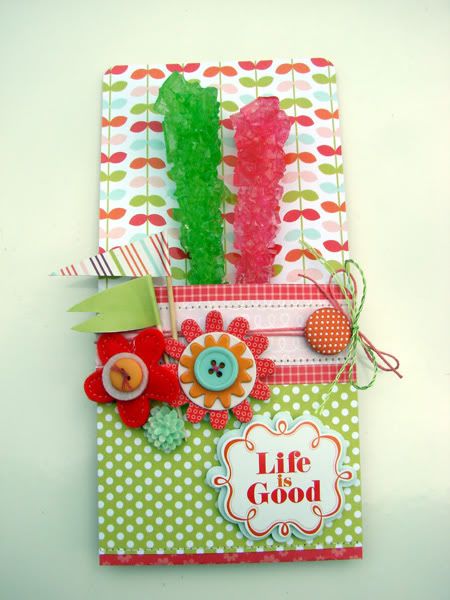
5. Wrap twine around the treat holder and tie into a simple bow on the right side. Add a green twine bow for detailing using Glue Arts Micro Extreme Adhesive Squares. Add toothpick flags to the left side using adhesive squares.
Add candy and enjoy!
We'd love to be able to help you feel a bit....Happy Go Lucky too! Pebbles has generously given us a wonderful collection of products to give away to YOU!! This collection is filled with papers, stickers, flowers, brads, embellishments, ribbons and more!

And to help you create all those projects we know you'll be itching to make this week, we're going to include a Glue Glider Pro along with our Ribbon Adhesive and our Mini Adhesive Squares.

And let's make another fan happy by announcing last week's winner of the summer fun Echo Park Splash collection!! Our winner is:
Love this mini album with it's extra nooks and cranies. Paradise for me is laying in the hammock at the lake.

You have read this article Glue Gilder Pro /
Patti /
Pebbles /
Perma Tac
with the title Life Is Good with Pebbles & GlueArts!!. You can bookmark this page URL http://skinnyminny22.blogspot.com/2011/08/life-is-good-with-pebbles-gluearts.html. Thanks!


